You will need to create a sentry account for this tutorial.
This is the second part in a 3 part series on how to proactively handle errors in your applications across the stack. If you've missed part 1, you can find it here.
Issues on the front-end are more easily noticeable. In a lot of applications this is beautifully handled by having an error boundary. I have seen people create Error Boundaries that react differently to different kind of errors and provide a really good experience even in the face of an error.
While this certainly helps calm the user down in the spur of the moment, having the ability to proactively be informed about these issues would be a blessing. This allows us to root cause and fix issues before they escalate into a PR problem.
Sentry is an Error Monitoring and reporting solution that integrates well with frontend applications.
This tutorial assumes that you are familiar with
In this tutorial we will
- Create an account with Sentry
- Integrate sentry into the application
- Add support for source-maps
- Test your integration and source maps
Create an account with Sentry
Step 1
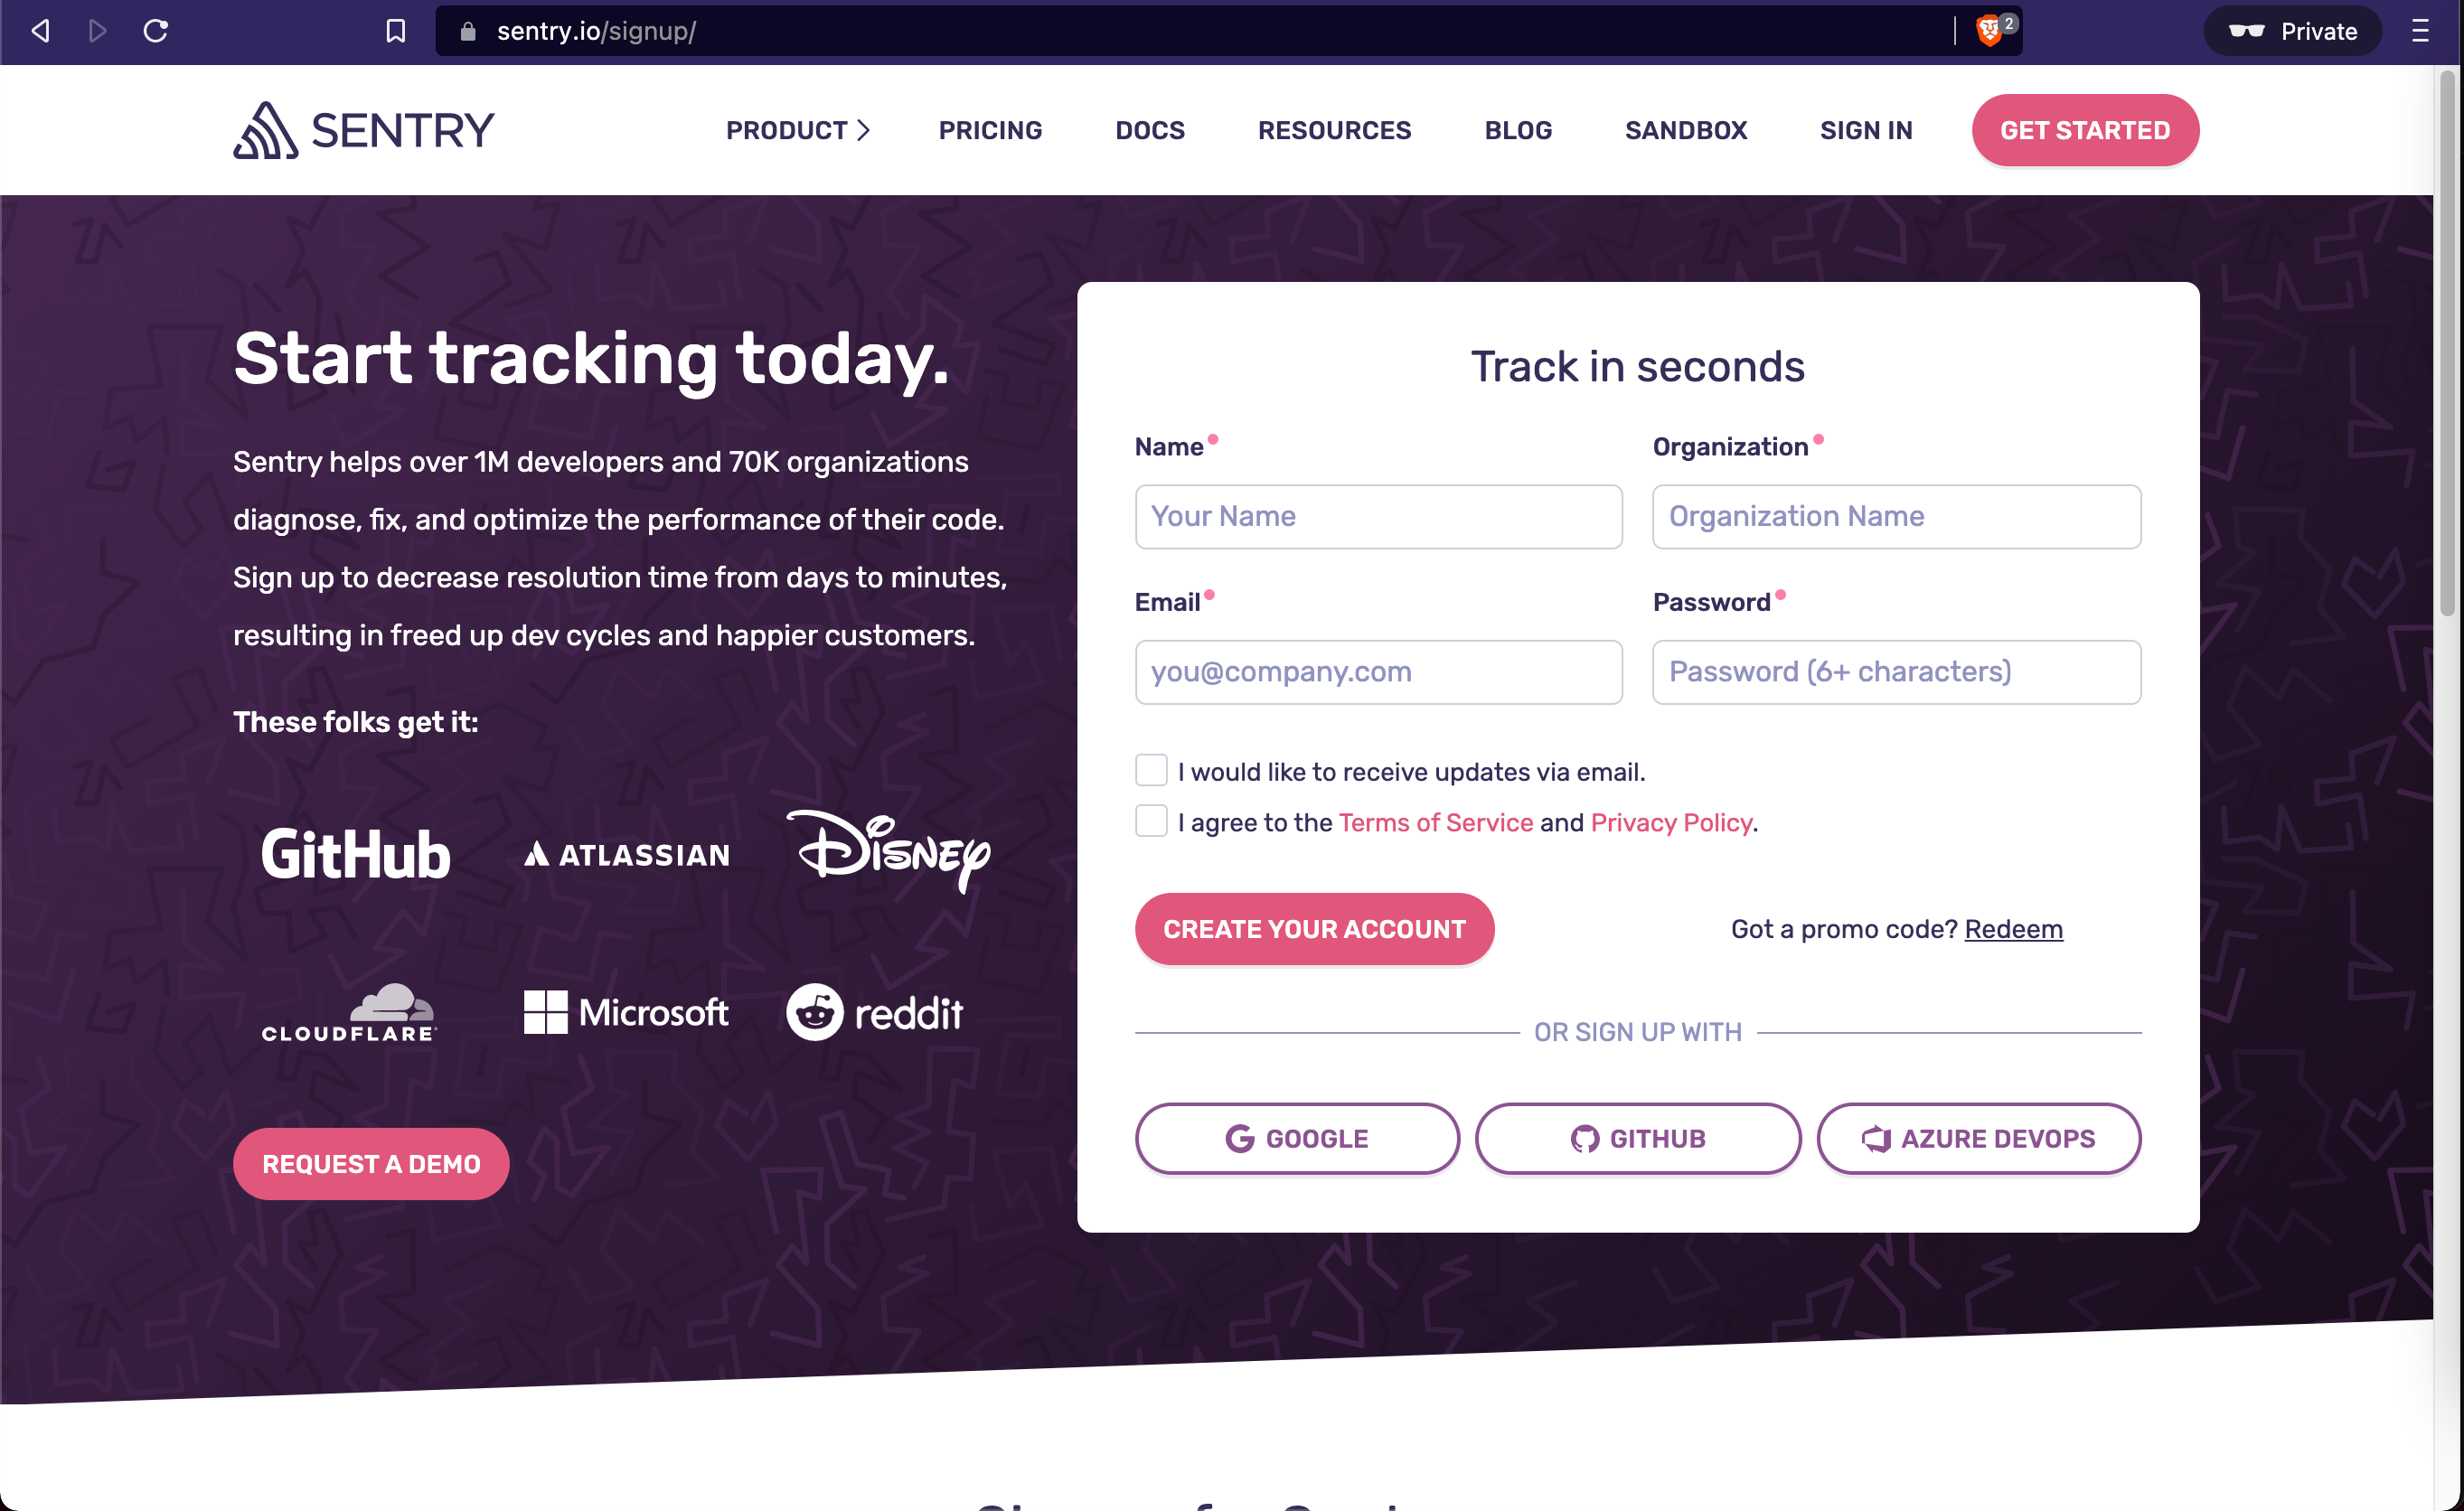
Go to https://sentry.io/ and click on GET STARTED
Step 2
Add in your details and click CREATE YOUR ACCOUNT
Step 3
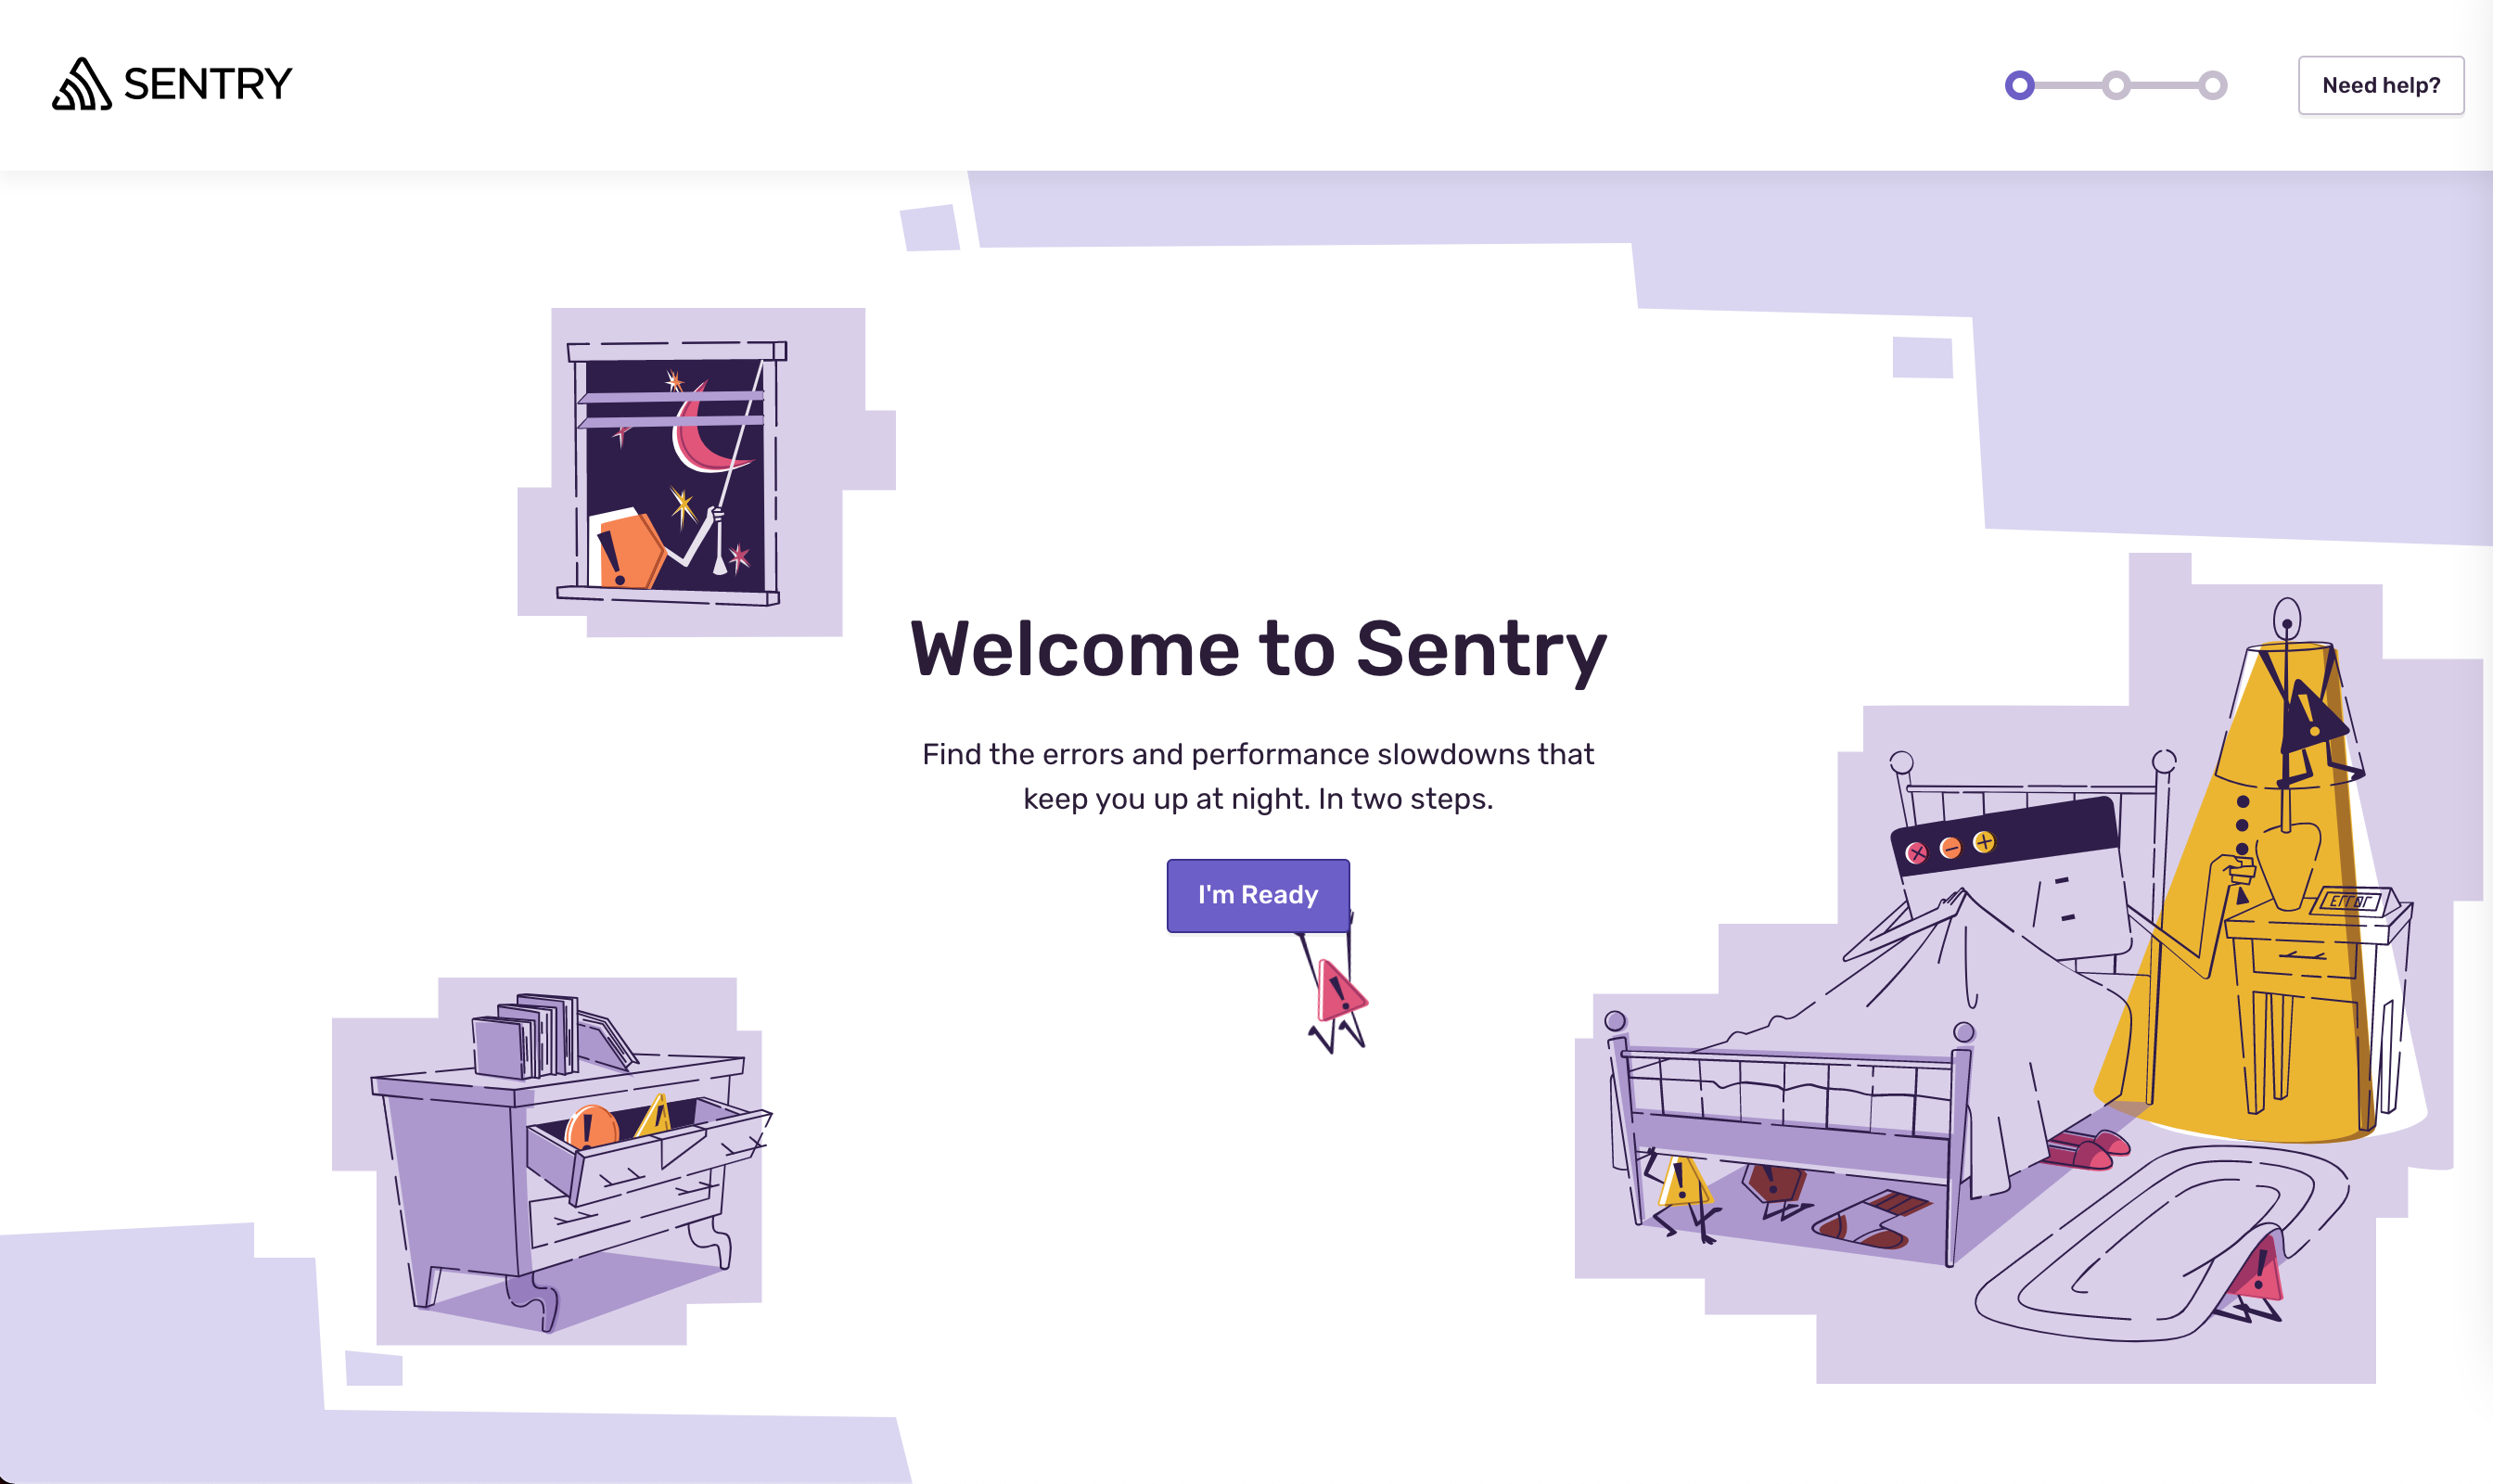
You will be redirected to the onboarding screen as shown below. Click on I'm Ready
Step 4
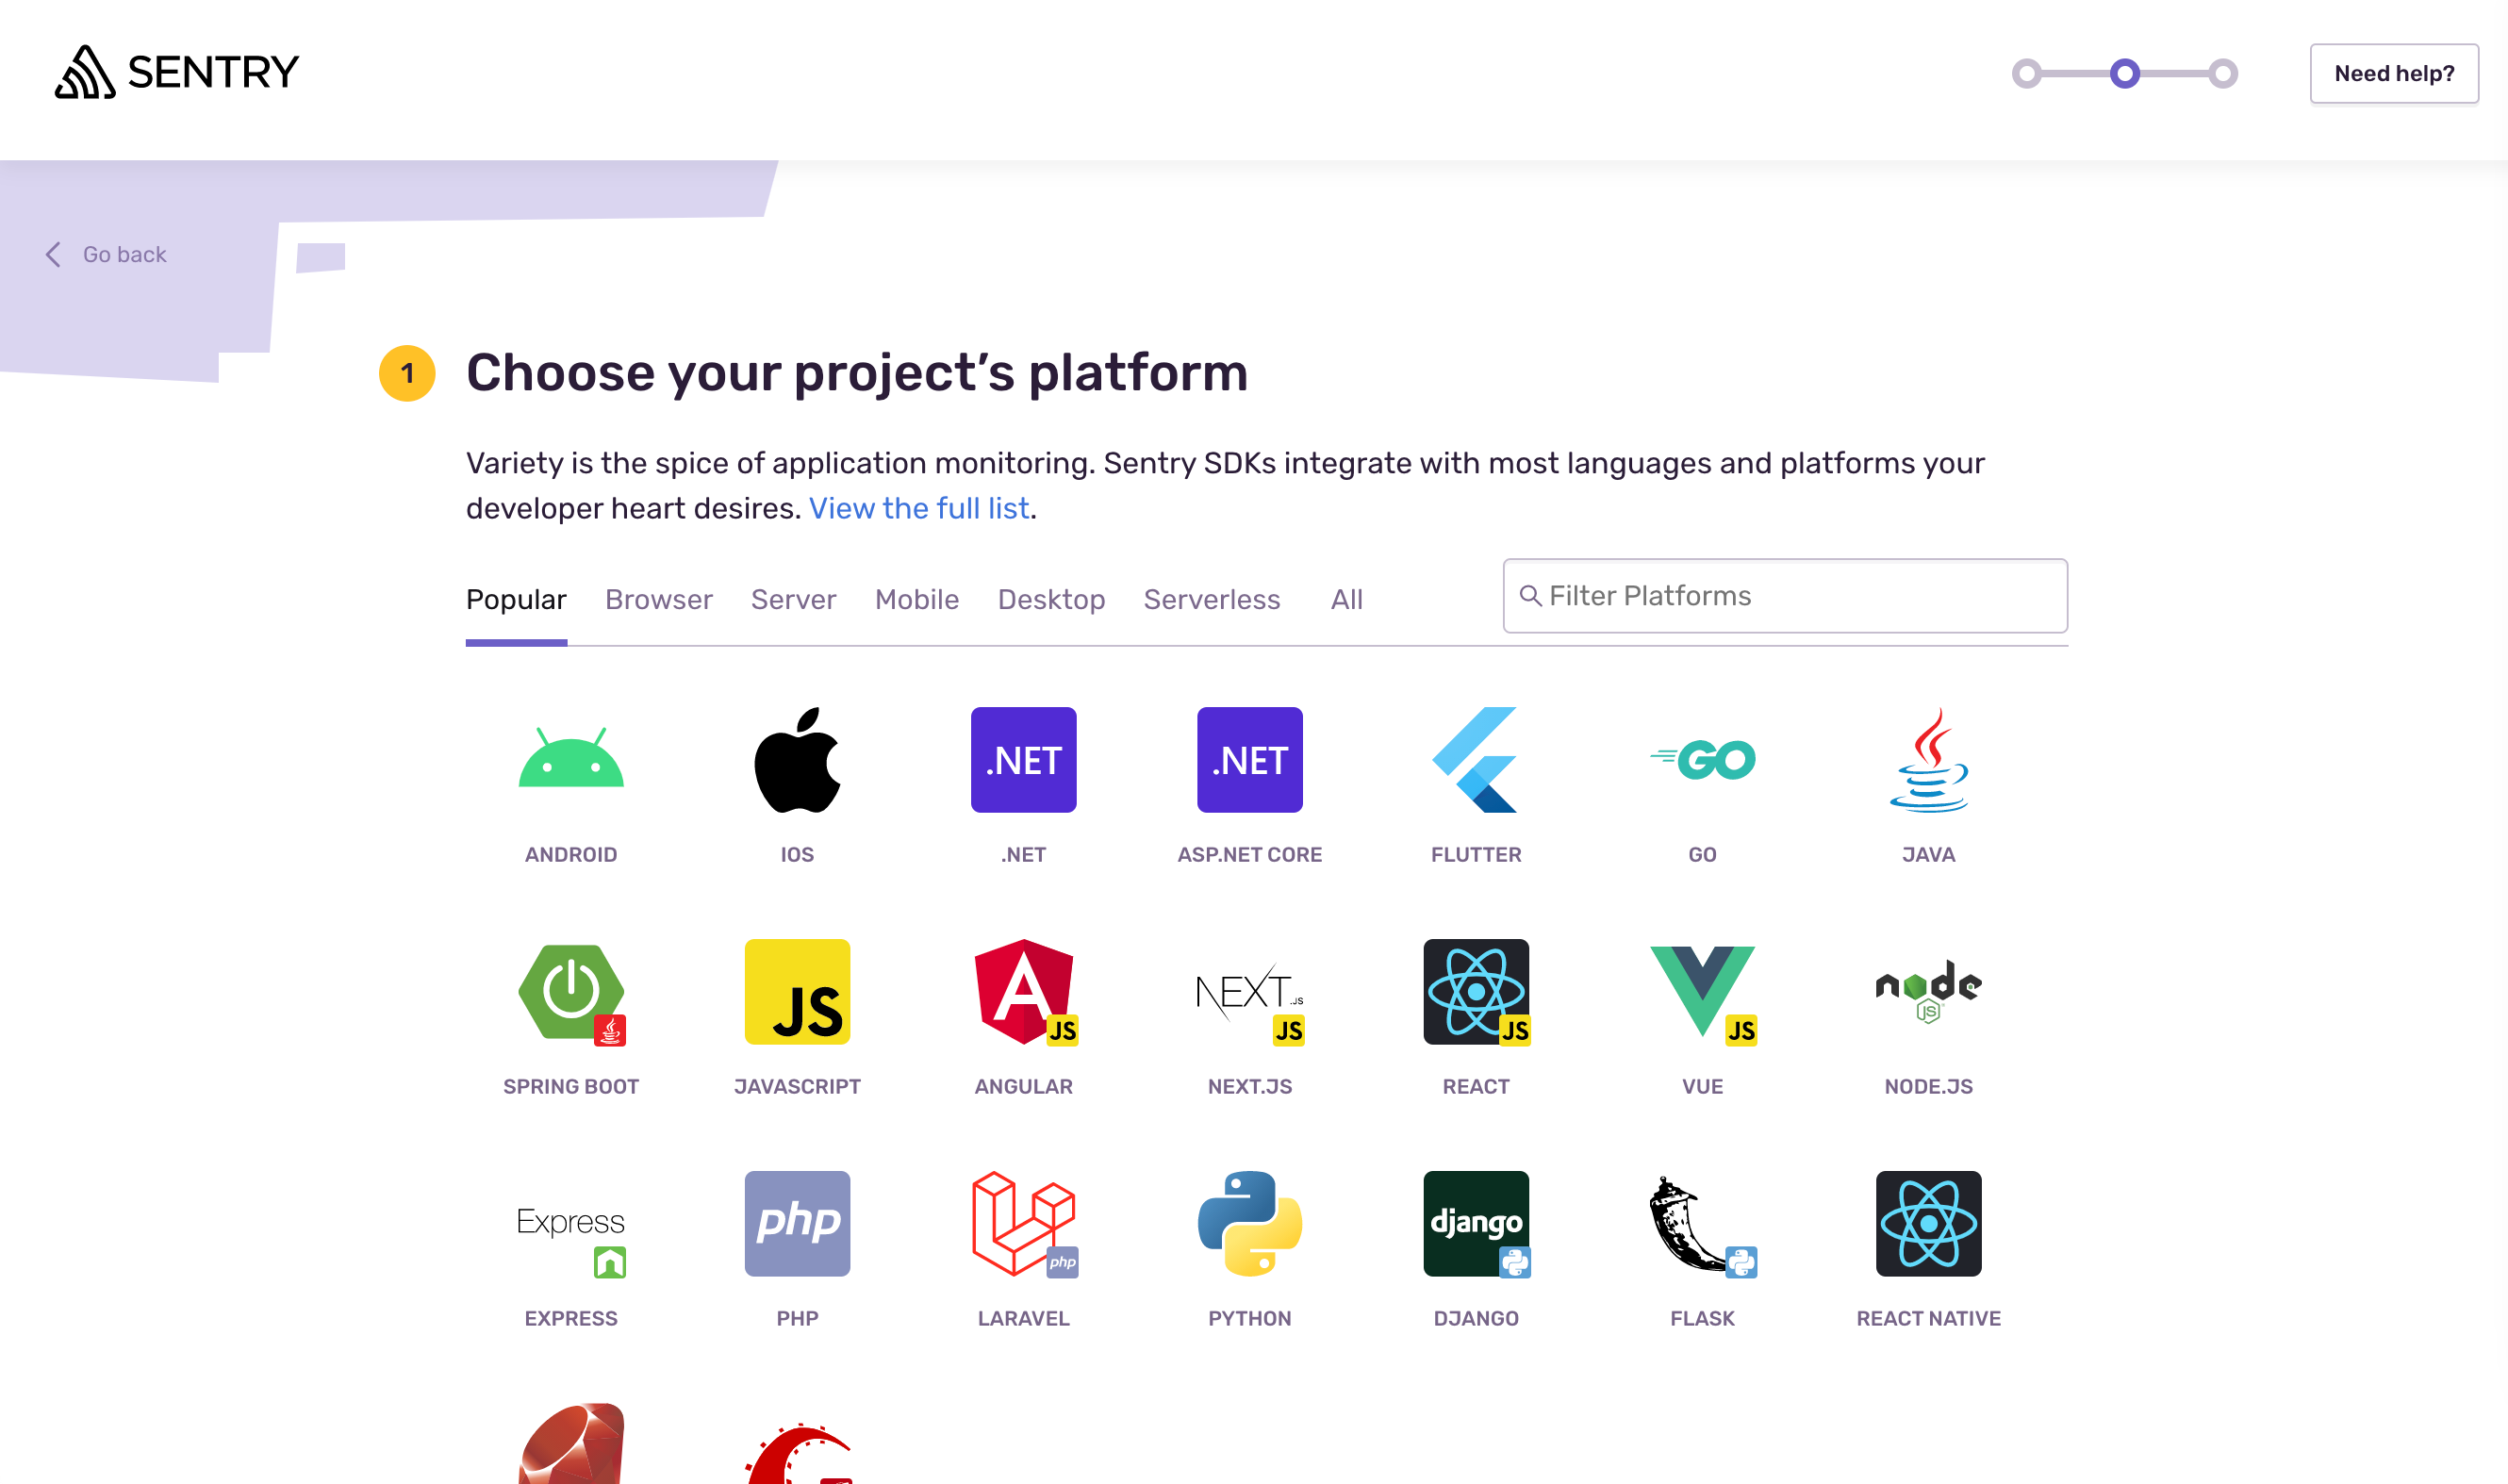
Select React, choose a suitable project name and click Create Project
Step 5
You will be redirected to the Configure React page. Copy the dsn value.
Integrate sentry into the application
We will now send sentry errors from the ErrorBoundary component
Step 1
Clone this repo: https://github.com/wednesday-solutions/react-template/
Step 2
Install the dependencies
Step 3
Copy the dsn from the 1st project and add it in the .env.development and in the .env file
Step 4
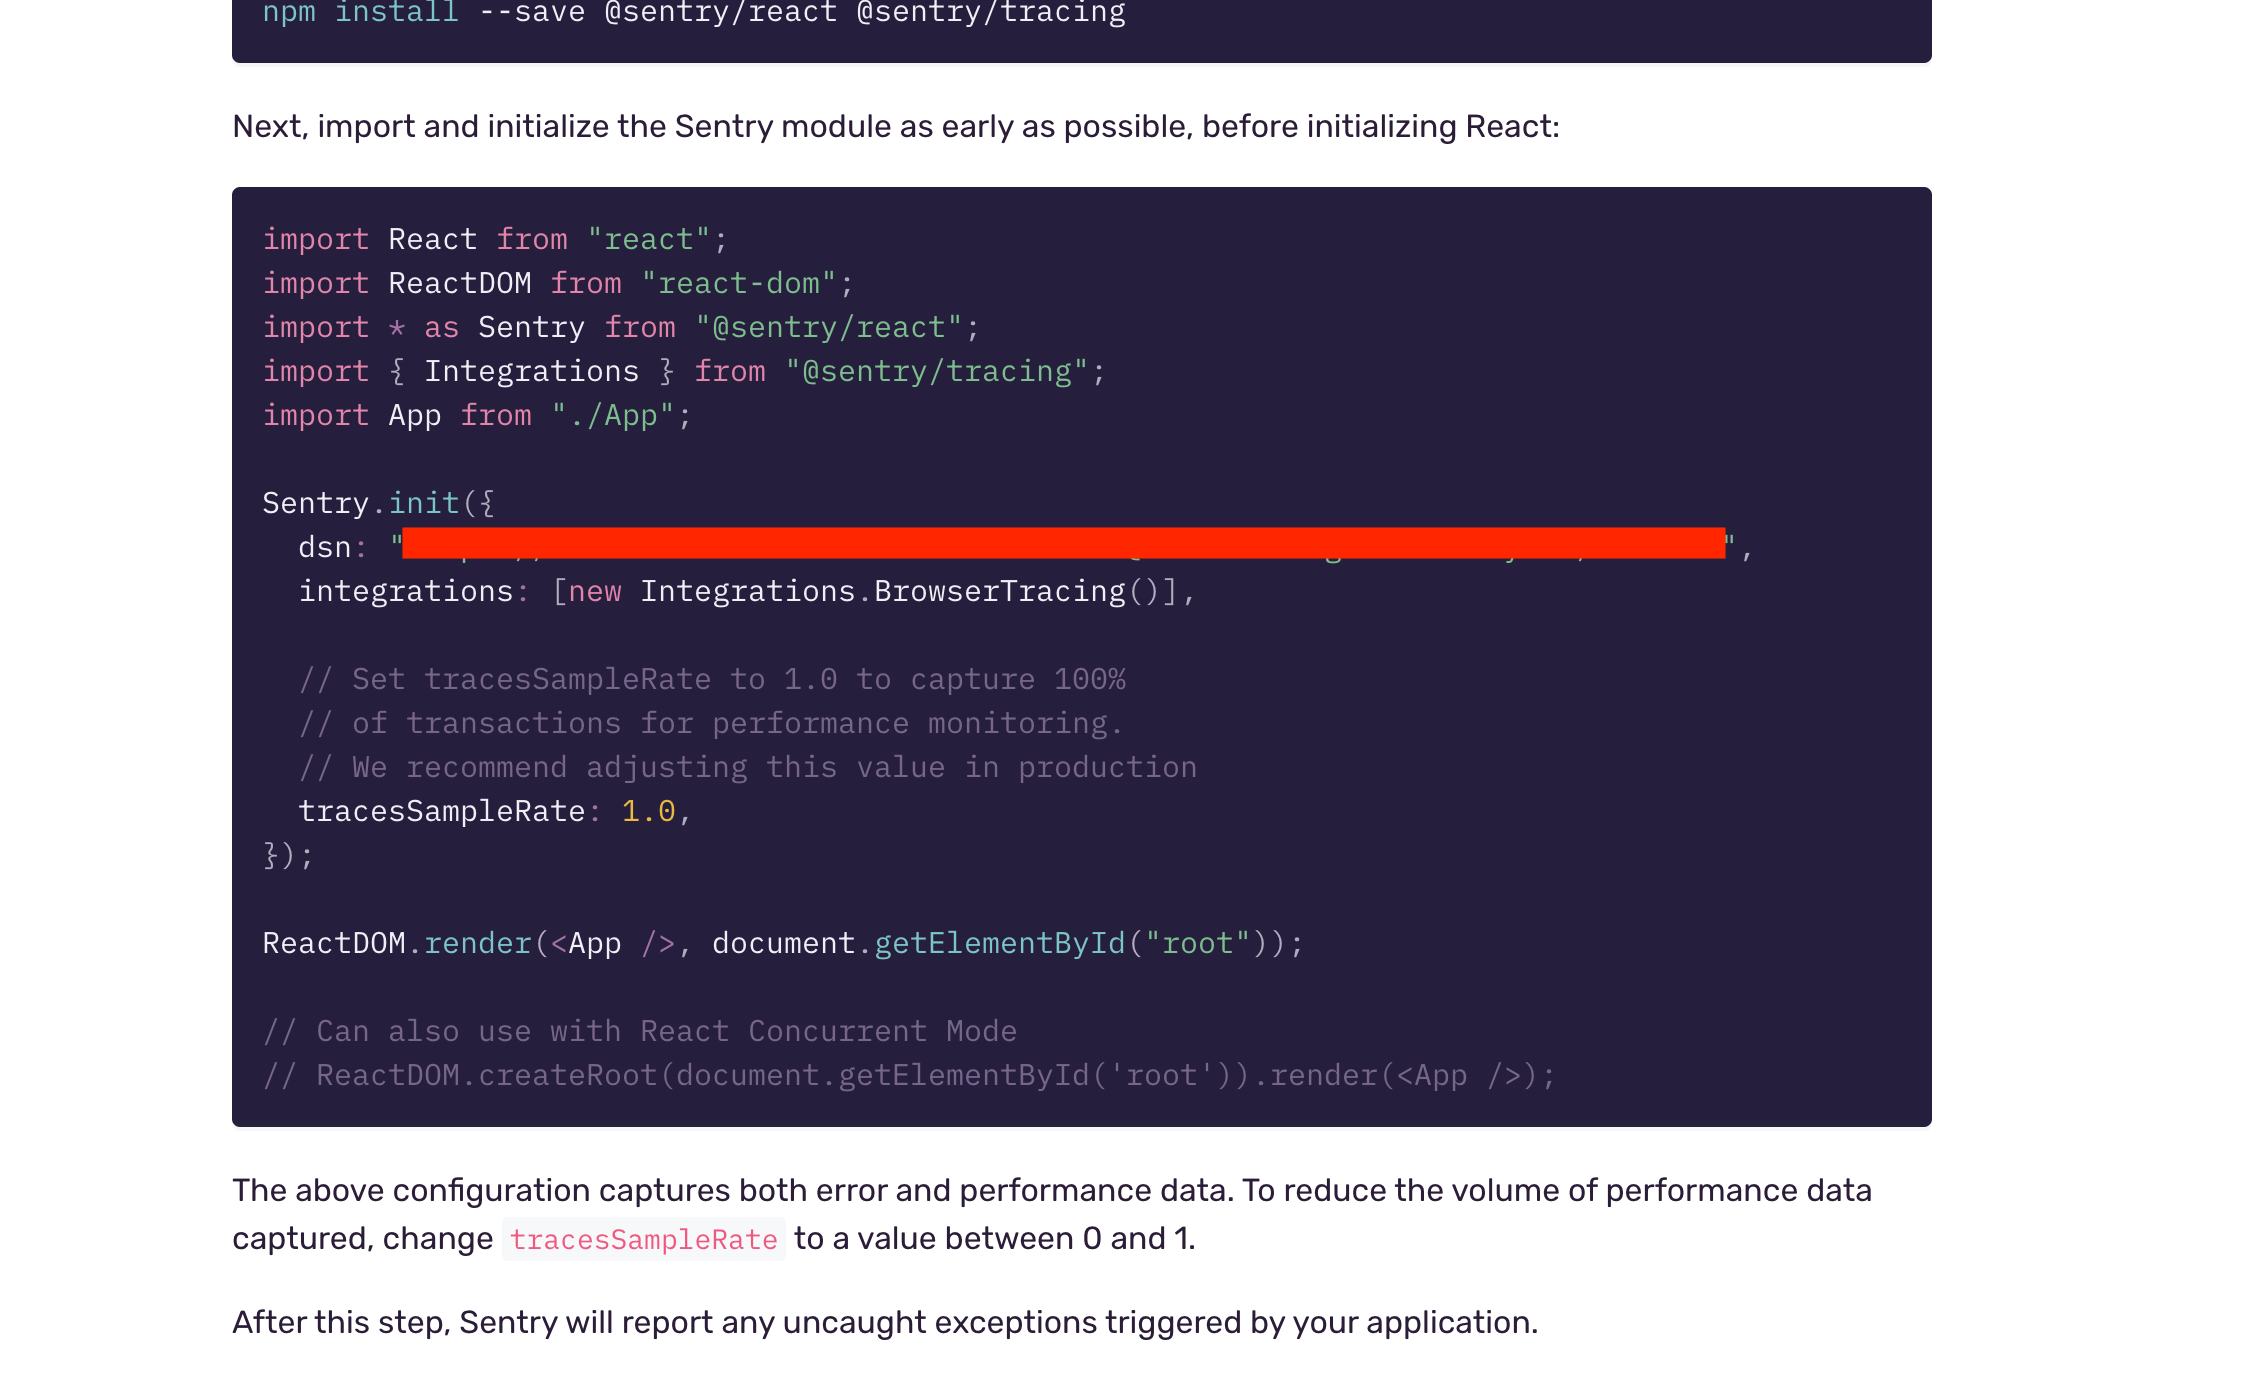
Create a sentry service.
Copy the snippet below in the sentry.js file
Step 5
Add the snippet below in the app/app.js
In order to test your integration locally, temporarily make a small change in the if condition of the initSentry function
Step 6
Go to http://localhost:3000 and you open the developer tools. Go to the network tab.
You should see an outgoing request to the sentry servers.
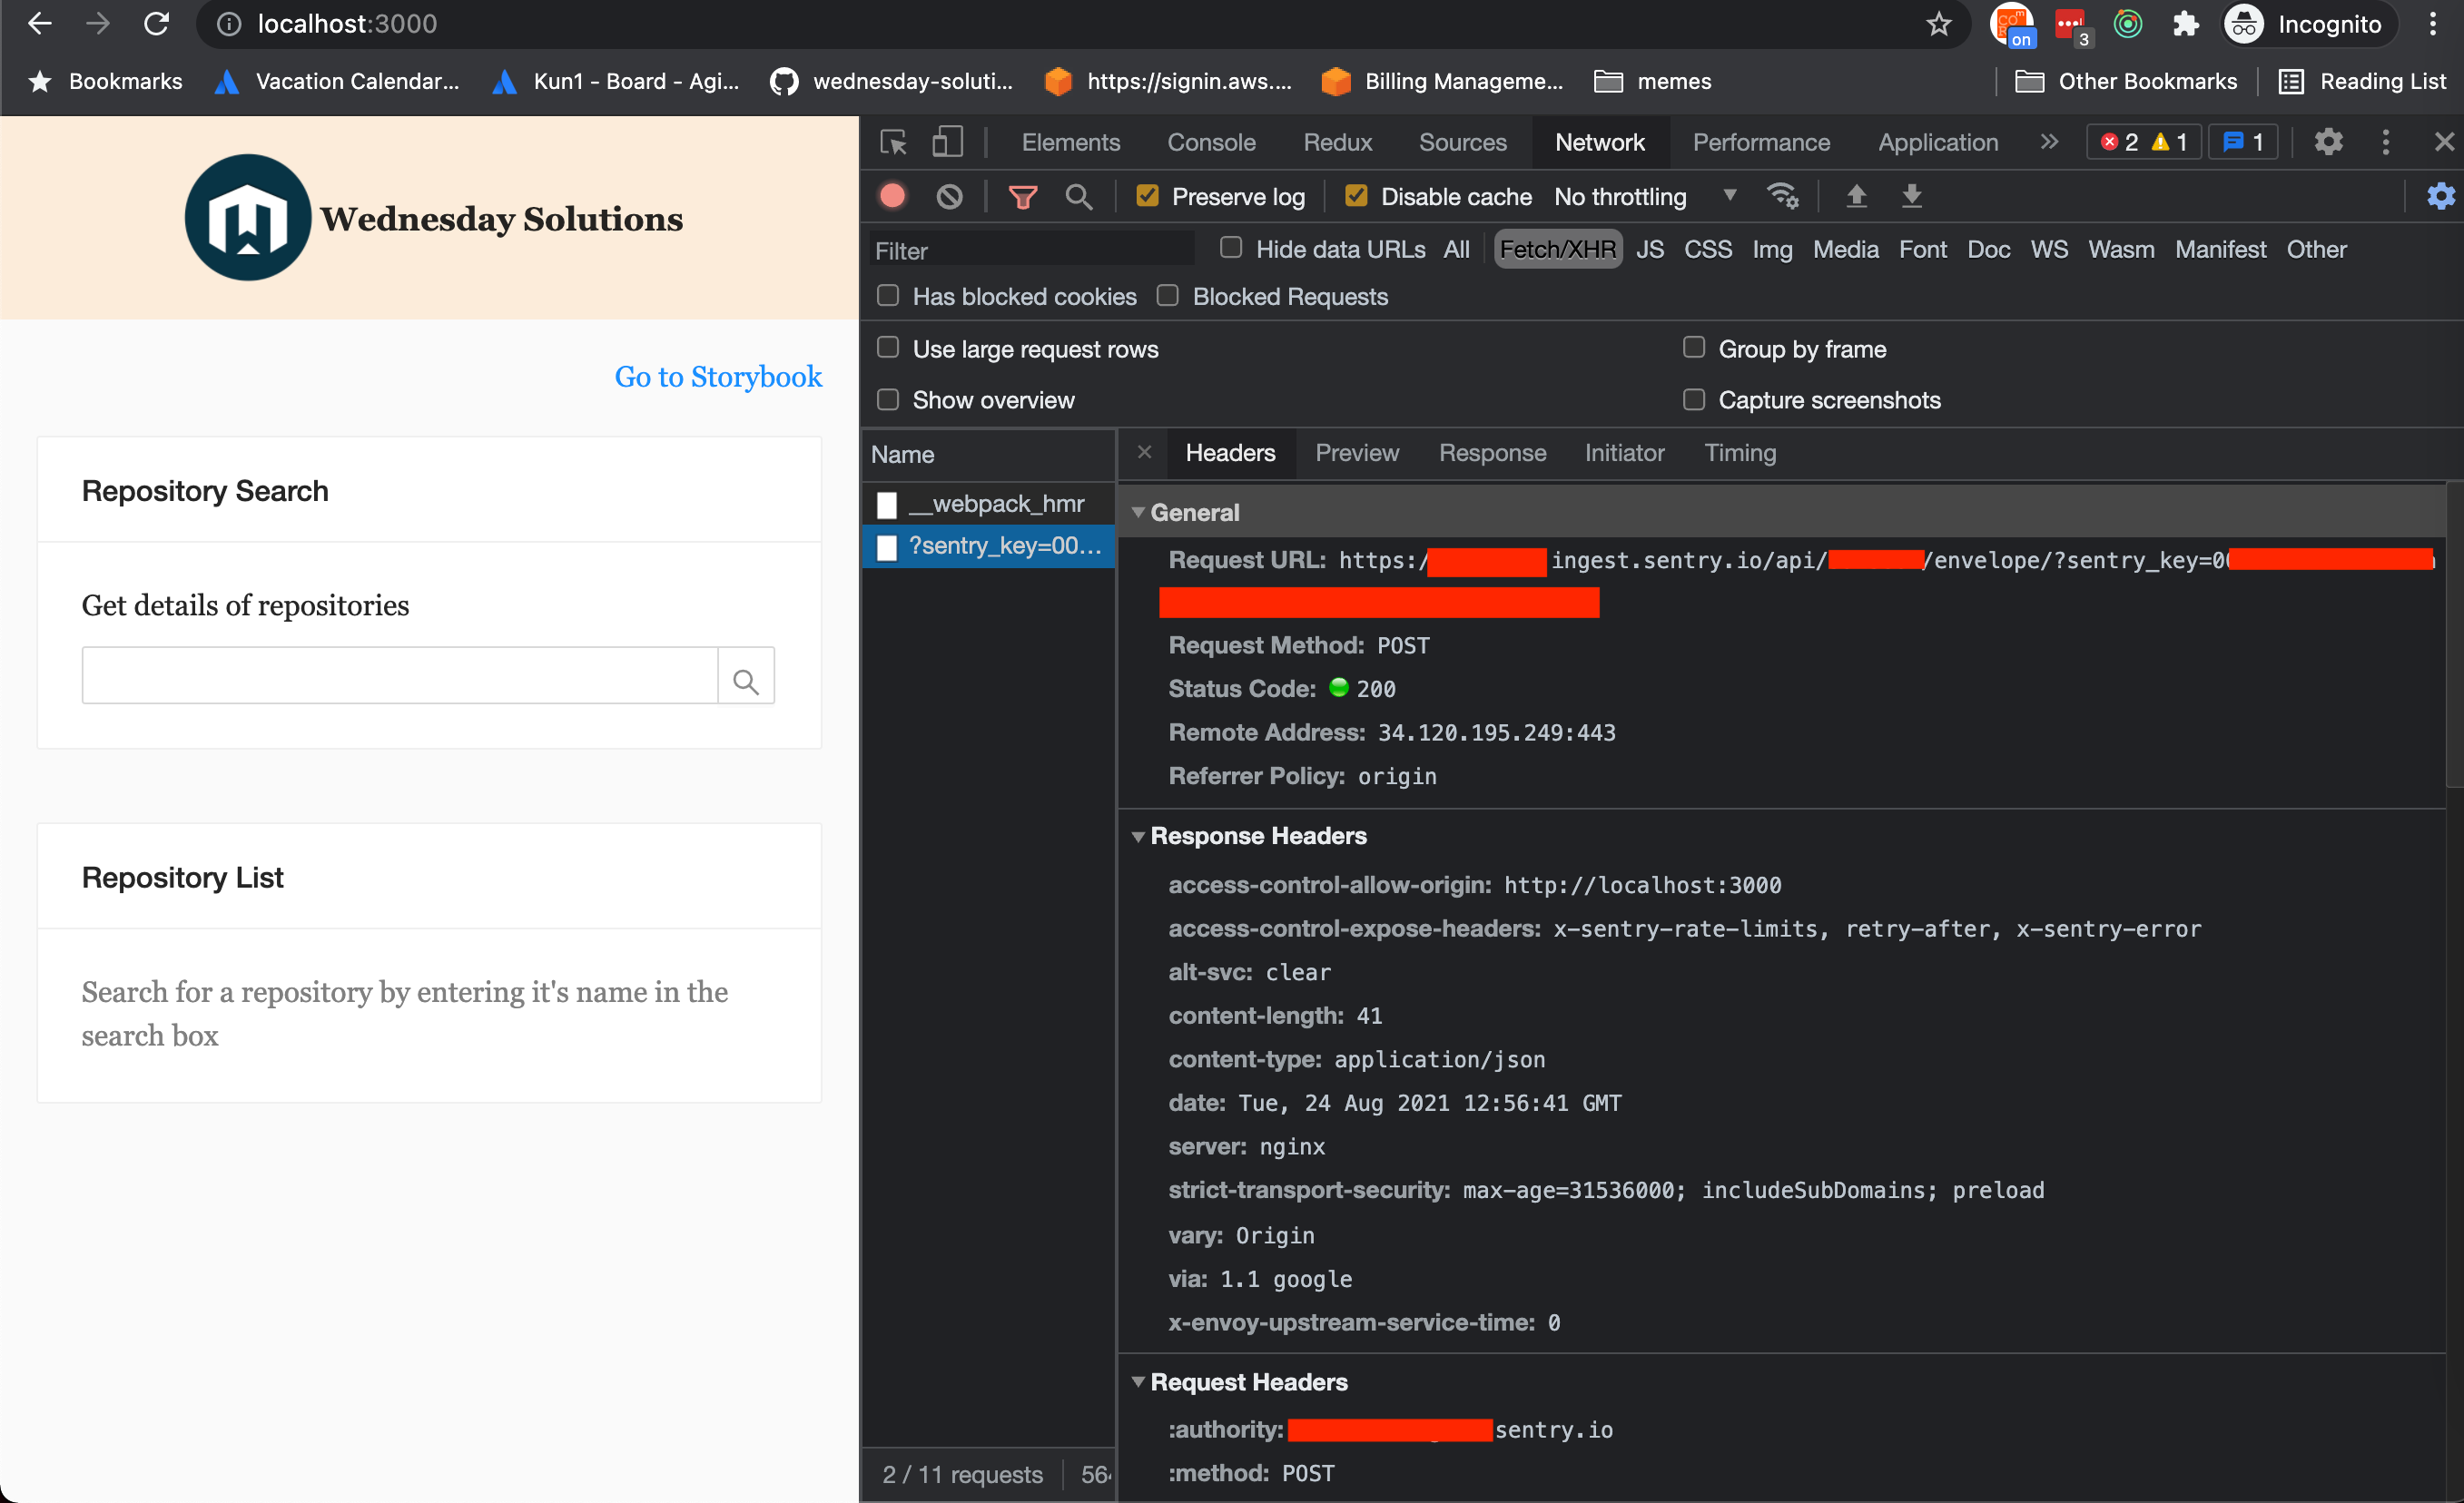
Congratulations! Sentry has been setup.
Step 7
Now let's integrate sentry in the ErrorBoundary so that we can report back to sentry whenever there is an error.
Copy this snippet into the app/services/sentry.js
Copy this snippet into the app/components/ErrorBoundary/index.js
Step 8
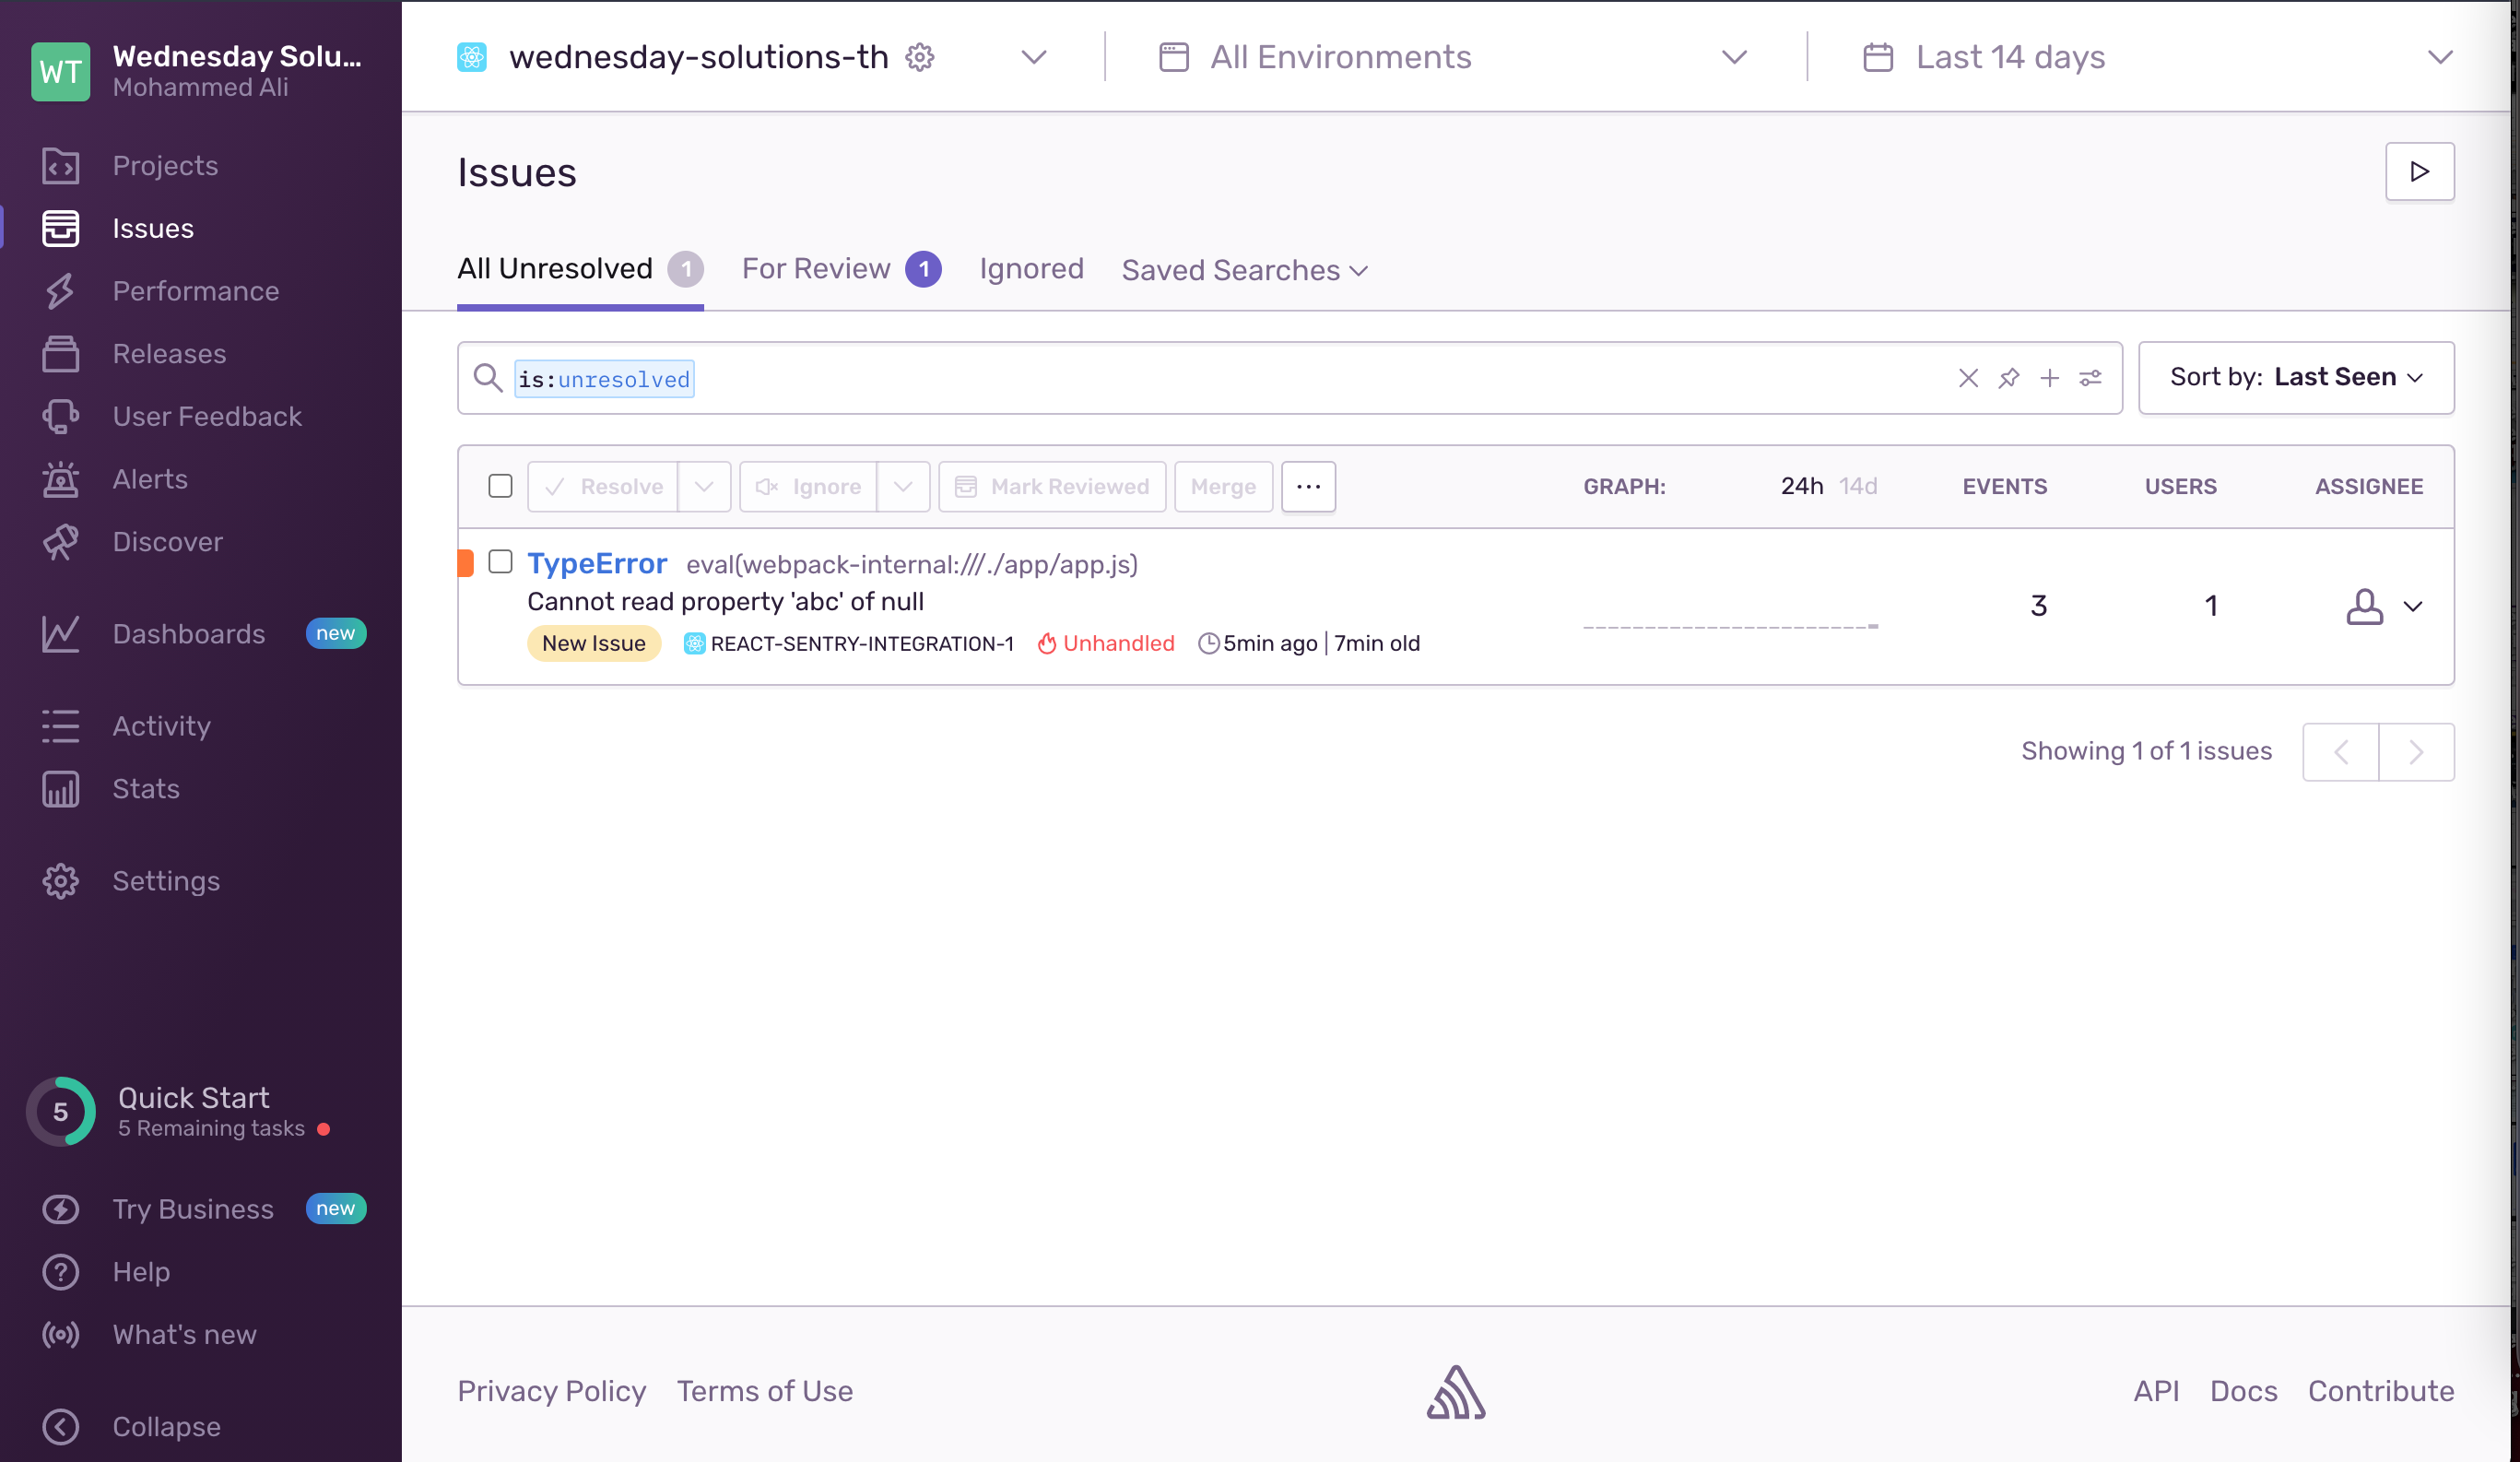
Test your integration by adding this snippet in the app/app.js file
Navigate to your project on sentry and you should see something like this
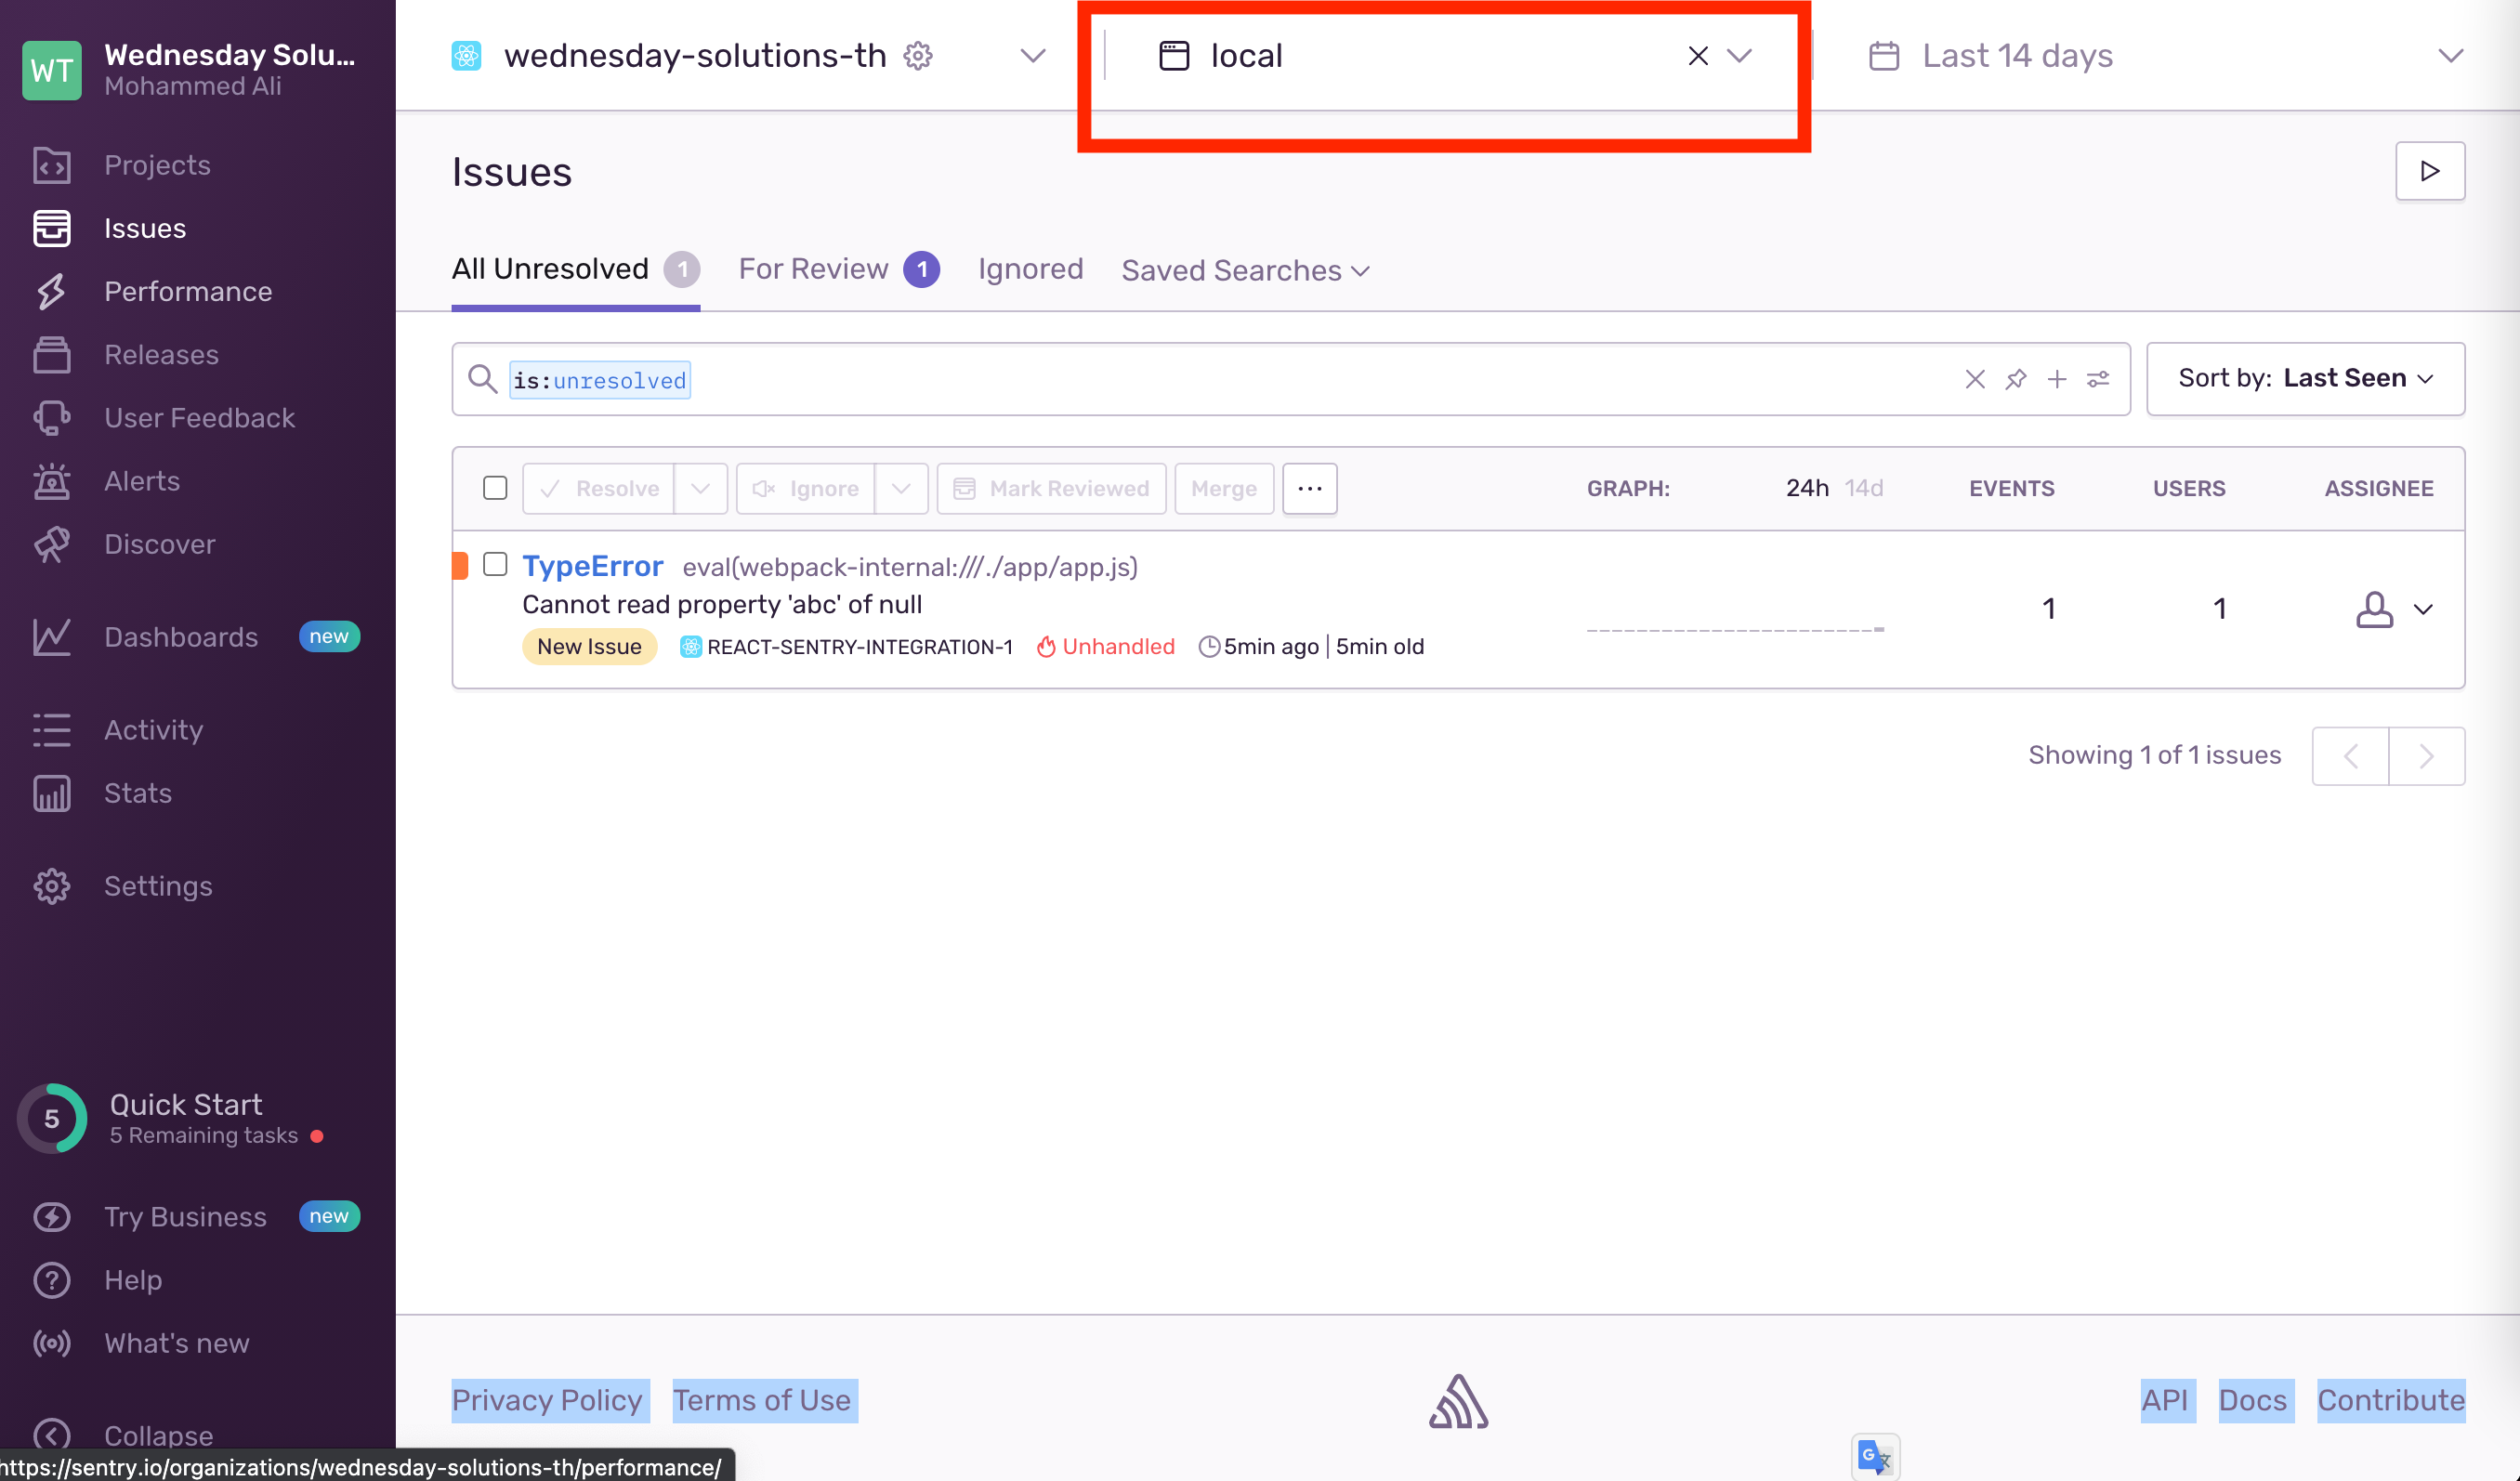
You should also be able to filter by environment.
Add support for source-maps
Step 1
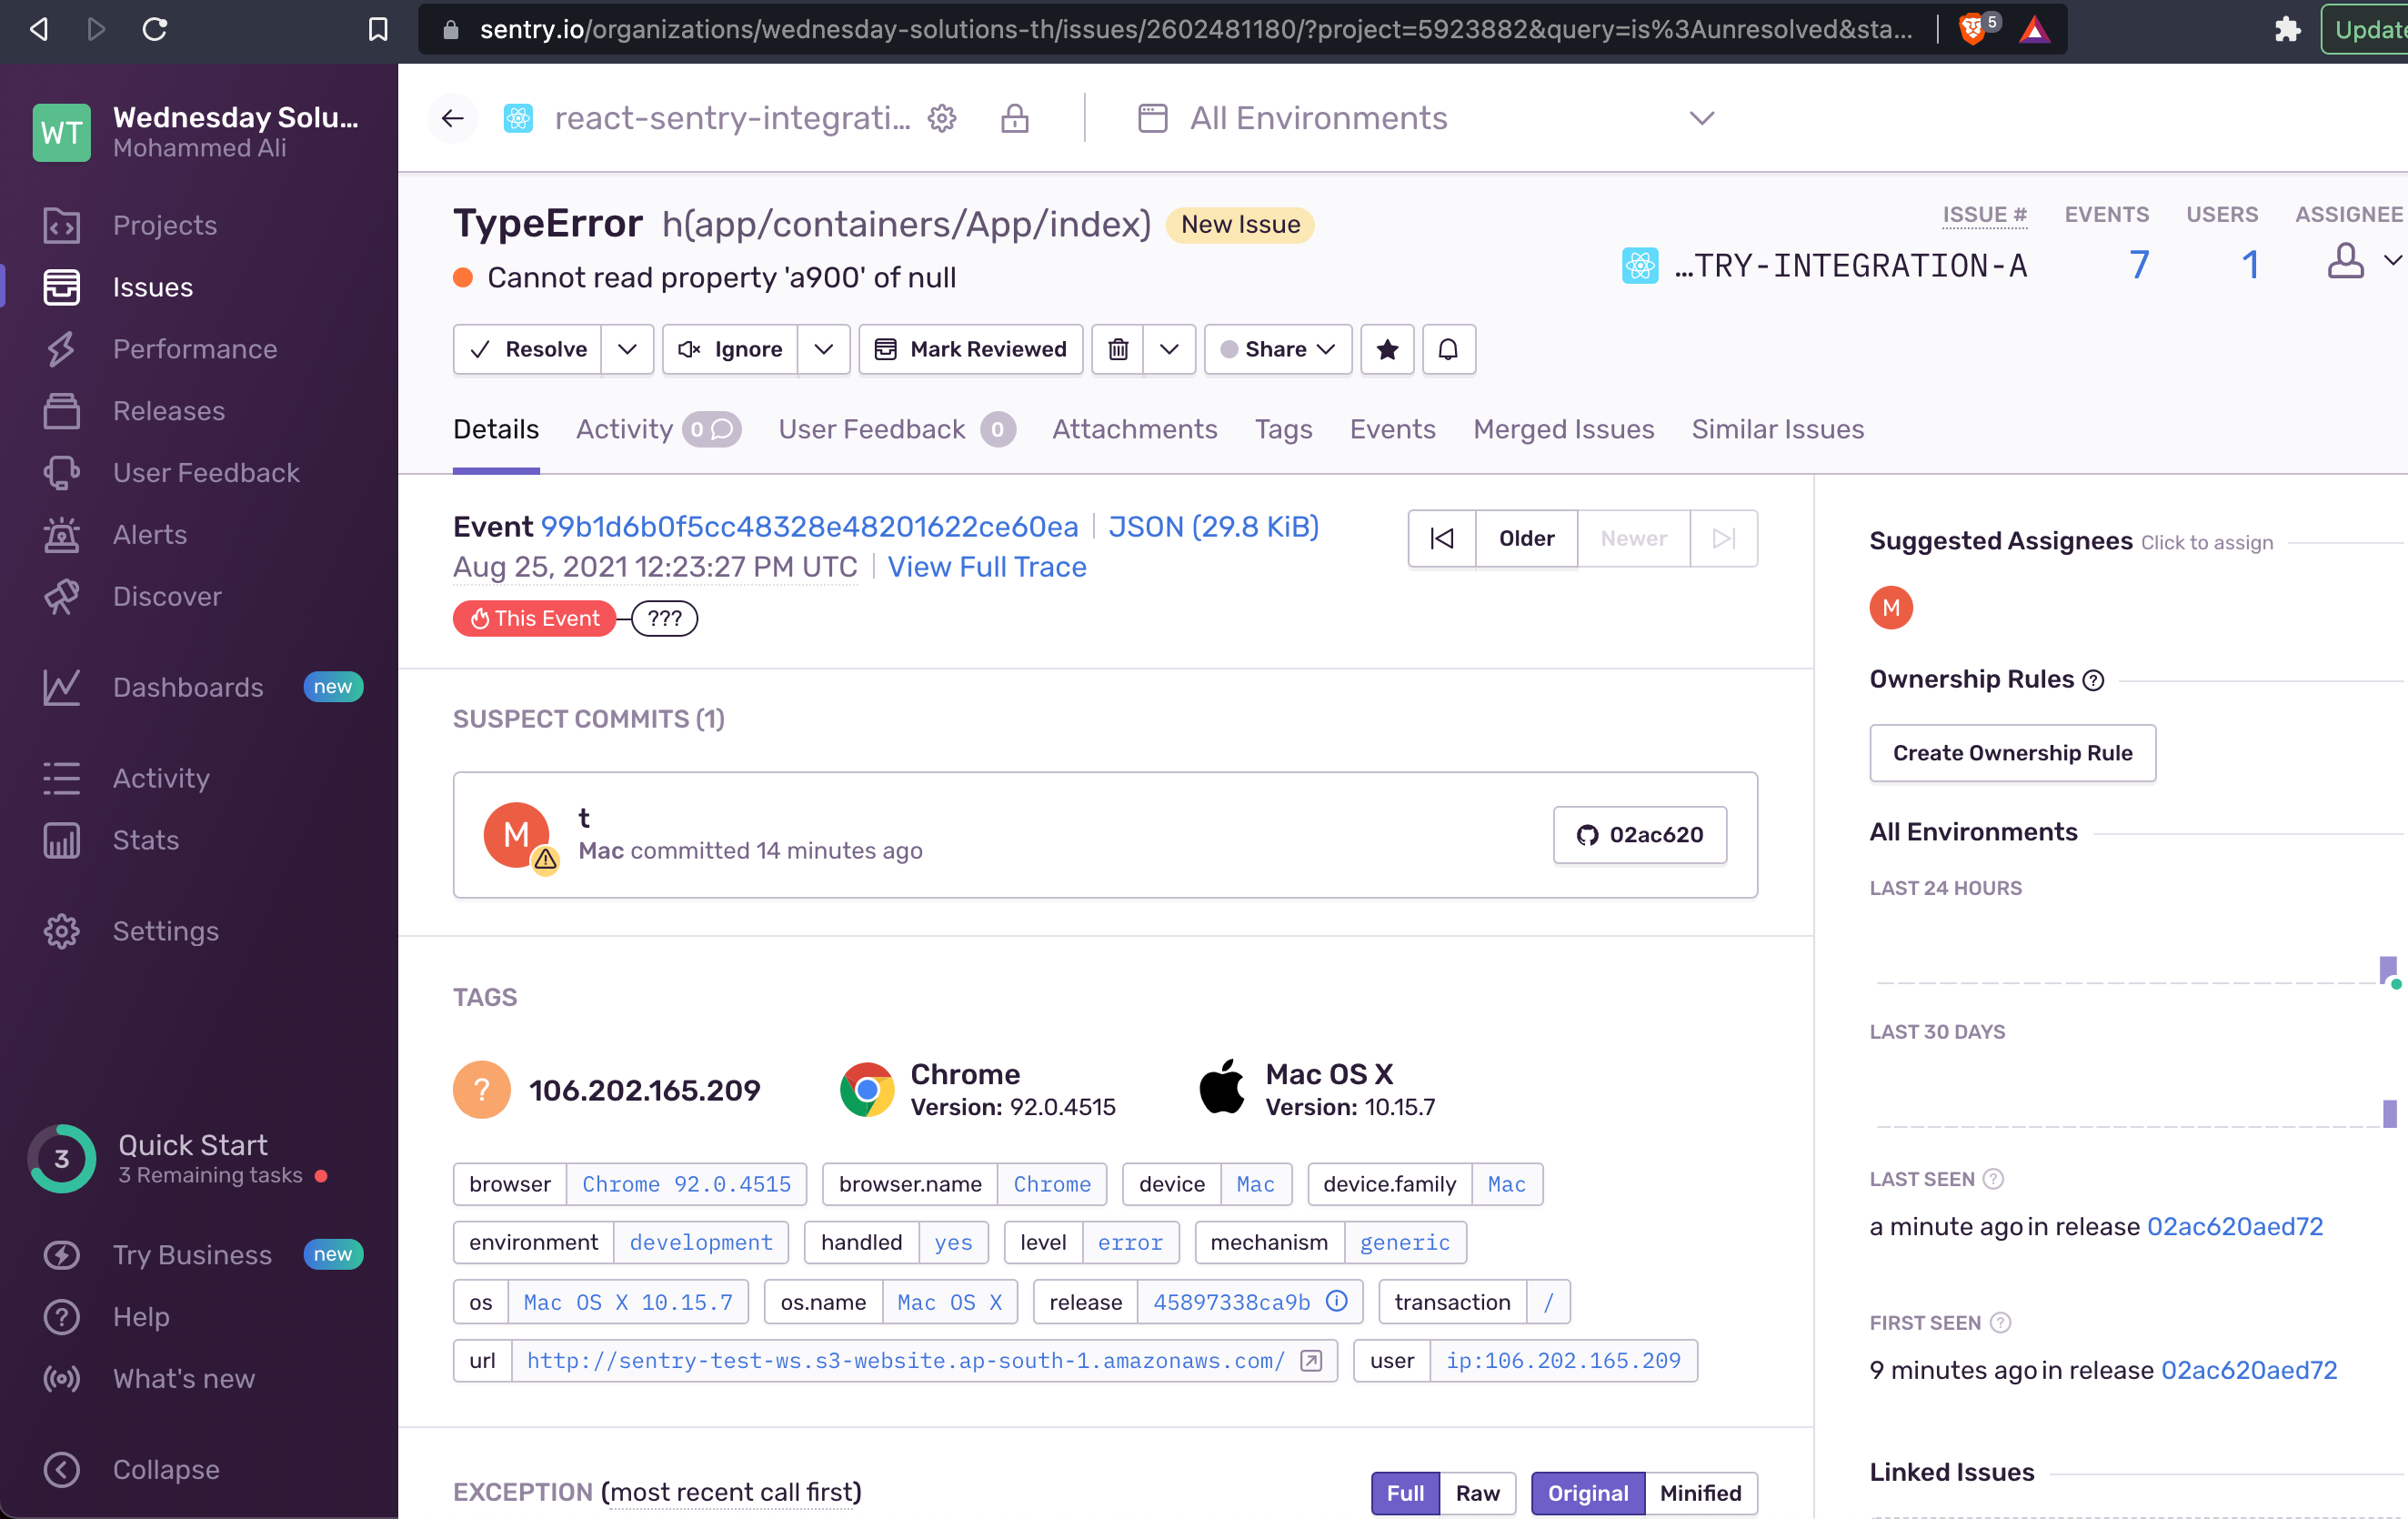
Click on the event to get some more details about it.

You will notice that it is not very easy to track where the exact issue is. We will now integrate source-maps so that we get the complete stack trace.
Step 2
In sentry go to Settings → Developer Settings → New Internal Integration
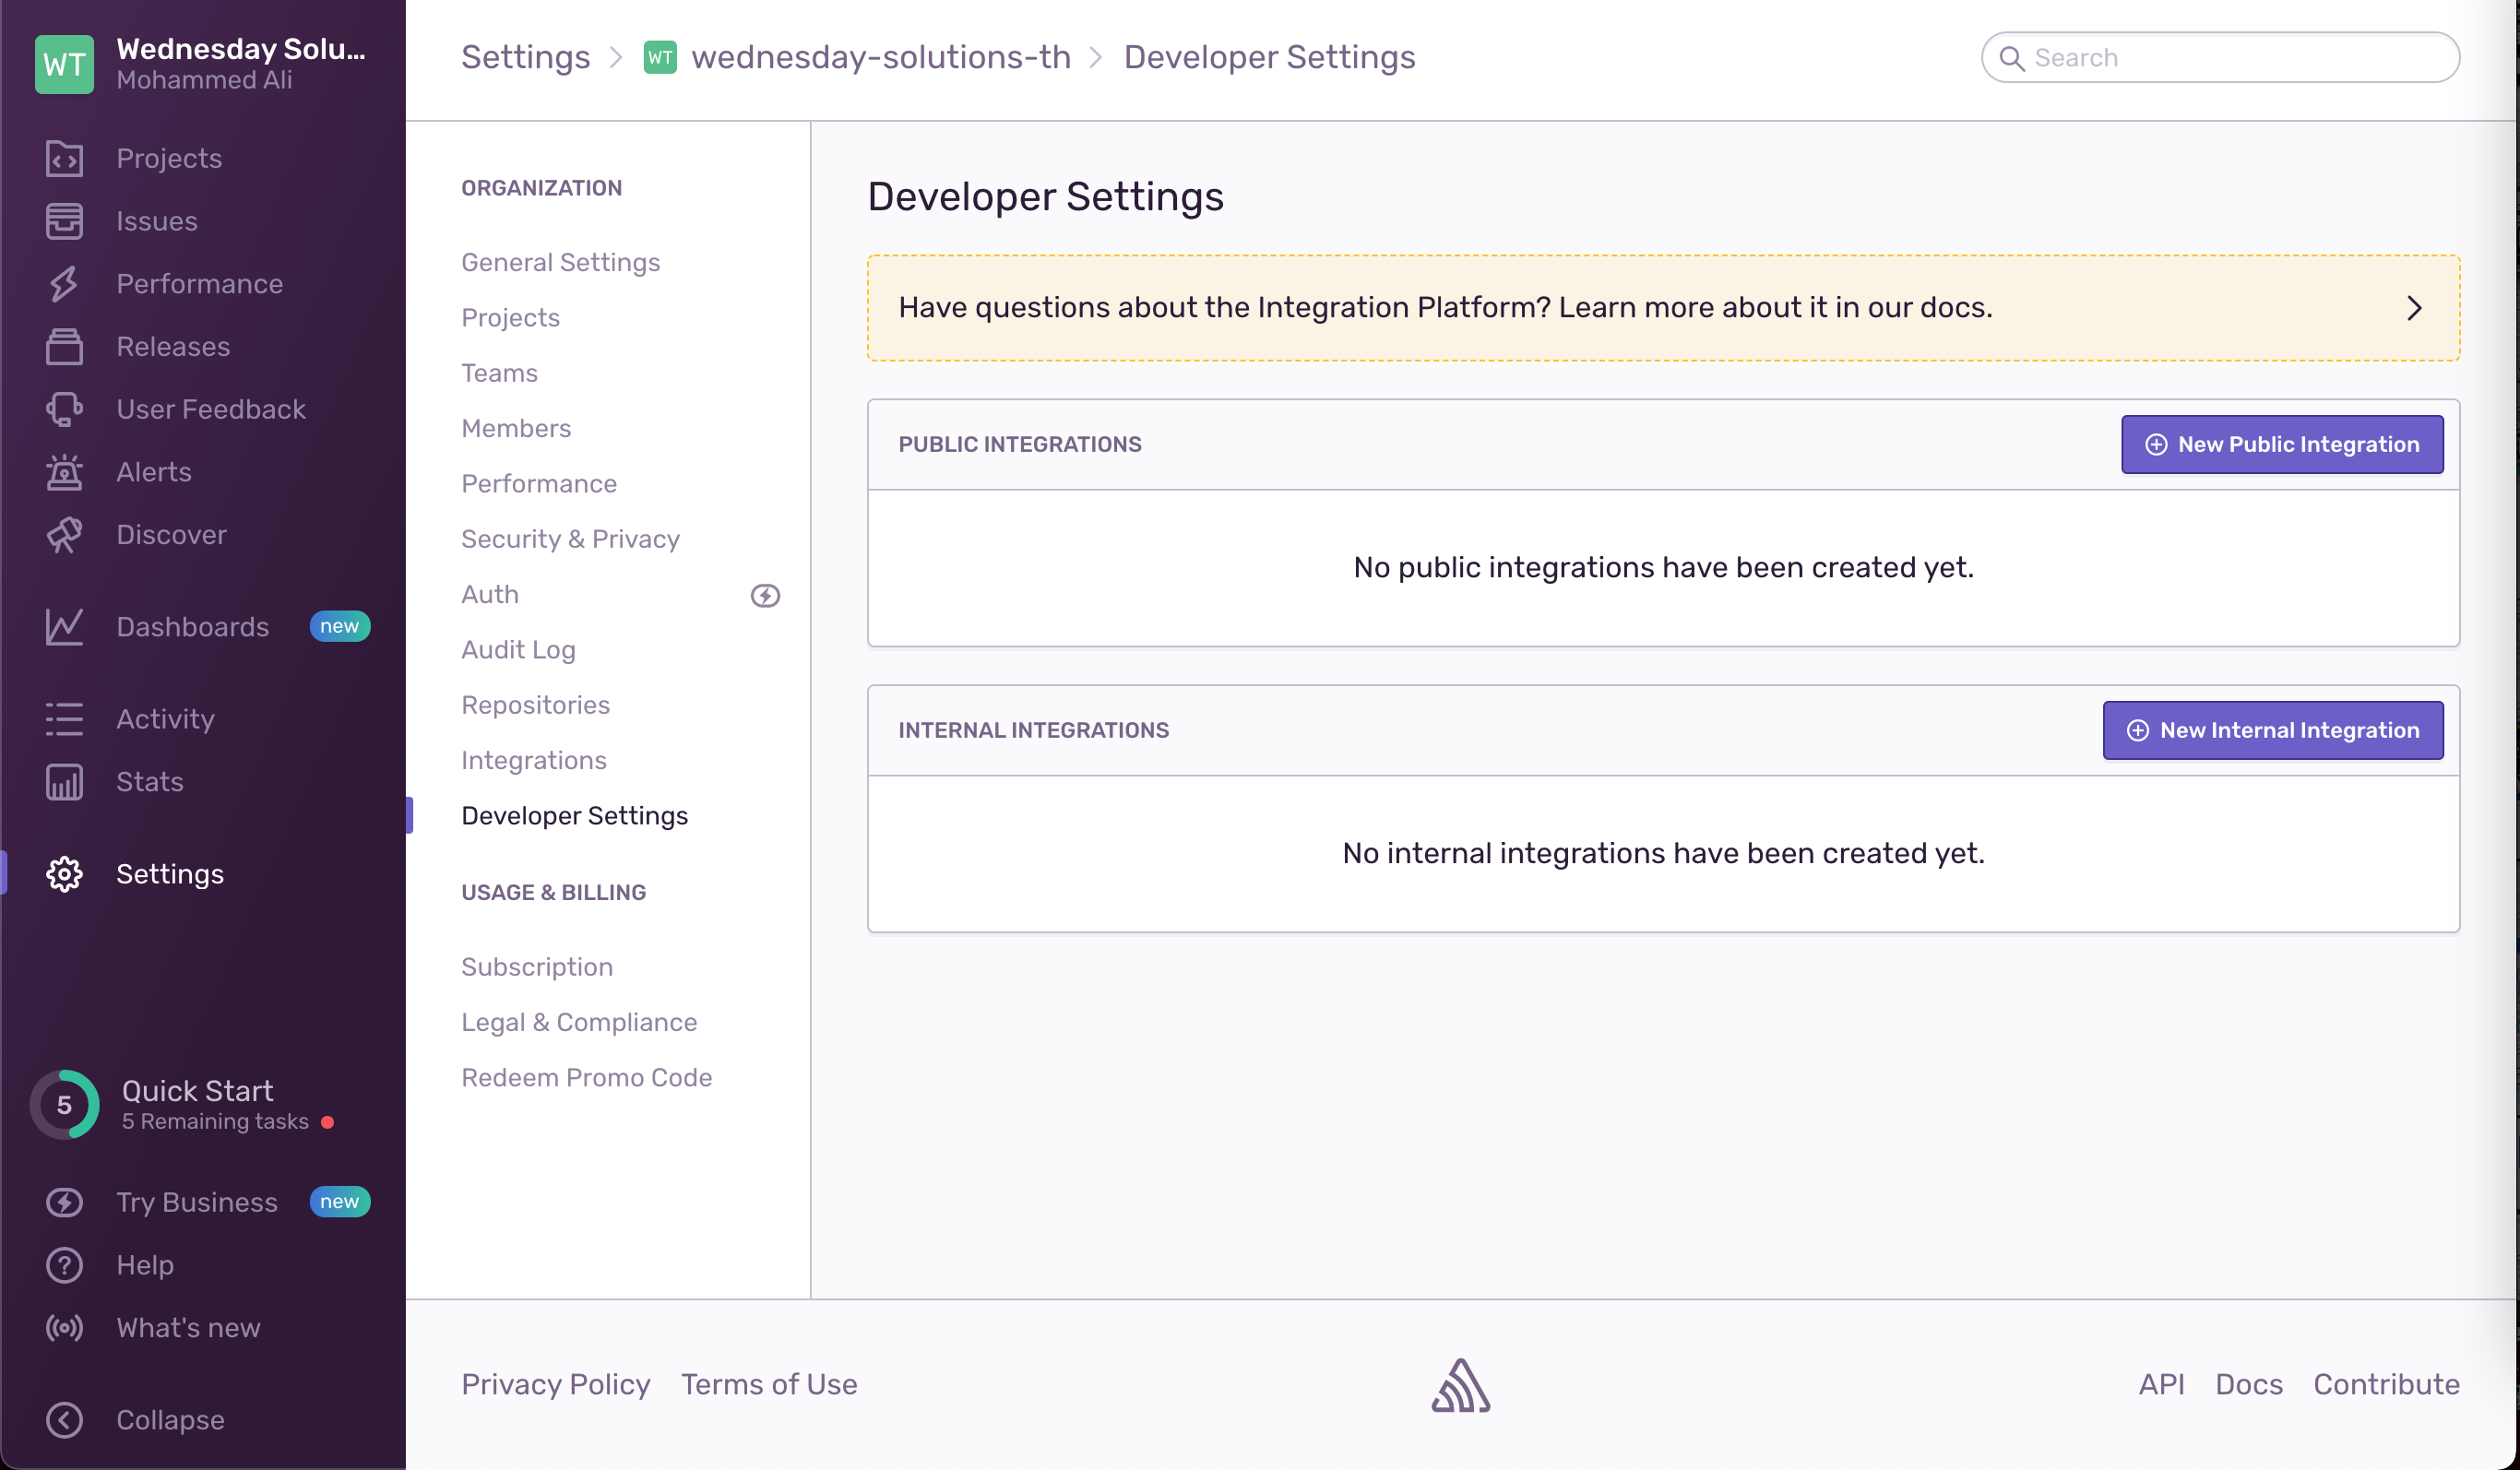
Add the name of the integration like Github Action Release
Setup permissions. We will need Admin for Release and Read for Organization
Click Save and copy the token
Step 3
Go to your repository on Github → Settings → Secrets → New Repository Secret name it SENTRY_AUTH_TOKEN and paste the token in the value field. Similarly add SENTRY_ORG and SENTRY_PROJECT to the secrets. Those these are not really secrets it will allow you to reuse this workflow as is in all your projects.
Step 4
Now we will write the sentry workflow that will handle deployment to AWS S3 and upload the source-maps. Create an S3 bucket and enable static website hosting.


Create a new workflow for uploading the source-maps
Copy the following snippet in the sentry.yml file.
- Add environment variables for AWS_REGION, AWS_ACCESS_KEY_ID, AWS_SECRET_ACCESS_KEY, AWS_S3_BUCKET
- Set the environment_name to either production or development based on the branch.
Update the initSentry function services/sentry.js as follows
Testing your integration and source-maps
Paste this snippet in your app/containers/App/index.js
Commit your code and push it. Wait for the sentry action to complete. Navigate to the URL where the website is hosted.
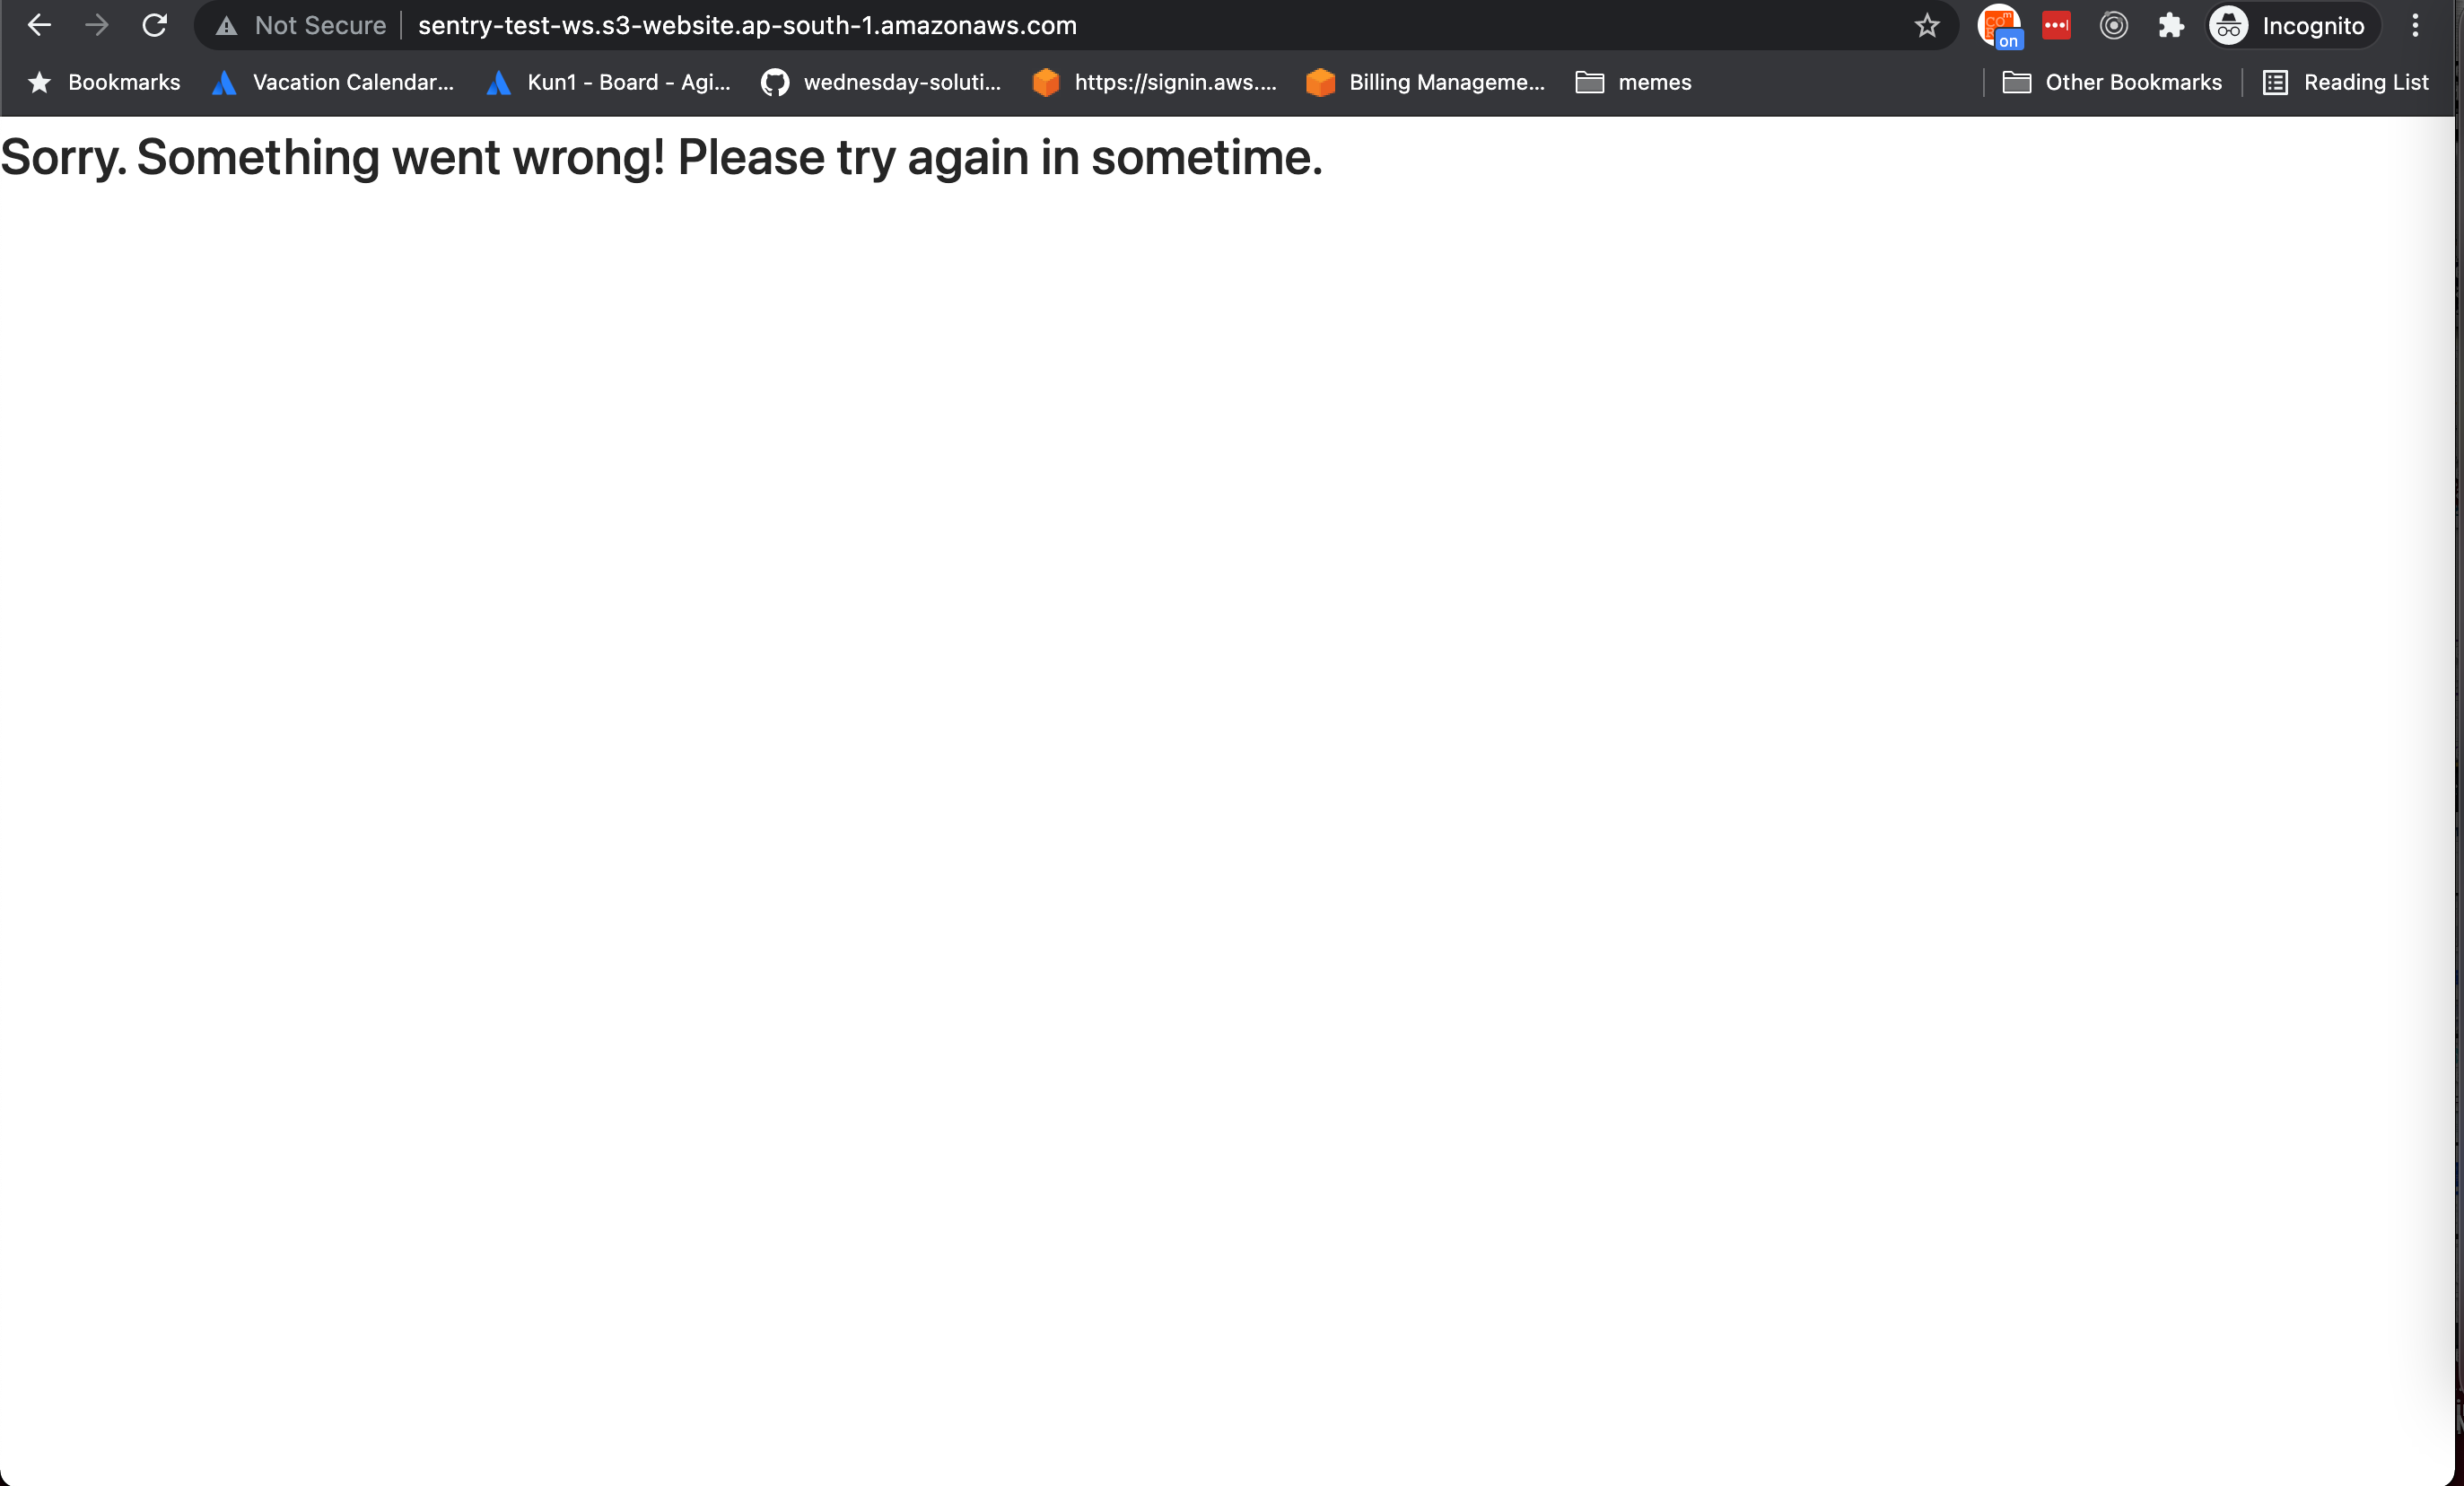
You'll be greeted with a Sorry. Something went wrong! screen. Don't worry, this means your ErrorBoundary has been invoked. Go to sentry and take a look at the issue.
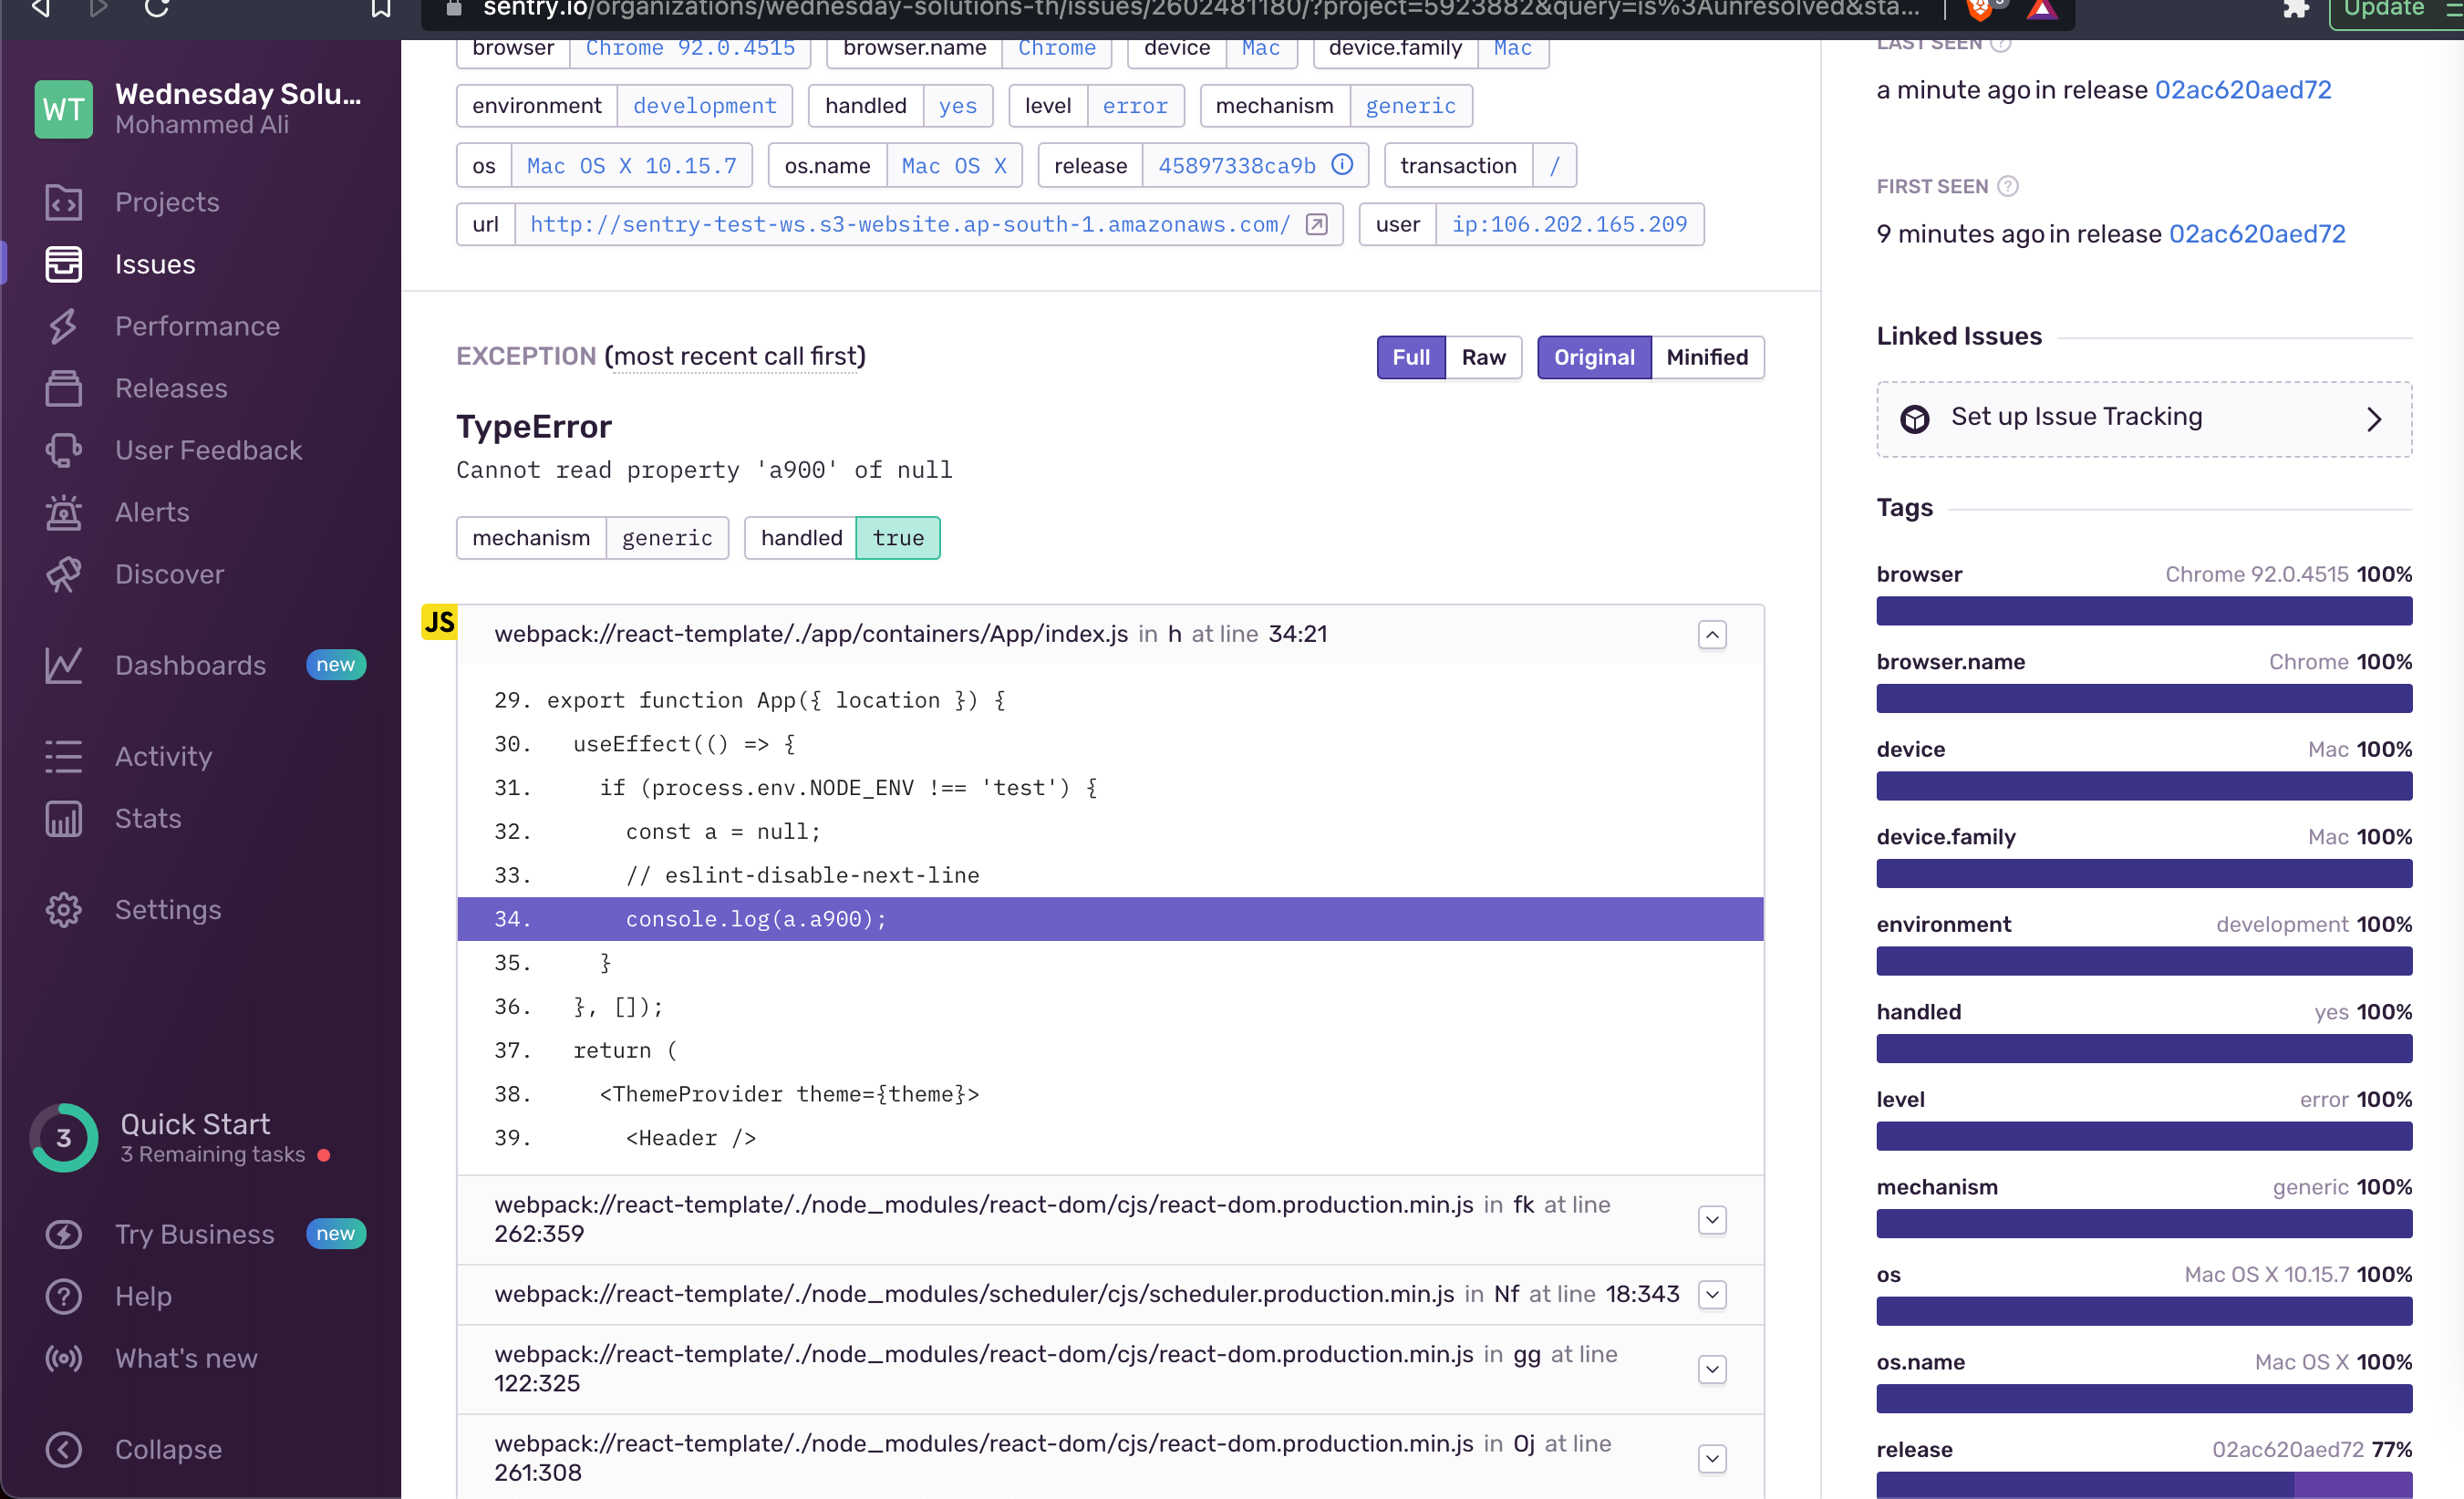
We now have support for release mapping!
Adding support for suspected commits
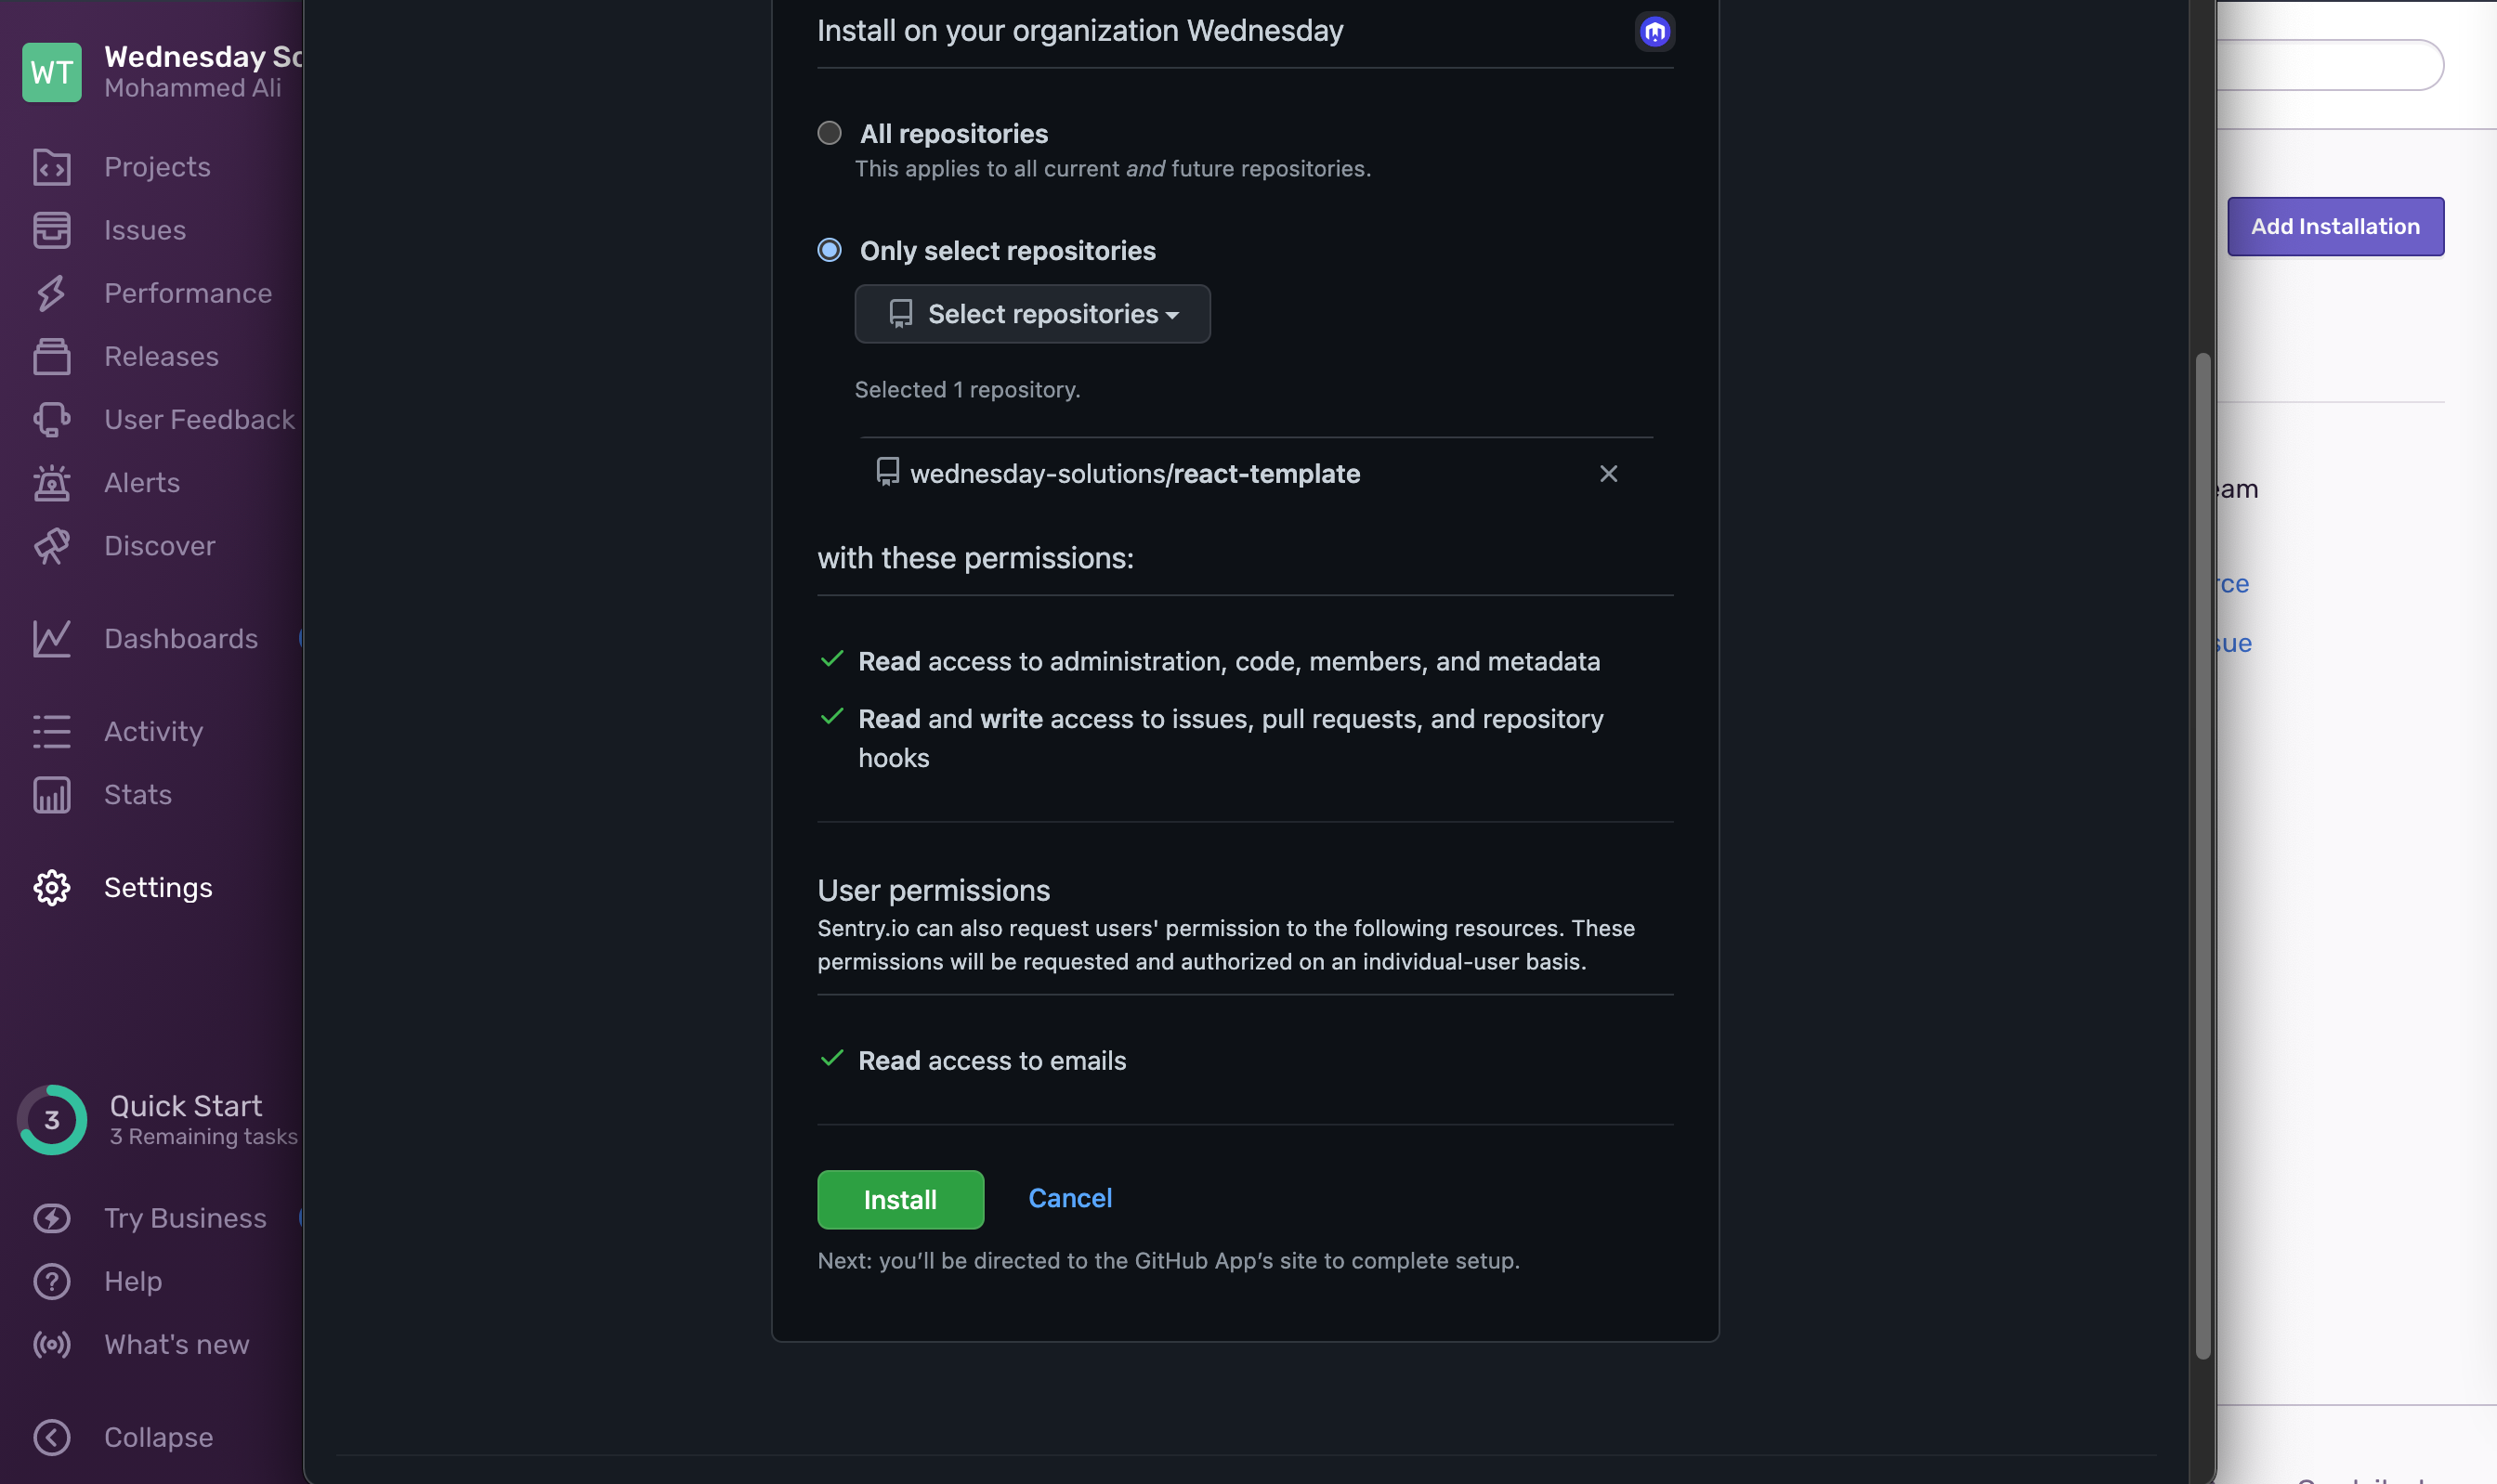
Add a Github Integration. Go to Settings → Integrations → Github
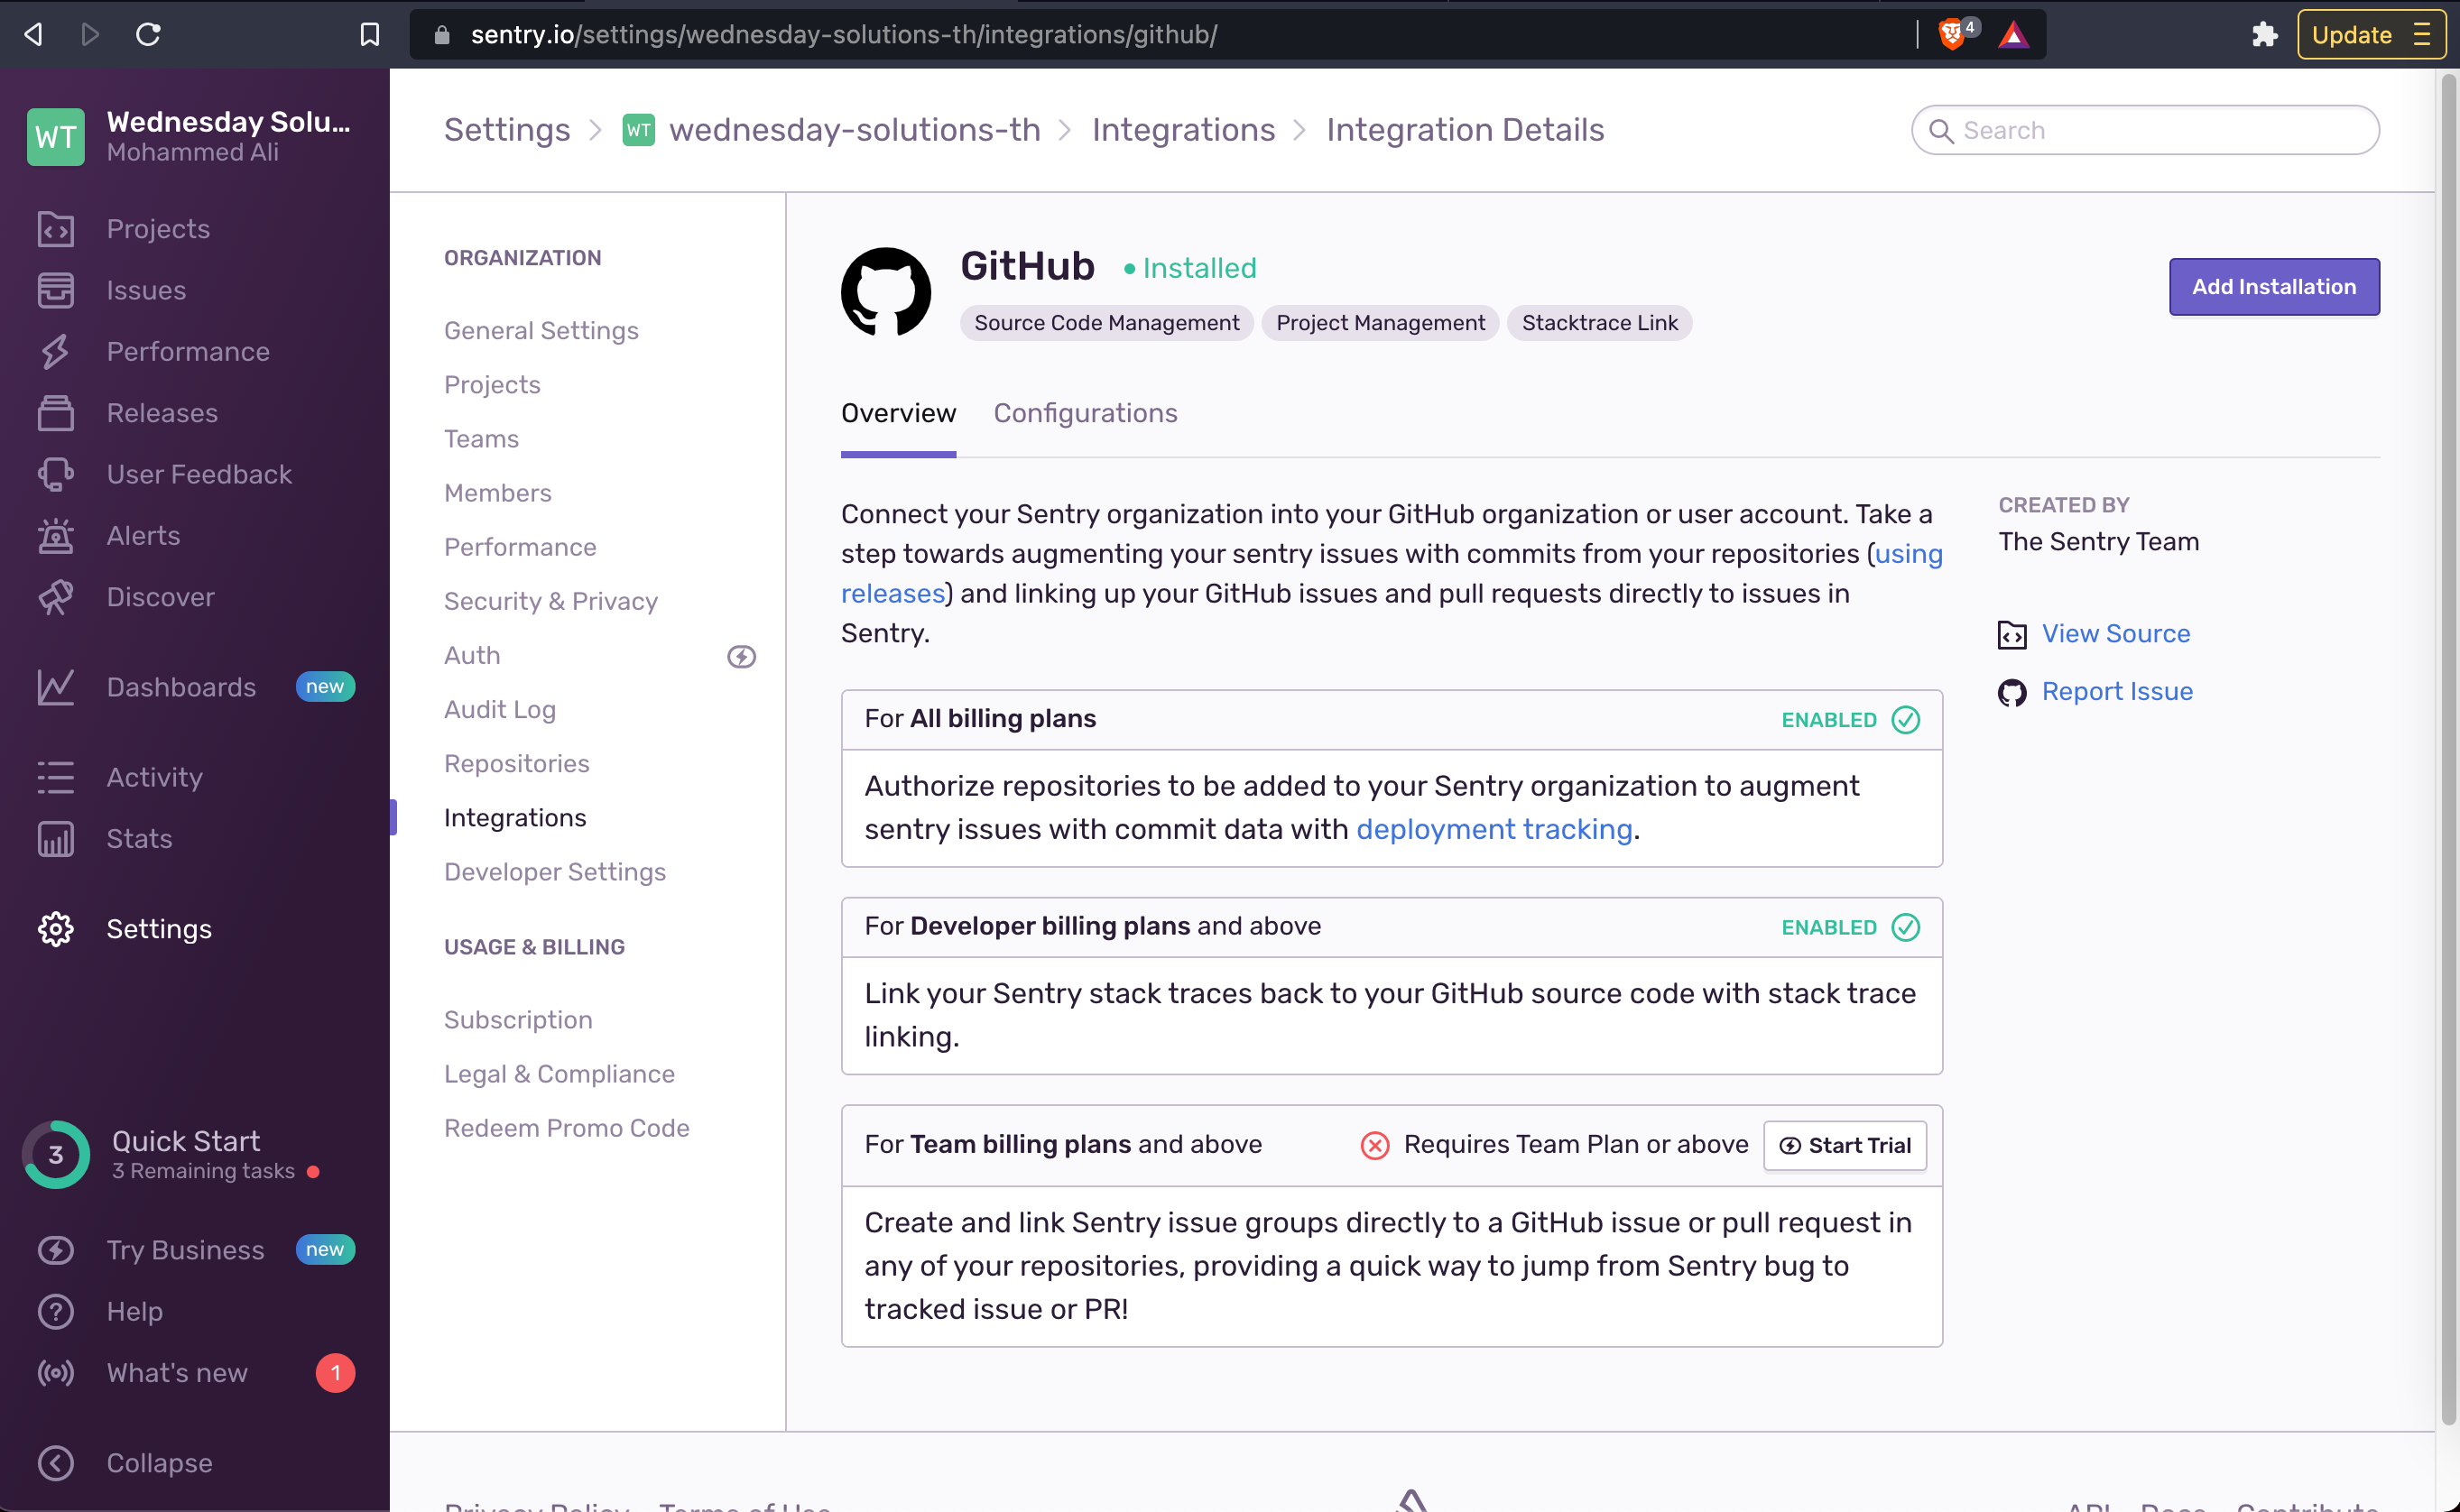
Choose the right organisation → Only select repositories → Install
Reload the react application to fire a new event.
You should now start seeing Suspect commits which help attribute the issue to the commit that introduced it. Filter all issues by releases, and assign issues to the right team member!
Liked what you read? There's more where that came from! Satisfy your craving for all things digital product strategy on LeadReads. Round out your perspective with exclusive stories straight from C-suite thought leaders.
Join here.
Where to go from here
You now have the ability to proactively handle errors on the backend.
Use the sendMessage function to capture and report errors to slack. Pull only the relevant logs using the request-id as a filter.
I hope you enjoyed reading this article as much as I enjoyed writing it. If this piqoed your interest stay tuned for the next article in the series where I will take you through how to proactively report frontend errors using Sentry.
If you have any questions or comments, feel free to tweet at us here.