As an android developer, you couldn’t have overlooked the flaky nature of testing coroutines in Kotlin. But there is a way out, all you need to do is make sure the tests are setup correctly. This tutorial will show you exactly that step by step followed by a deep dive on testing Kotlin Flows.
Note: In this tutorial we’re using an Android project. However, this isn’t limited to Android and can be used for any Kotlin project
Before diving in, please familiarize yourself with unit testing with JUnit and Kotlin Coroutines.
This tutorial is divided into two sections:
- Testing setup for Kotlin Coroutines
- Testing Kotlin Flows
Each sections starts with a starter project and gives you the final codebase towards the end. This allows you to skip a section if you want.
Testing Setup for Kotlin Coroutines
Starter Project
To begin, clone the start branch of this git repository.
Next, open the project in Android Studio. The starter project is based on the MVVM architecture but without the service layer. It already contains a repository, a view model, and a test class for the view model.
Here is how your project should look:
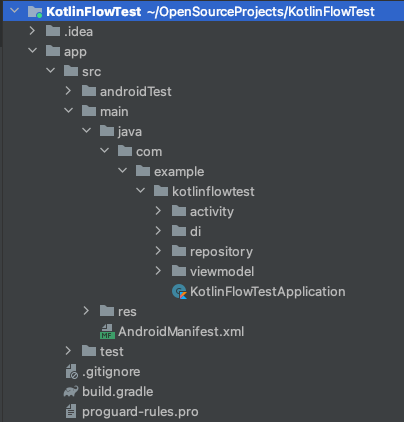
Here, you will be testing the view model. The repository is just a placeholder dependency of the view model. You will mock this repository in your tests.
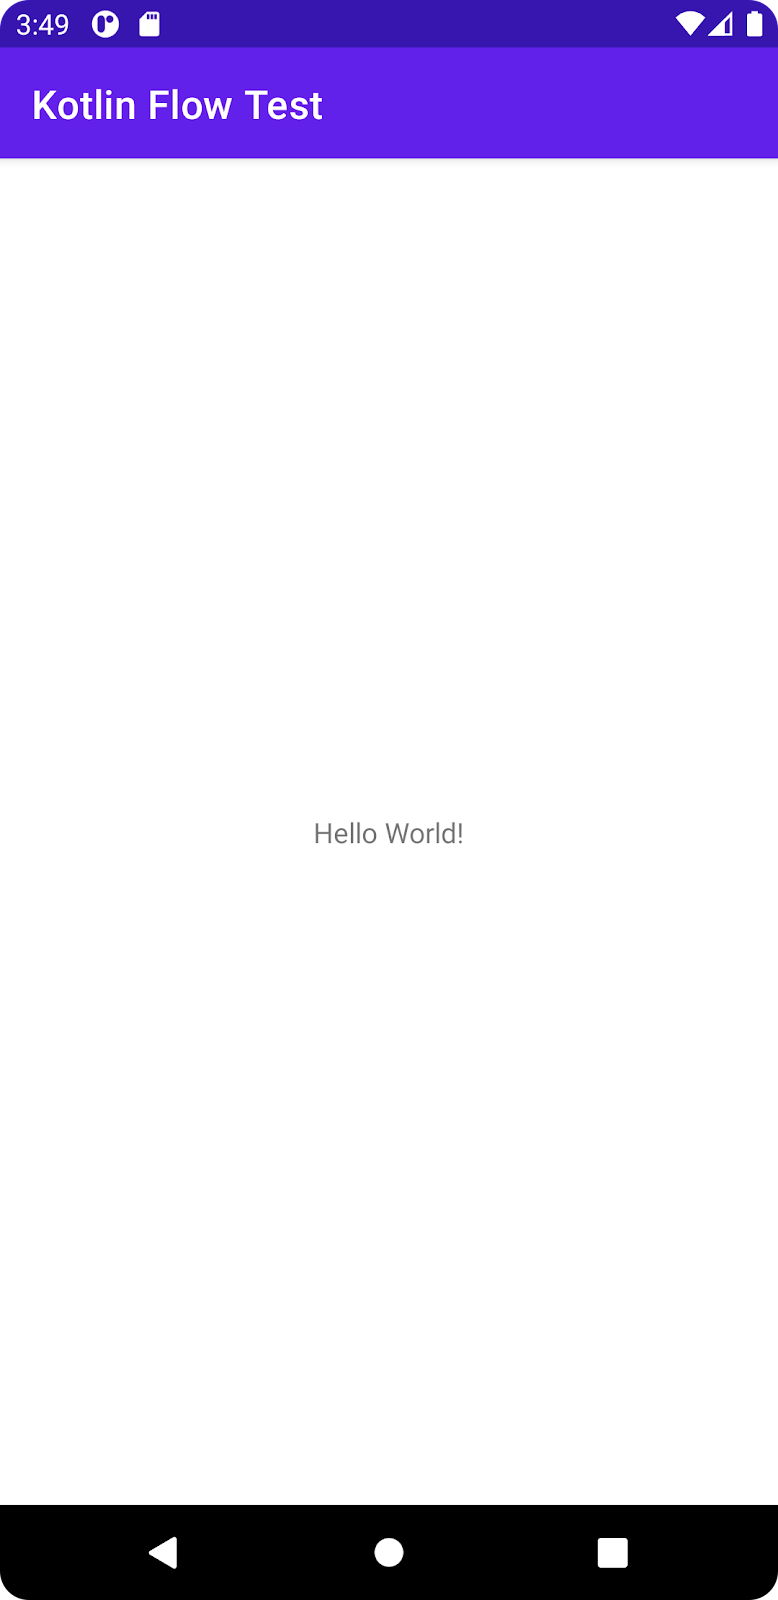
Before you start writing the test, build and run the project in Android studio. The app should run without any errors and you’ll see a “Hello World” on your phone.
Running the first test
Open the MainViewModelTest.kt file in the app/test directory. This file already contains the following test.
Run the test by pressing the icon in the gutter right next to the test function name and selecting Run MainViewModelTest.Gi..

The test should run without any errors and you should see a green checkmark saying your test passed.

Let’s understand what this test tests. The MainViewModel.kt file has a suspending function called suspendingFunction which in turn calls another suspending function in the repository.
This test uses runBlocking. It allows you to call suspend functions within its body by blocking a new coroutine. It blocks the current thread until it completes. This is the behaviour that we want in a test, we do not want any other code running on the thread while the test is in progress.
If the function under test has any calls to delay, we can use runBlockingTest instead. It works the same as runBlocking with a few differences.
While runBlocking will wait for the amount of the delay, runBlockingTest will skip past any delay blocks present and will instantly enter the coroutine block. This makes the tests run fast.
Testing functions that launch a new coroutine
Now let's write a test for another function in the view model that calls the same function in the repository, but does that by launching a new coroutine, instead of being a suspend function itself.
Go to the MainViewModelTest file and add a new test that tests launchASuspendFunction.
Run this new test. You will get an error message saying module with the Main dispatcher had failed to initialize.
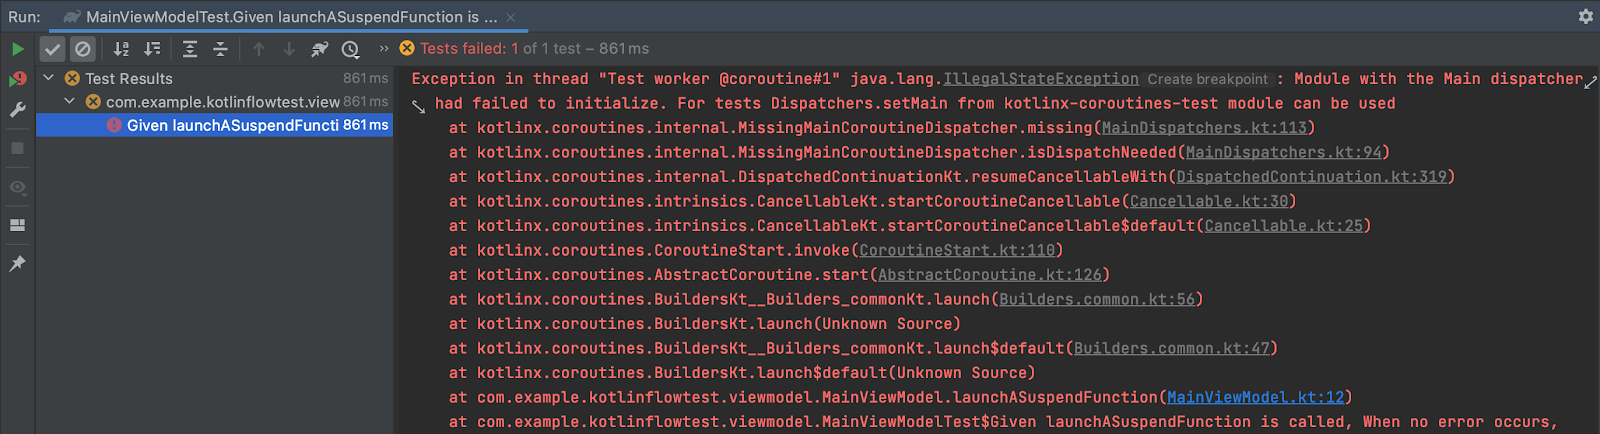
The error means that it was not possible to launch a coroutine on the main thread.
Since launchASuspendFunction launches a new coroutine on the viewModelScope without any dispatcher provided as an argument, it uses Dispatchers.Main by default. In the test environment, Looper.getMainLooper() is not available thus the test fails.
To solve this issue we need to use TestCoroutineDispatcher which executes tasks immediately.
Set the TestCoroutineDispatcher as the main dispatcher in the setUp function that executes before every test.
Create a function that will run after every test to clean up.
Now if you run the test, because we replaced the main dispatcher, it passes as expected!

Always Inject Dispatchers
Now that we have fixed the problem of Dispatchers.Main, let's try some other dispatchers.
Go to the MainViewModel and update the viewModelScope.launch method on launchASuspendFunction to accept a dispatcher. Let's use the Default dispatchers.
Run the test again and you will see that it still passes.
So everything is fine right? Not quite. We could have functions that do more than just one operation or function call. Let's call the repository function one more time.
And also update the test to expect 2 calls to repositorySuspendingFunction
Now if you run the test, it fails! We expected the function to be called twice, but it was only called once.
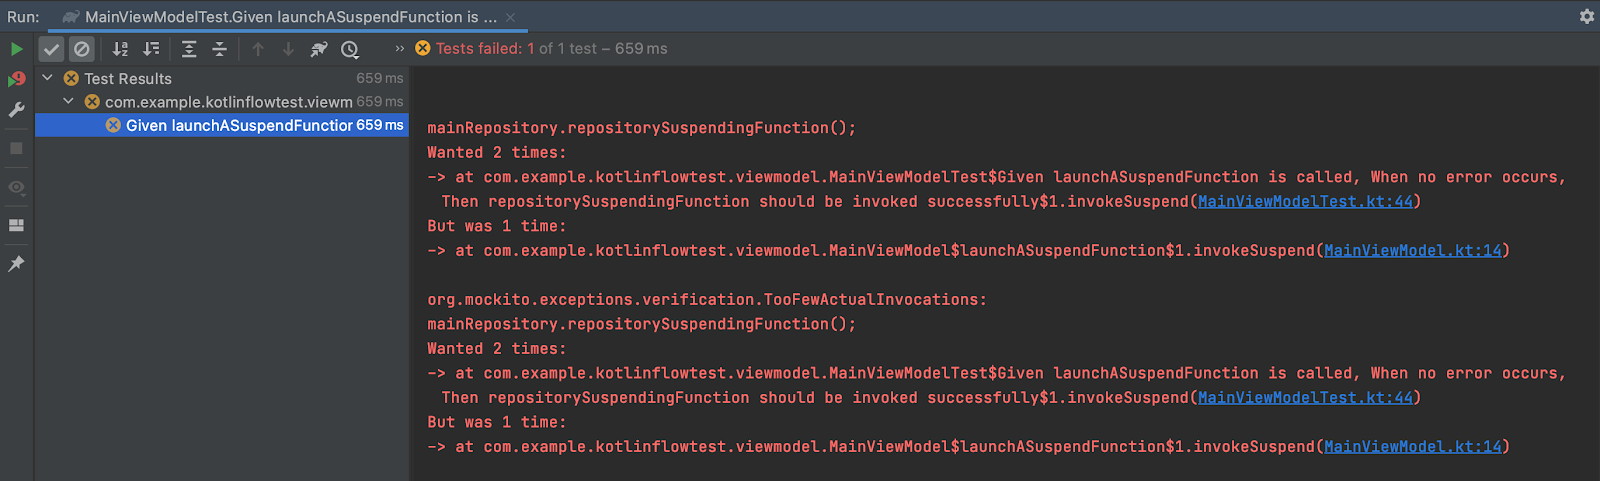
We replaced the Main dispatcher with the TestCoroutineDispatcer. But now the function under test is launching a new coroutine on the Default dispatcher. To make the test run correctly we need to replace the Default dispatcher with TestCoroutineDispatcher as well. But there is no method like Dispatchers.setMain to replace the Default or IO dispatcher.
The solution to this is to inject dispatchers as a dependency into the classes that use them.

Create a class CoroutineDispatcherProvider
Add CoroutineDispatcherProvider as a dependency to MainViewModel
In app/di/viewModelModule update the view model constructor
Update the setUp function of the test class
Finally update the function we are testing to use the dispatcher provider
Now if we run the test, it will pass again no matter what dispatcher we use.
Excuse this brief pause, but here's something worthwhile: Join the ranks of elite C Execs who are already benefiting from LeadReads. For all things digital products
Join here.
Coroutine Scope Rule
Manually creating a test dispatcher and CoroutineDispatcherProvider for every test class is a bit tedious. We can extract this work into a JUnit rule.
Create a class CoroutineScopeRule in the test directory.
We can apply this rule as
We can also create a BaseTest class that will apply the rule. Create a new file BaseTest
And make the MainViewModelTest class extend from BaseTest
We can now get rid of the dispatchers related code in the setup function of MainViewModelTest.
The cleanup function can be deleted as that part is already handled by the rule applied in the BaseTest class. You now have a setup that can help you write unit tests that deal with coroutines and any dispatchers! Bravo!
You can look at the complete code so far here.
Testing Kotlin Flows
Now it’s time to see how we can test Kotlin Flows. At its base, flow is a type that can return multiple values sequentially. If you are not familiar with flows, you can read more about them here.
Starter project
In the previous section, we built on top of the starter project and created a coroutines testing setup. If you want to code along with this tutorial, you can clone the repo from here and check out the part2-start branch and open the project in Android Studio.
Testing a simple Flow
A flow that only emits a few values and does not have any more operations applied to it, is the easiest to test.
In the MainViewModel we have a countFlow that points to a flow returned by the repository. This is a simple flow that counts from 1 to 3.
In MainViewModelTest we have mocked the response of getCount3Flow. Since countFlow is a val on the view model, we need to mock the response before we initialize the MainViewModel. Otherwise, the value is read before the mock is registered and it leads to a NullPointerException.
The setup function now looks like this:
And the getCount3Flow function just emits 3 numbers from the flow builder.
The easiest way to test a flow is to convert it to a list. This internally collects the flow and return all the collected values as a list. Let's run the test named Given no error occurs, When count3Flow is called, Then it should emit all values correctly.
It passes!

Testing Complex Flows
Often we need to move the heavy computation away from a particular thread / main thread.
To do that with flows, we use flowOn. Let's modify the flow in the MainViewModel to use the Default dispatcher. Notice that we did not use the dispatcher provider that we created in the first section, here.
In the MainViewModel add one more flow that maps over the countFlow and doubles the value of each number. Let's use the IO dispatcher for this. Let's also use a delay to simulate some long-running operation, or to represent a flow that emits values at a certain frequency.
Now, let's zip these two flows into a flow that returns count to double pairs. The zip operator only emits a value when each flow emits one value.
Let's look at this with an example: If countFlow emits two values: 1 & 2 and doubleCountFlow has only emitted one value as of yet, that is 2.
In this case, our new countWithDoubleFlow will only emit 1 time with the value (1, 2). As soon as doubleCountFlow emits the second value, that is 4, countWithDoubleFlow will now have the 2nd value from both the flow and will emit its own second value: (2, 4).
Let's use the Default dispatcher for this zipped flow as well.
Now, let's zip these 2 flows into a flow that returns count to double pairs. The zip operator only emits a value when each flow emits one value.
Now if we run the test, it will pass but the time it takes to run is almost 6 seconds.

That is a very long time for such a simple test. As we saw in part 1, we can use runBlockingTest to skip past delays and make the test run as fast as possible. Let's use that.
Running the test now gives an error saying This job has not been completed yet. The reason for this is, runBlockingTest tries to skip past delays by advancing time on the dispatcher. Since we have not injected the dispatchers, we are not using the test dispatcher in our test. Advancing time is only possible on a test dispatcher.

Replace the dispatchers with the dispatchers from the CoroutineDispatcherProvider for all of the flows.
We also need to tell the runBlockingTest to use the test dispatcher that we are injecting in tests. To do that first make the test dispatcher from CoroutineScopeRule public.
Then replace the runBlockingTest with coroutineScope.dispatcher.runBlockingTest so that we are using the correct dispatcher with runBlockingTest
Run the test and you will see that it passes and also takes much less time to execute. From approximately 6.7 seconds before to only around 600-700 milliseconds.

Cold vs Hot Flows
Cold flows are flows that do not produce values until they have at least 1 collector registered. As soon as the last collector leaves, cold flows stop producing.
Hot flows on the other hand do not wait for a collector to be registered and start producing right away. Also, hot flows do not stop producing once all the collectors leave.
Another major difference is that hot flows never complete. So calls to collect on a hot flow are also never complete and always suspended. Also, functions like toList will never complete when called on a hot flow.
Since hot flows are never complete, we cannot test them by converting the values to a list. For testing hot flow and making testing any flow in general easier we can use a library called Turbine. You can read more about turbines here.
Testing State Flow
State flow is a type of hot flow. It emits updates to a value, i.e. duplicate consecutive values are not emitted by a state flow.
For example, if we try to emit [10, 20, 20, 30] from a state flow, the collector of the flow would only receive [10, 20, 30].
If you are familiar with Android's LiveData, state flow is very similar to it. You can read more about state flow here.
First, add a getStateFlow function to the MainViewModel
Here we are creating a normal flow and converting it to a state flow using the stateIn function.
Next, add a test for getStateFlow in MainViewModelTest
If you run this test, you will notice that it keeps running forever. This is because the state flow is a hot flow, and hot flows are never complete.

To overcome this, we can use a library called Turbine. It is a small testing library for Kotlin Flows. Let's add the turbine dependency in the app's build.gradle file.
The turbine library comes with a handy test extension function on the flow that lets us test all types of flow with ease. It internally uses a Channel to collect the values from the flow and gives us useful functions to receive items one by one from the flow.
Channels are out of the scope of this article but you can read more about those here.
Let's update our test case to use this test function.
The test function lets us await the next item in the flow and also expect various events. We can run assertions on each emit individually. This also makes the test code very clean and precise. Also, notice that the last call to emit is with the same value, thus the state flow does not actually emit again. Therefore we can call expectNoEvents after that and the test passes.
As of the time of writing this tutorial the turbine library internally uses the kotlin time library which is still experimental. So we need to add the @ExperimentalTime annotation to the test class for it to compile.
Now if we run the test, it passes!

Testing Shared Flow
Shared flow is another type of a hot flow. Unlike a state flow, it will emit all the values, even if the values are the same.
For example, if we emit [10, 20, 20, 30] from a shared flow, the collector would receive all the values [10, 20, 20, 30].
Let's create a shared flow in the MainViewModel from the doubleCountFlow. We can use the shareIn extension function to create a shared flow from an existing flow.
We pass the viewModelScope as the scope in which the flow will be shared. The second argument is the SharingStarted class. It indicates the strategy by which the sharing should be started.
For eg: Lazily means sharing is started when the first subscriber appears and never stops. While Eagerly means that sharing is started immediately.
Similar to the state flow, call to terminal functions like toList do not complete on shared flow and keep running forever.
Add a test for this shared flow in MainViewModelTest. We will use a turbine for this test as well. We are also using runBlockingTest here because the doubleCountFlow uses a delay block.
This test passes as expected. Testing s lazily started shared flow is not much different than any normal hot flow.
Always inject SharingStarted strategy
There are situations where you would want your shared flow to start eagerly. Eagerly started shared flows can pose some challenges in terms of testing.
Let's change the SharingStarted strategy to Eagerly
If we run the test now, it will fail with an error Timed out waiting for 1000 ms. 1 sec is the default timeout period for turbine tests.

Why does the test fail? Since we are using Eagerly, the sharing of this shared flow starts immediately. That means by the time we start collecting the flow in our test, it has already emitted all the values.
To fix this we need the sharing to be started Eagerly in real application but Lazily in tests. We can create a class similar to CoroutineDispatcherProvider that will provide us with the sharing strategy. Then we can inject the sharing strategy wherever we need it. Create a class SharingStrategyProvider as shown below.
Add it as a dependency to the MainViewModel
In app/di/viewModelModule update the view model constructor
For tests, we can add SharingStrategyProvider to the already created CoroutineScopeRule
Also, update the starting function and use Lazily as the strategy everywhere.
Update the setUp function of the test class
Lastly use the injected sharing strategy in the view model
That's it. If you run the test now, it will pass as expected!

Where to go from here
If you have gone over Part 1 and now this, you are well versed on how to deal with it. You can now write tests for all types of coroutines and flows!
You can look at the complete code from this article here.
If you've enjoyed reading this tutorial and found yourself smarter than you were say, 5 minutes ago, then please do share it and leave your comments on our Twitter handle here.
About the Author
A master of Android and Flutter apps, Shounak is busy leading teams of mobile developers by day. A gaming enthusiast, you can find him in front of a screen looking for a good movie to watch. An avid photographer in his free time Shounak tries to capture different landscapes at sunset.