
Product development is a long journey. Any development team is in a cycle of planning, building, releasing, and collecting feedback. To build the product, you're writing code and more code and on and on. The product manager has a great new idea for a feature, more code. We are launching in a new country, more code. You get the gist.
One of the core metrics that quality is measured by for any software delivery team is the number of regressions. This means the number of bugs introduced when a change is made. You want this number to be low. By low, I mean zero because your users don't have the patience you think they do.
To achieve this, you need an automated testing strategy. If you're still manually testing builds, you will have prolonged release cycles which means with the current market economics, your competitors will beat you.
In this tutorial, I write about end-to-end tests and how you can write them using selenium.
What are end-to-end tests and why should it matter to you?
There is an entire slew of automated testing strategies. These include unit, functional, integration, end-to-end, performance, etc. Each one has its own merits. For this tutorial, we will focus on just end-to-end tests.
Modern applications include a combination of internal and external modules. Let’s take any application as an example. The product will most likely be built using a few managed services, it might use external APIs as a data source, and it might even use external modules for decision-making or business logic. The end-to-end testing strategy allows you to test your application with all these different modules. Unlike other testing strategies where you’re testing modules in isolation, an end-to-end strategy allows you to test the application in a real-world situation. Here are some advantages of end-to-end tests:
- Real-world simulation: End-to-end tests are run without mocking any subsystem. The test does the same, just as your user would use the application.
- Reduction in manual testing
- Performance measurement across environments and modules
Note: This tutorial will set up e2e testing using selenium and cucumber for a front-end application. This tutorial assumes you know how to build a front-end application using React.
Prerequisites - Libraries & Tools
This tutorial will set up end-to-end (e2e) testing for an existing react application. The libraries & tools you will use are:
- Selenium: A browser automation tool.
- Selenium IDE: A chrome extension to record user actions.
- Cucumber: A behaviour-driven development (BDD) framework.
- Chai: An assertion library.
Note: The details of each of these libraries and tools are out of scope for this tutorial. However, I highly recommend that you go through each of their websites to learn more about them.
Getting Started
In this tutorial, we will work with the Wednesday React Template. We will use this as a starter project which is the master branch and add e2e tests to it.
Git clone the React template to your local system and run yarn install to install all the dependencies.
Note: At the time of writing this tutorial I’m using version 16.15.1 of Node.
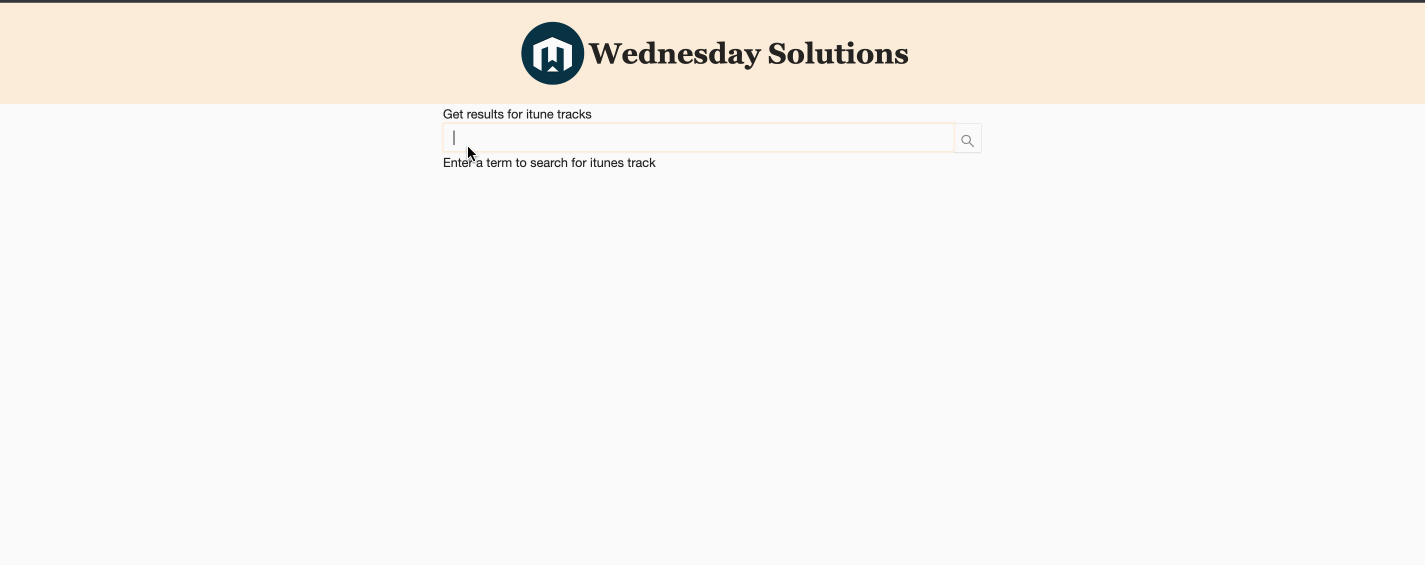
After running the above open localhost:3000 on your browser and you should see the application running as shown below.

In this application, we use the iTunes API to get music information based on the what is searched. Play around, and use the search bar to find music from your favorite artists.
Next, install the dependencies for your e2e test by running the following command
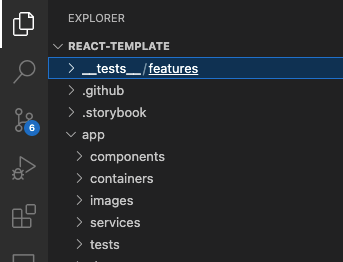
The folder structure
Open the project in your favorite editor and poke around the directory structure.
Next create a **tests** folder in the root directory, and it it create a features folder. This is where you will be adding the feature files (more on this later)
Writing the feature file
A feature file contains instructions in plain English that are followed when running a test. It includes a description of what is being tested and the steps to follow to perform the test. It’s super easy to read.
For this tutorial, we’ll write a test for the search functionality. Before we start writing this test, please try the search yourself, so you’re familiar with how this works.
Create a new file called searchTest.feature in the features folder and add the following steps to it.
Notice how easy it is to read. Here is a breakdown on what each keyword is for:
- Feature - This will state the feature of the application under which the testing will be carried out.
- Scenario - For every feature, we will have different scenarios. The name of these scenarios will be made using this keyword.
- Given - The Given statement will be used to bring the application into a known state after which we will carry out our testing action.
- When - The When statement will define the main actions that will be performed for that scenario.
- Then - The Then statement will state the validation part where we will define the desired result after the series of actions.
- And - The And statement is an extension for Given, When and Then statements where if we want to extend a statement, we will use And.
Our test is basically saying when the user searches for X and clicks on the first option they should see the song for the artist X. Simple.
Recording the actions through the selenium IDE extension
Through the selenium IDE extension, we will record our actions for the e2e test and export that code into javascript. This IDE extension is available for chrome and firefox. For this tutorial, we would be implementing it in the Chrome browser.
In order to start using the IDE extension, do the following steps
- Install the extension by following this link for your chrome browser.
- Click on the extension and select the Record new test in a new project option and provide a project name. Let’s call it iTunes Search.
- Now it will ask for the base URL. Provide your local URL i.e http://localhost:3000 and hit the Start Recording button.
- Now do the actions as stated in the feature file. Search for the song “Alan Walker Faded” and click the information icon on the first result which will then take you to the song detail page.
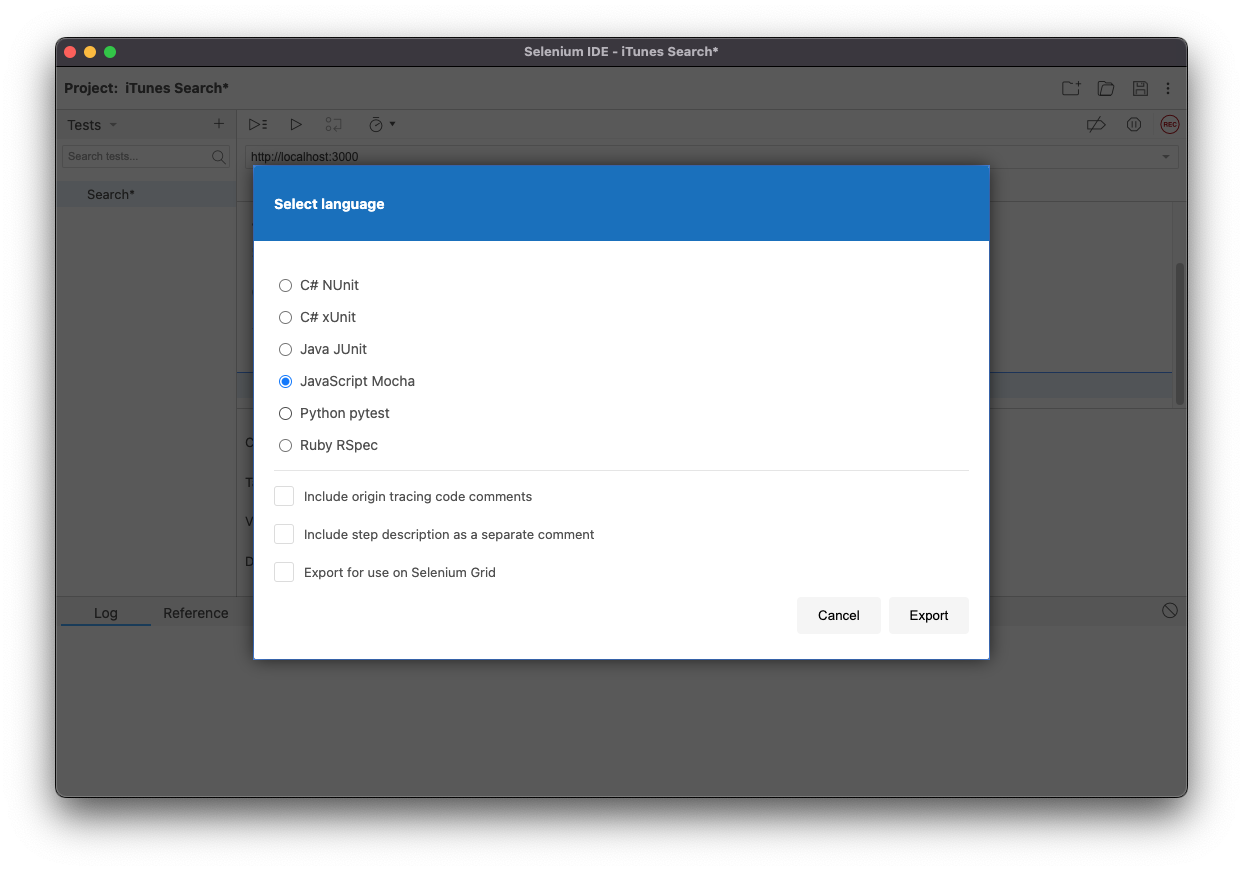
- Once done, go to the extension, stop the IDE recording and give a name to the test. Let’s call it Search.
- On the left-hand side, besides the test name click on the more option and select Export. Then select Javascript Mocha as the language.

Now save the exported code in a folder. The exported code will have all the action codes defined in a single file.
Defining a hook file
For our test, we want our browser instance to start before the test and close itself at the end of the test. To achieve this, we need to define a hook file.
To create a hook file, create a support folder in the tests folder, and inside it, create a hook.js file. Add the following code in it.
Here, we use the Builder class to create a browser session of chrome. We are creating and closing the session in the Before and After function calls.
In the support folder, add an env.js file in which we will set the default timeout option. This will help us not to close out the browser unexpectedly.
Copying the recorded tests to appropriate steps
Our recorded e2e actions are all combined into one single code snippet. We will now divide and copy the code to cucumber statements.
For this, first, we will have to create a step-definitions file. Create a new folder in the tests folder and name it step-definitions. In it, create a file and name it searchTest.js.

Add the following code to the searchTest.js file.
Now open the file you extracted from the test recorder. Note how we’re using the code from there for each statement. This should be easy to understand. We use the recorder to give us the code we need to automate the test.
In some cases, I have changed the CSS selectors as the generated code is a little difficult to read.
Note: As a best practice, try using data-testId attributes as selectors as much as possible.
Running the tests
In your package.json file add the following command under scripts.
Run the command using yarn to run your test.
When you run this command, the chrome browser will do the actions mentioned in the feature file. Your final e2e test setup would look something like this https://github.com/poojesh-ws/react-template/tree/feat/final-e2e which you can find in the branch name feat/final-e2e
Note: The chrome driver version in this branch is 109.x.x. If you are facing an error due to the chrome driver version not being compatible with the chrome browser version then I would suggest upgrading the chrome driver package to the latest.
Where to go from here?
That’s a wrap for now. If you’ve followed this tutorial, you should understand how to use the selenium chrome extension to record user actions. Using this, you can get the code needed to select the right DOM element and perform an action similar to what the user would do. In a full-blown web application, there would be n number of user flows, and managing these selectors gets difficult. One way to manage them would be to use the Page Object pattern. But that’s for another tutorial. Thanks for reading.
If you’re looking for a team that has experience building applications that don’t just work but are backed by full-fledged test suites, get in touch at hello@wednesday.is
Liked what you read? There's more where that came from! Satisfy your craving for all things digital product strategy on LeadReads. Round out your perspective with exclusive stories straight from C-suite thought leaders.
Join here.