

Hasura is an open-source real-time GraphQL API server with a strong authorization layer on your database. You can subscribe to database events via webhooks. It can combine multiple API servers into one unified graphQL API. Hasura is a great tool to build any CRUD GraphQL API. Hasura does not have any authentication mechanisms; e.g., you need an auth server to handle sign-up and sign-in.
Keycloak is an OpenID-compliant auth server. It’ll help us achieve Single-Sign-On. Once logged in to Keycloak, users don't have to log in again to access a different application.
Hasura will validate the JWT token passed in the header. The JWT token will have the necessary information to handle the authorization in Hasura. Hasura can’t perform the OAuth flow. For that, we’ll need an app server to handle it. The app server will initiate the Sign-up or sign-in process and pass the auth tokens to the client. The client app will need to send the access token in the header to Hasura to get access to the protected data.
In this tutorial, we’ll learn how to integrate Hasura and Keycloak with RBAC.
The code is available on Github.
Why Keycloak over others like Cogntio or Auth0?
- Complete control over user data. You will not have to share data with a third-party authentication provider. Great for user privacy and no vendor lock-in
- Cost. Cogntio and Auth0 are cheaper to get started, but when you scale, they can get expensive. For Keycloak, you just host it yourself.
Setup
Let’s create a docker-compose yaml file and paste the following code. You can also clone the repo, which contains all the code you need.
Let’s create an env file
Let's create a SQL file for the initial Postgres configuration.
Let's start up the containers by running
It will take some time for the initial start-up
Setup Hasura client in Keycloak
Open up the Keycloak admin console at localhost:8180
Admin credential: admin / password123
Create a realm. Let’s name it development_realm. You should not use the master realm, which is for managing Keycloak itself. Once you’ve created a realm, let’s set up Hasura client in Keycloak.
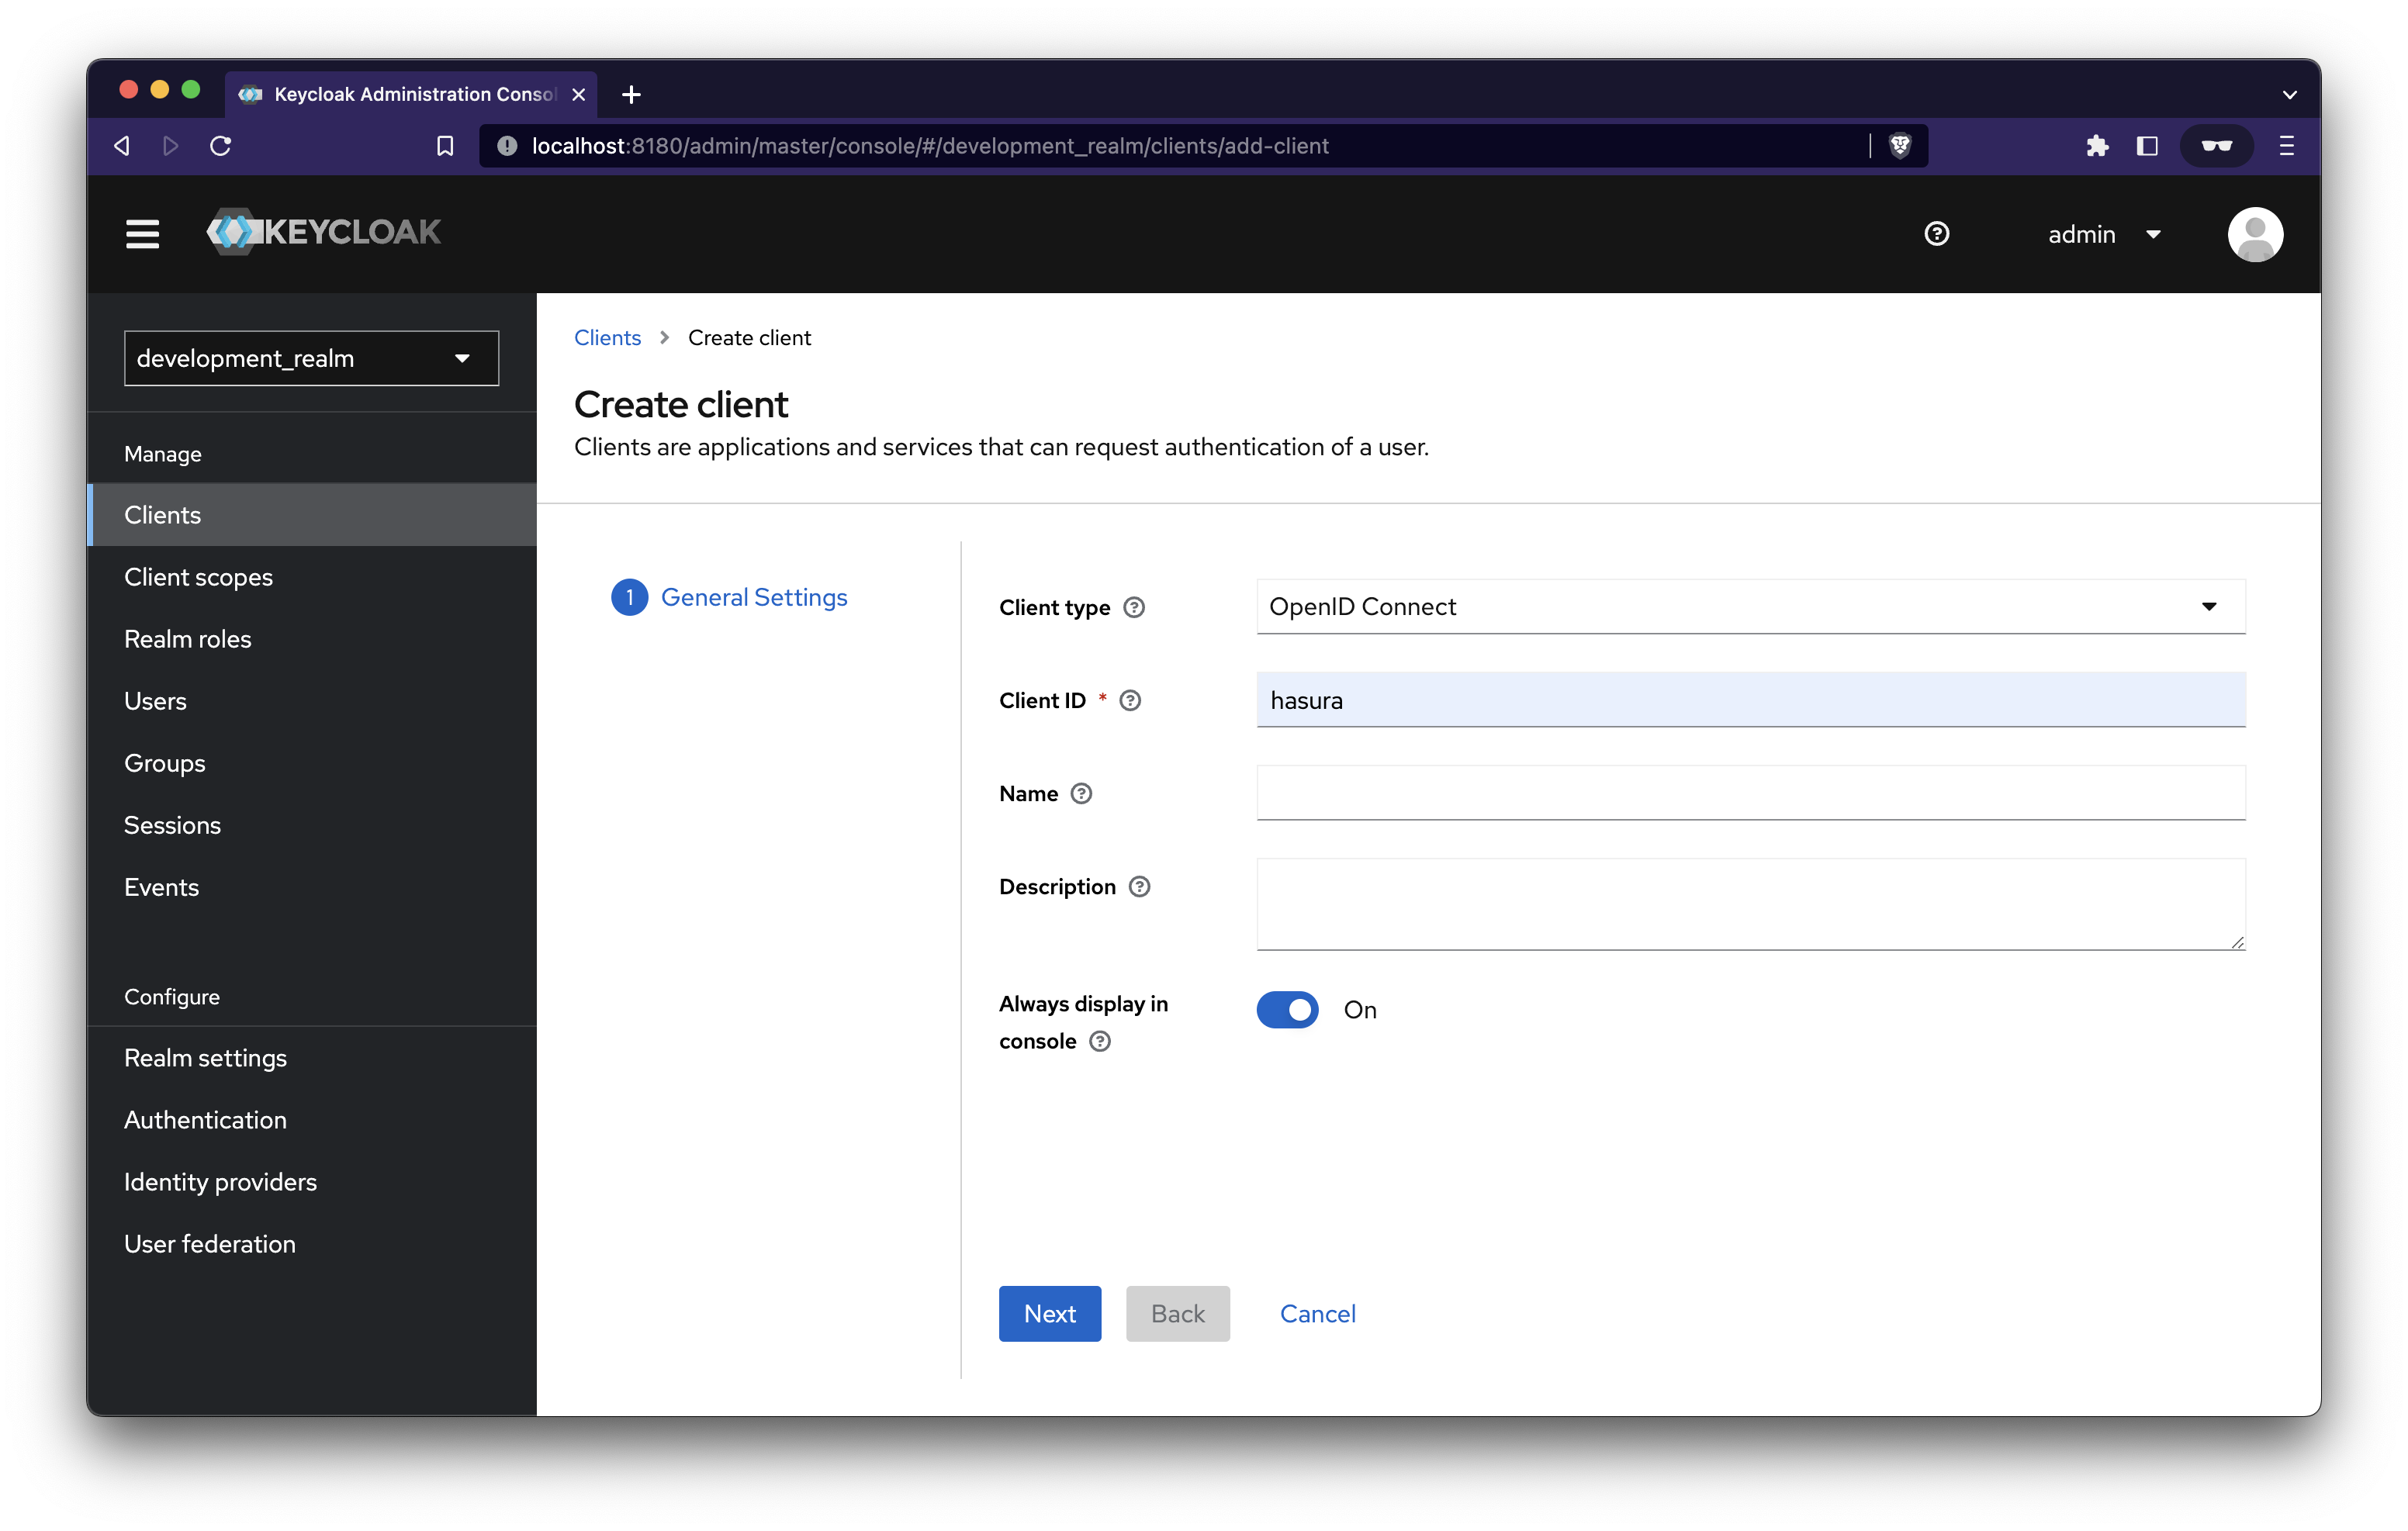
Navigate to the Clients page and click on Create Client.
Enter the client name in the Client ID field and click next
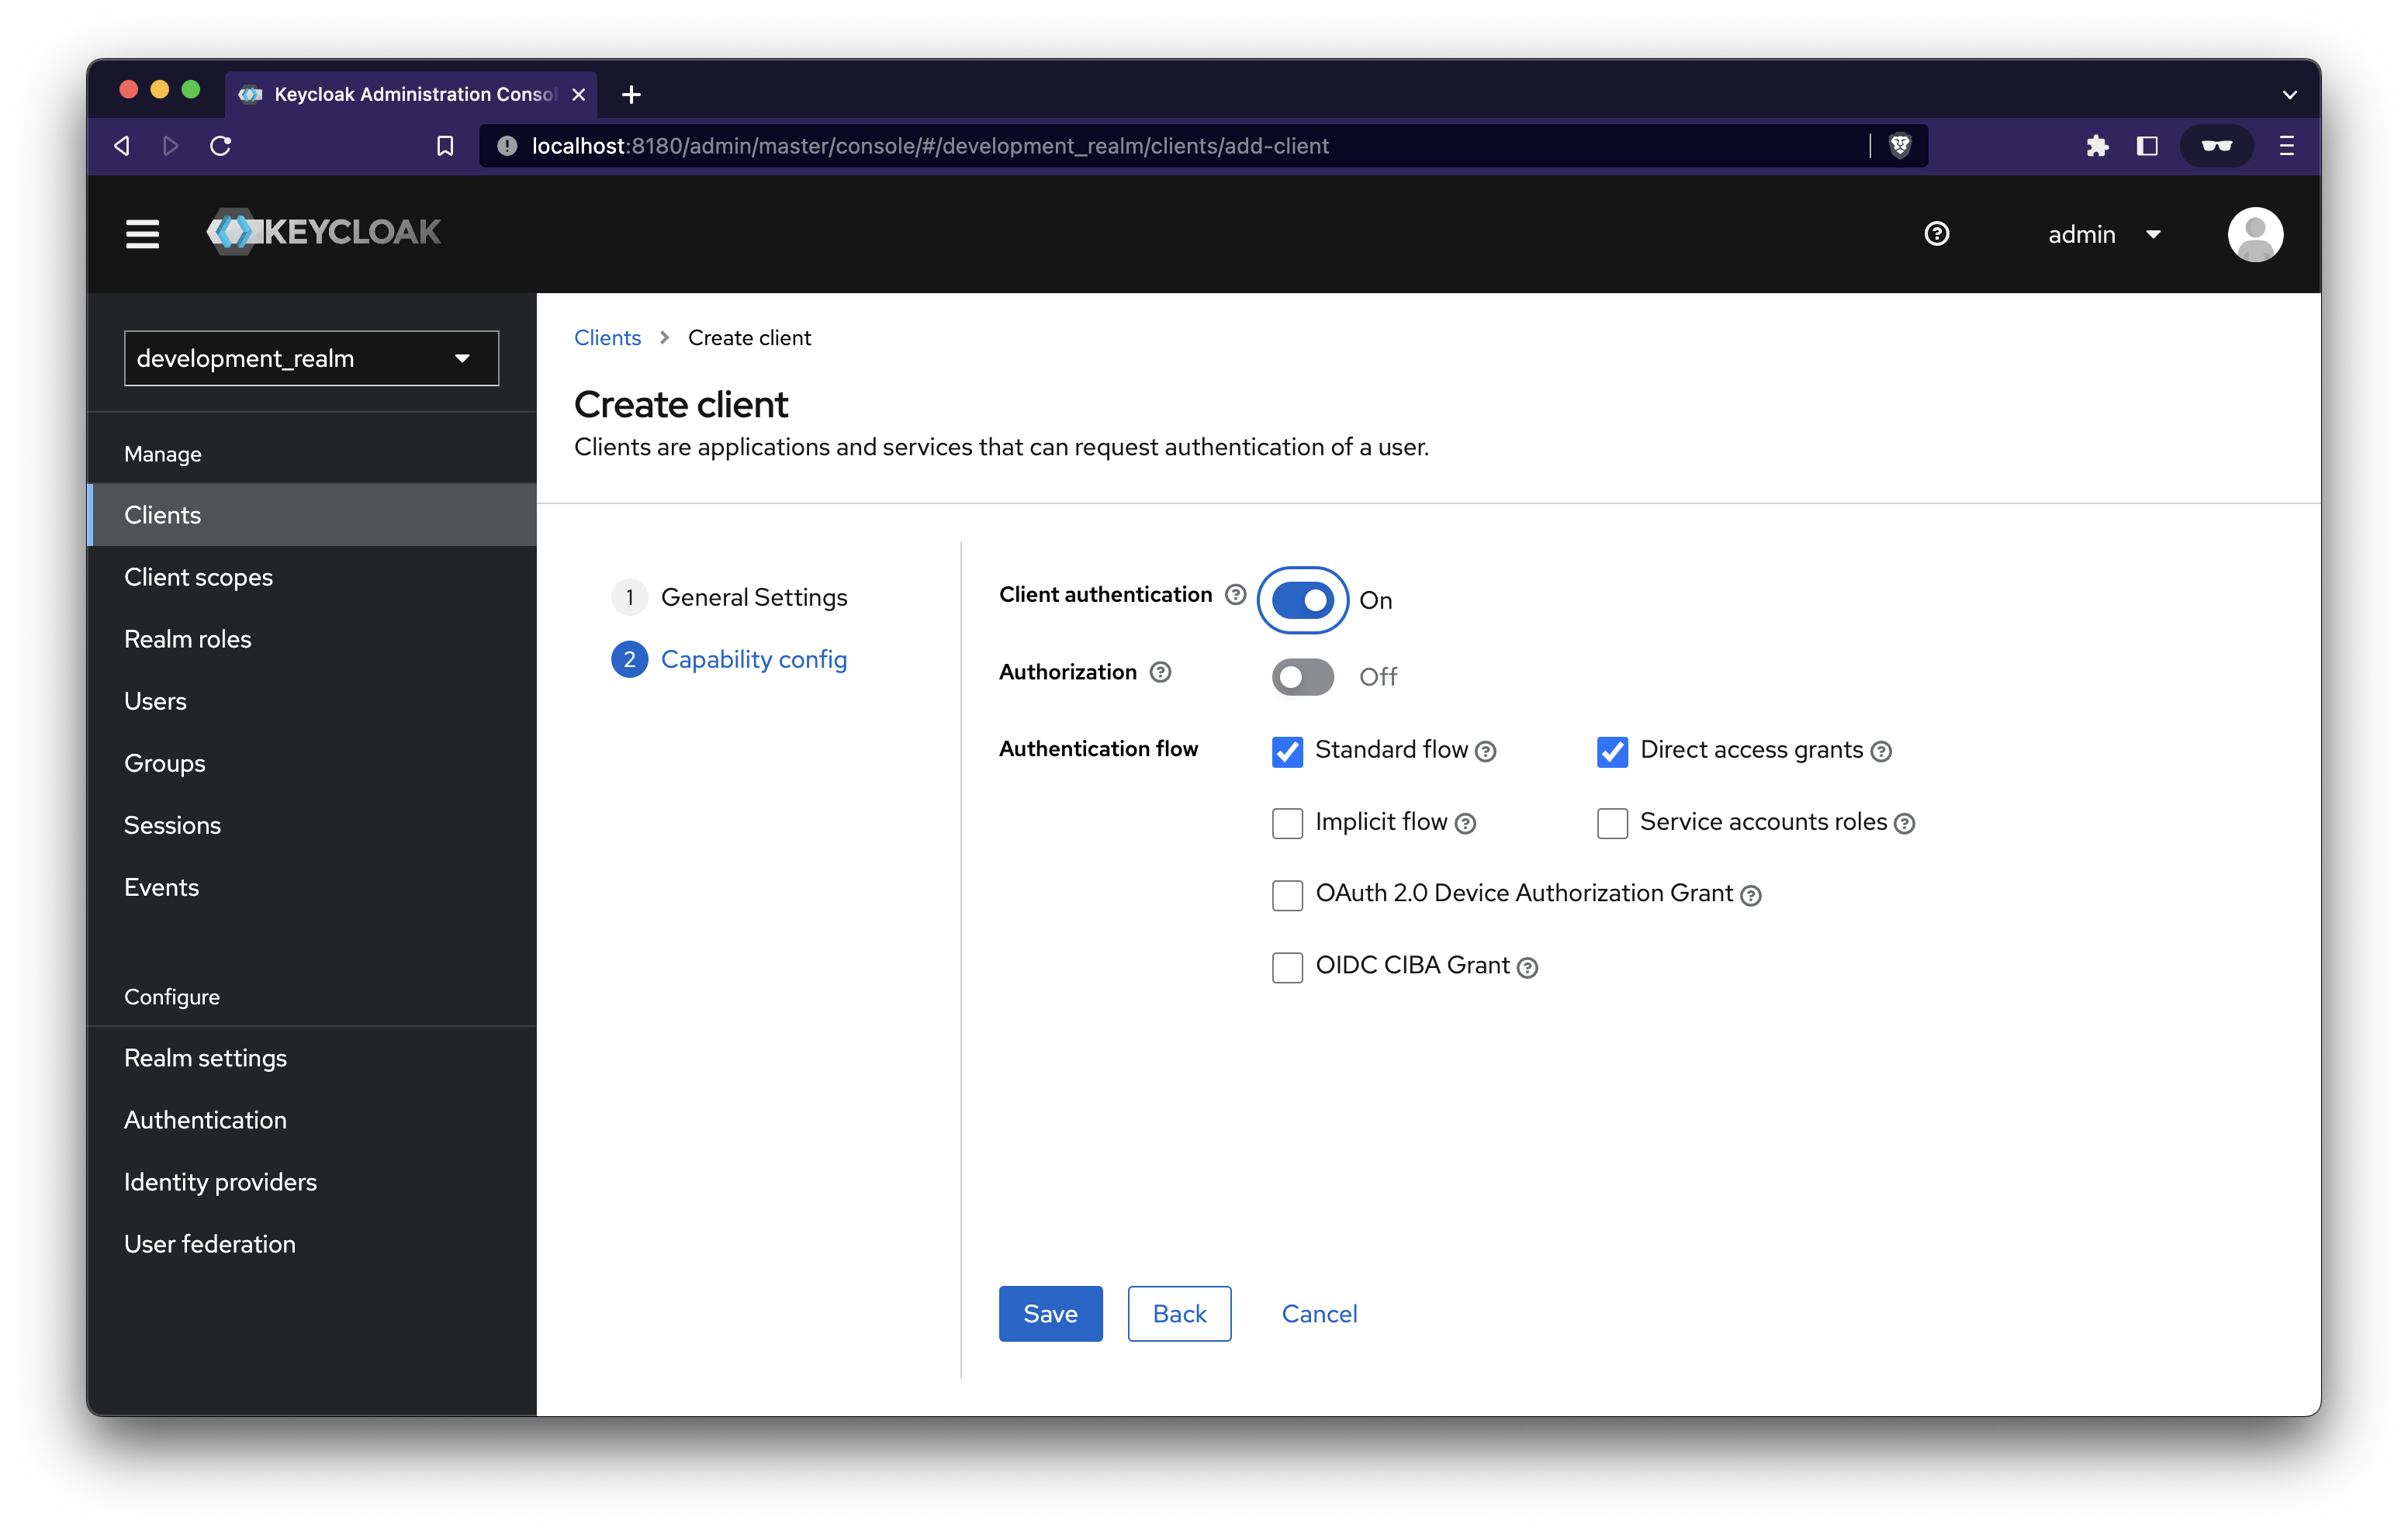
On the next page, enable Client authentication and click save. You can also choose to enable implicit flow for easier authentication handling. You can modify this later
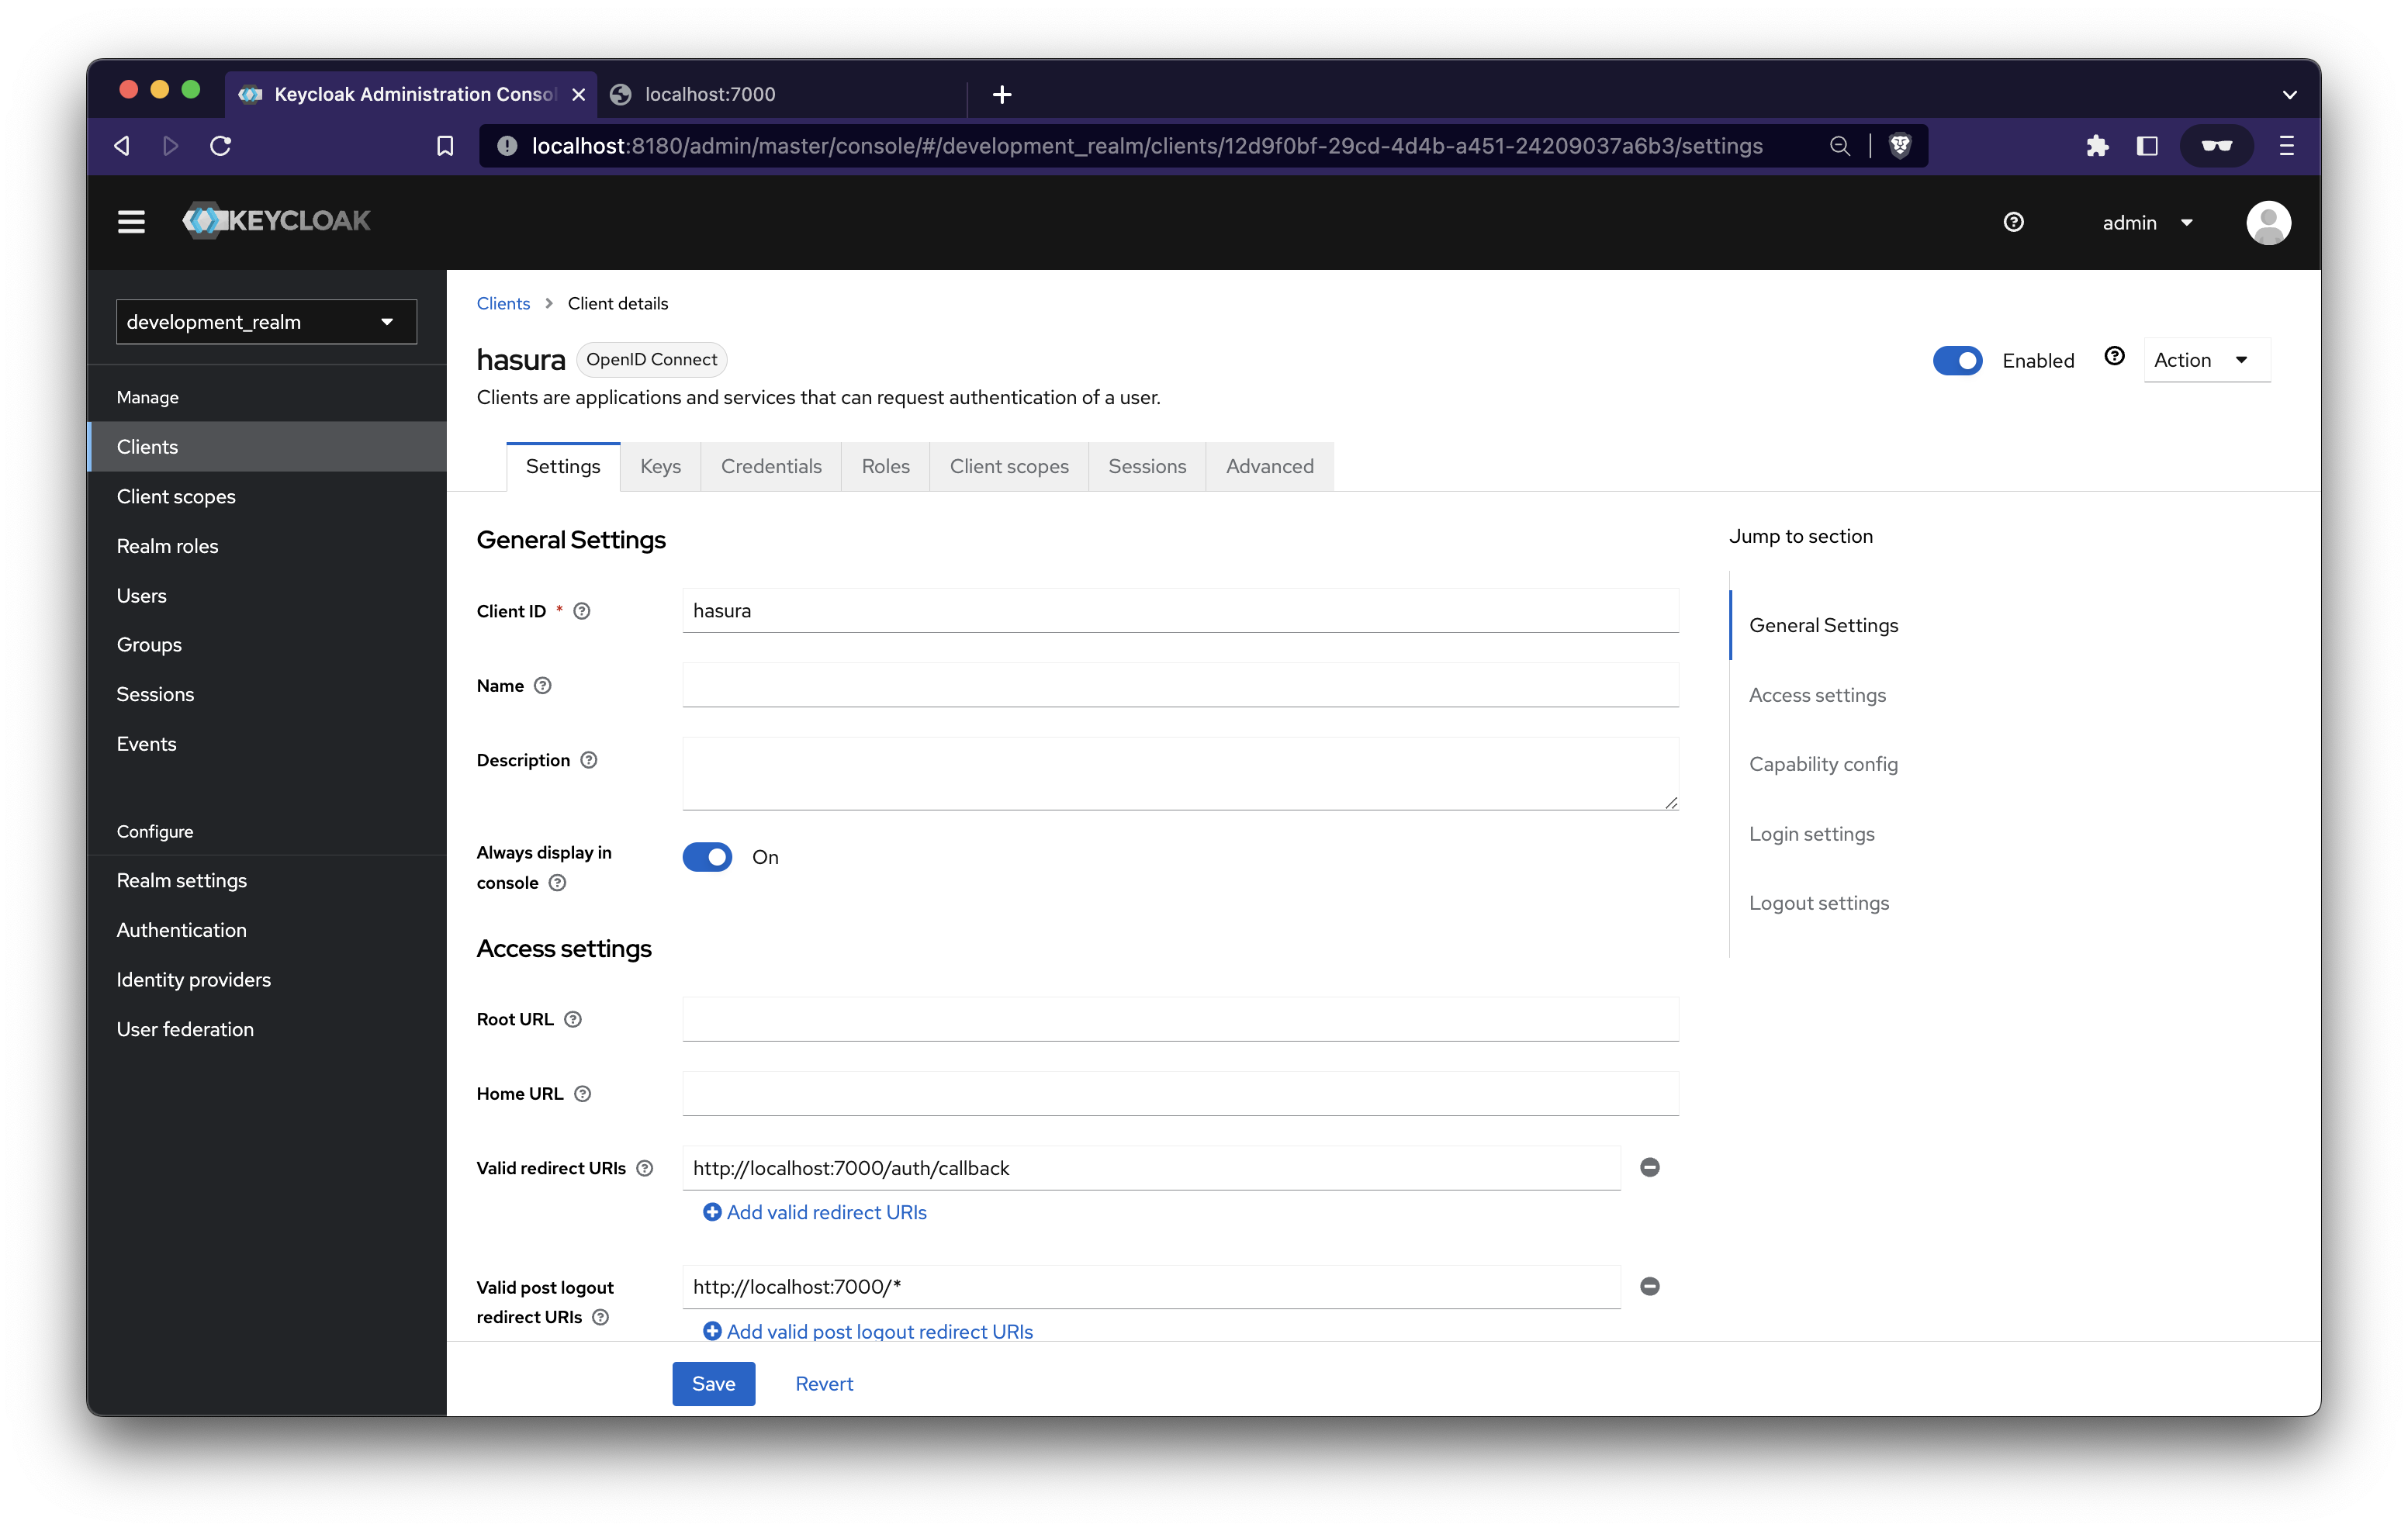
Provide a valid redirect URI and a post-logout URI. I’ve entered the URL of our NestJS app running on localhost:7000
User Roles in Keycloak
Keycloak has two types of roles:
- Realm roles: All the clients share them
- Client roles: They are available only to the client for whom it was created
In this case, we will create client roles.
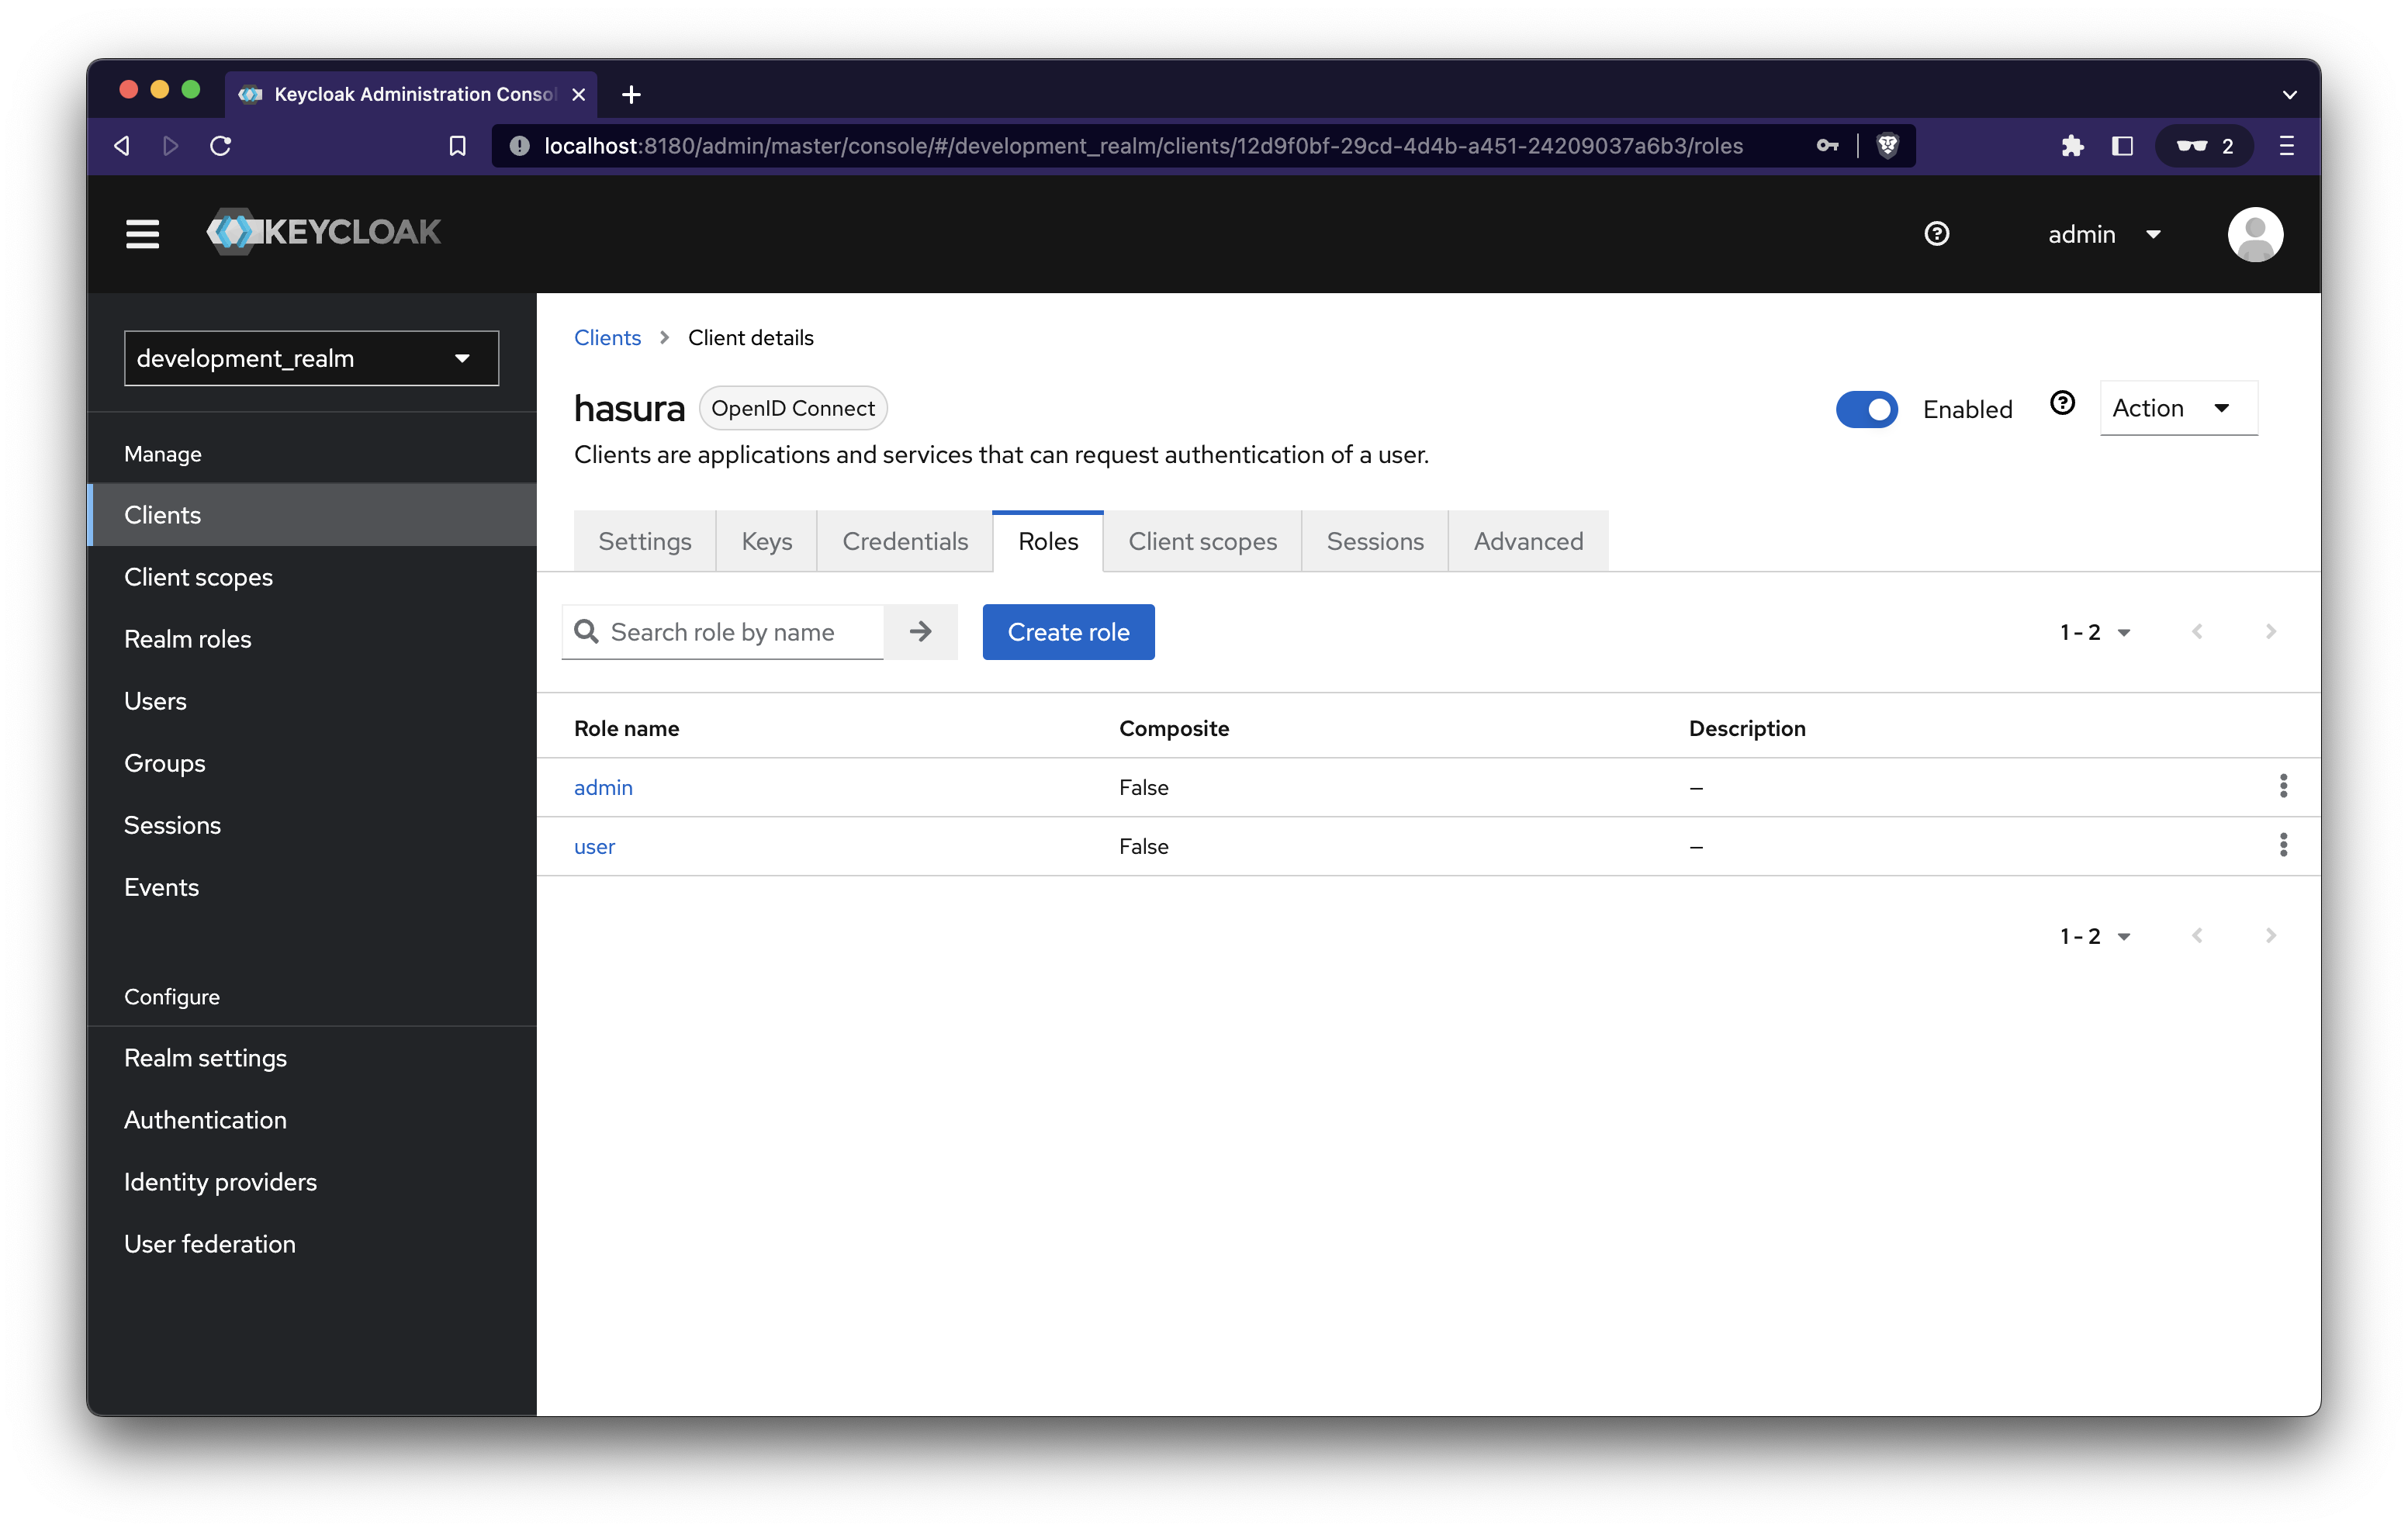
Navigate to the Roles tab of Hasura client and click Create Role, then create two roles: user and admin
Create Mappers for Hasura JWT Claims
When Keycloak generates the JWT, the custom claims in the JWT must contain the following in a custom https://hasura.io/jwt/claims namespace
- A x-hasura-allowed-roles field. A list of allowed roles for the user
- A x-hasura-default-role field. The role that will be used when the optional x-hasura-role header is not passed.
- Add any other optional x-hasura-* claim fields (required as per your defined permissions) to the custom namespace
Navigate to Clients → Hasura → Client Scopes and click hasura-dedicated
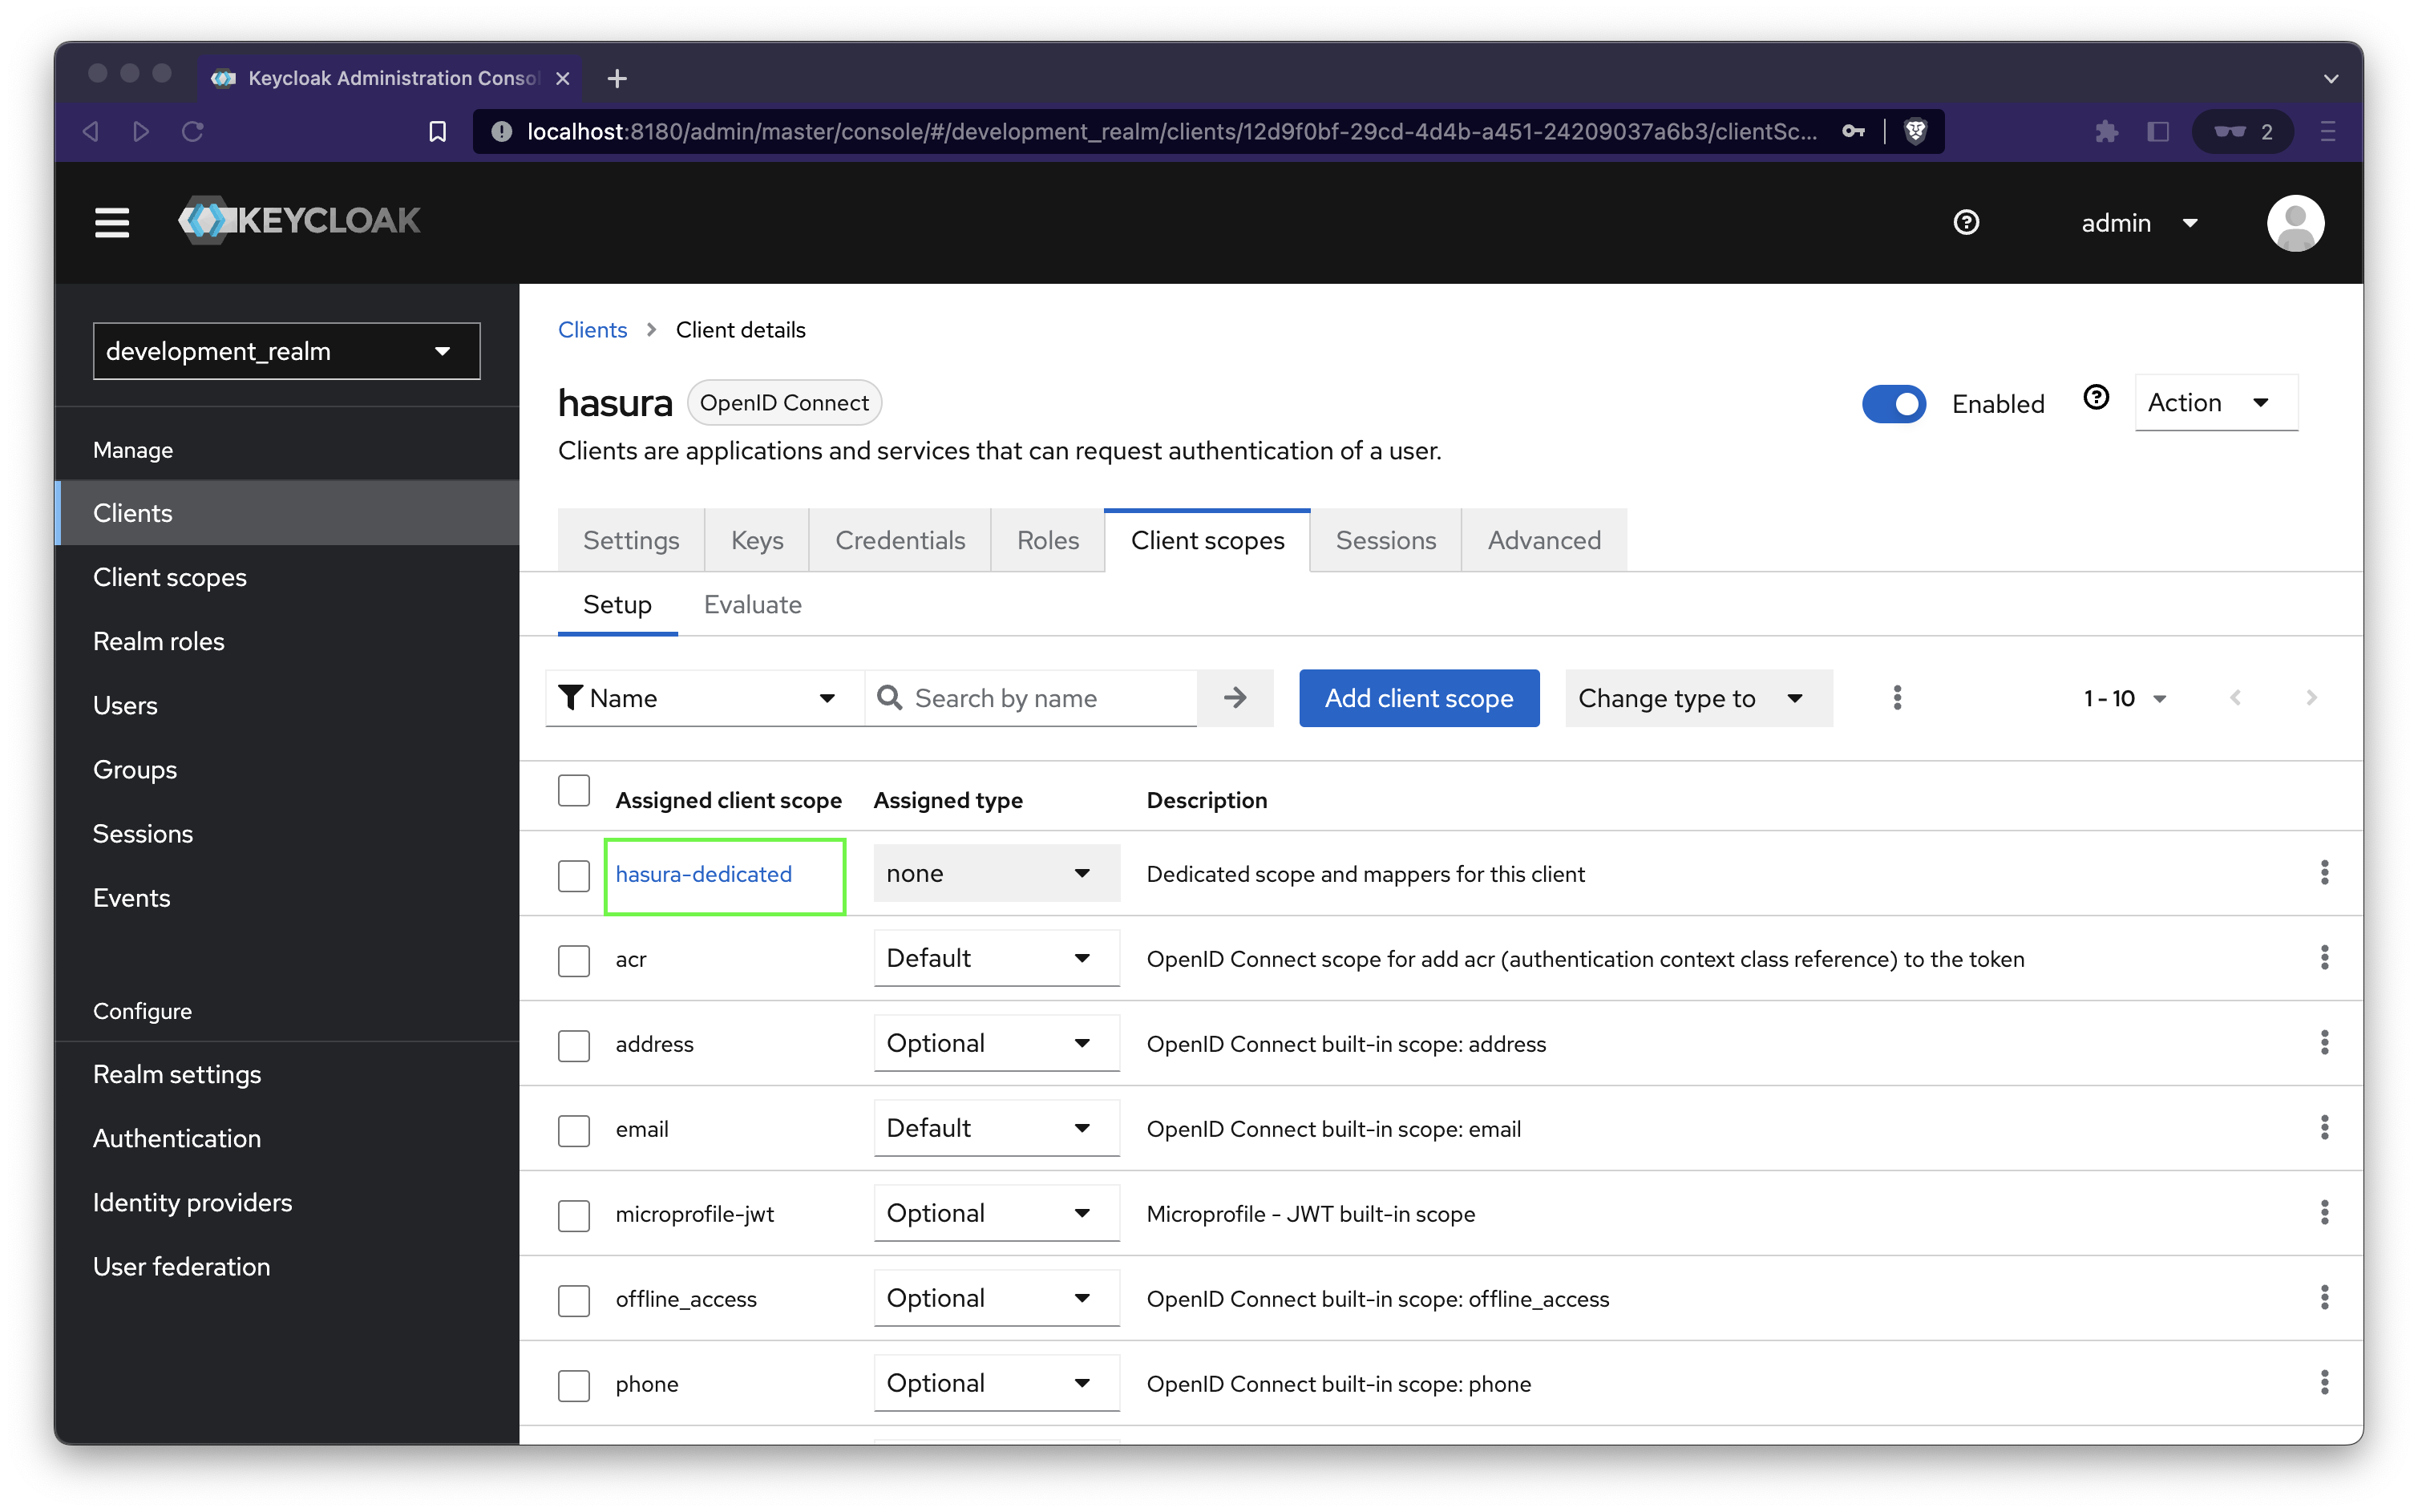
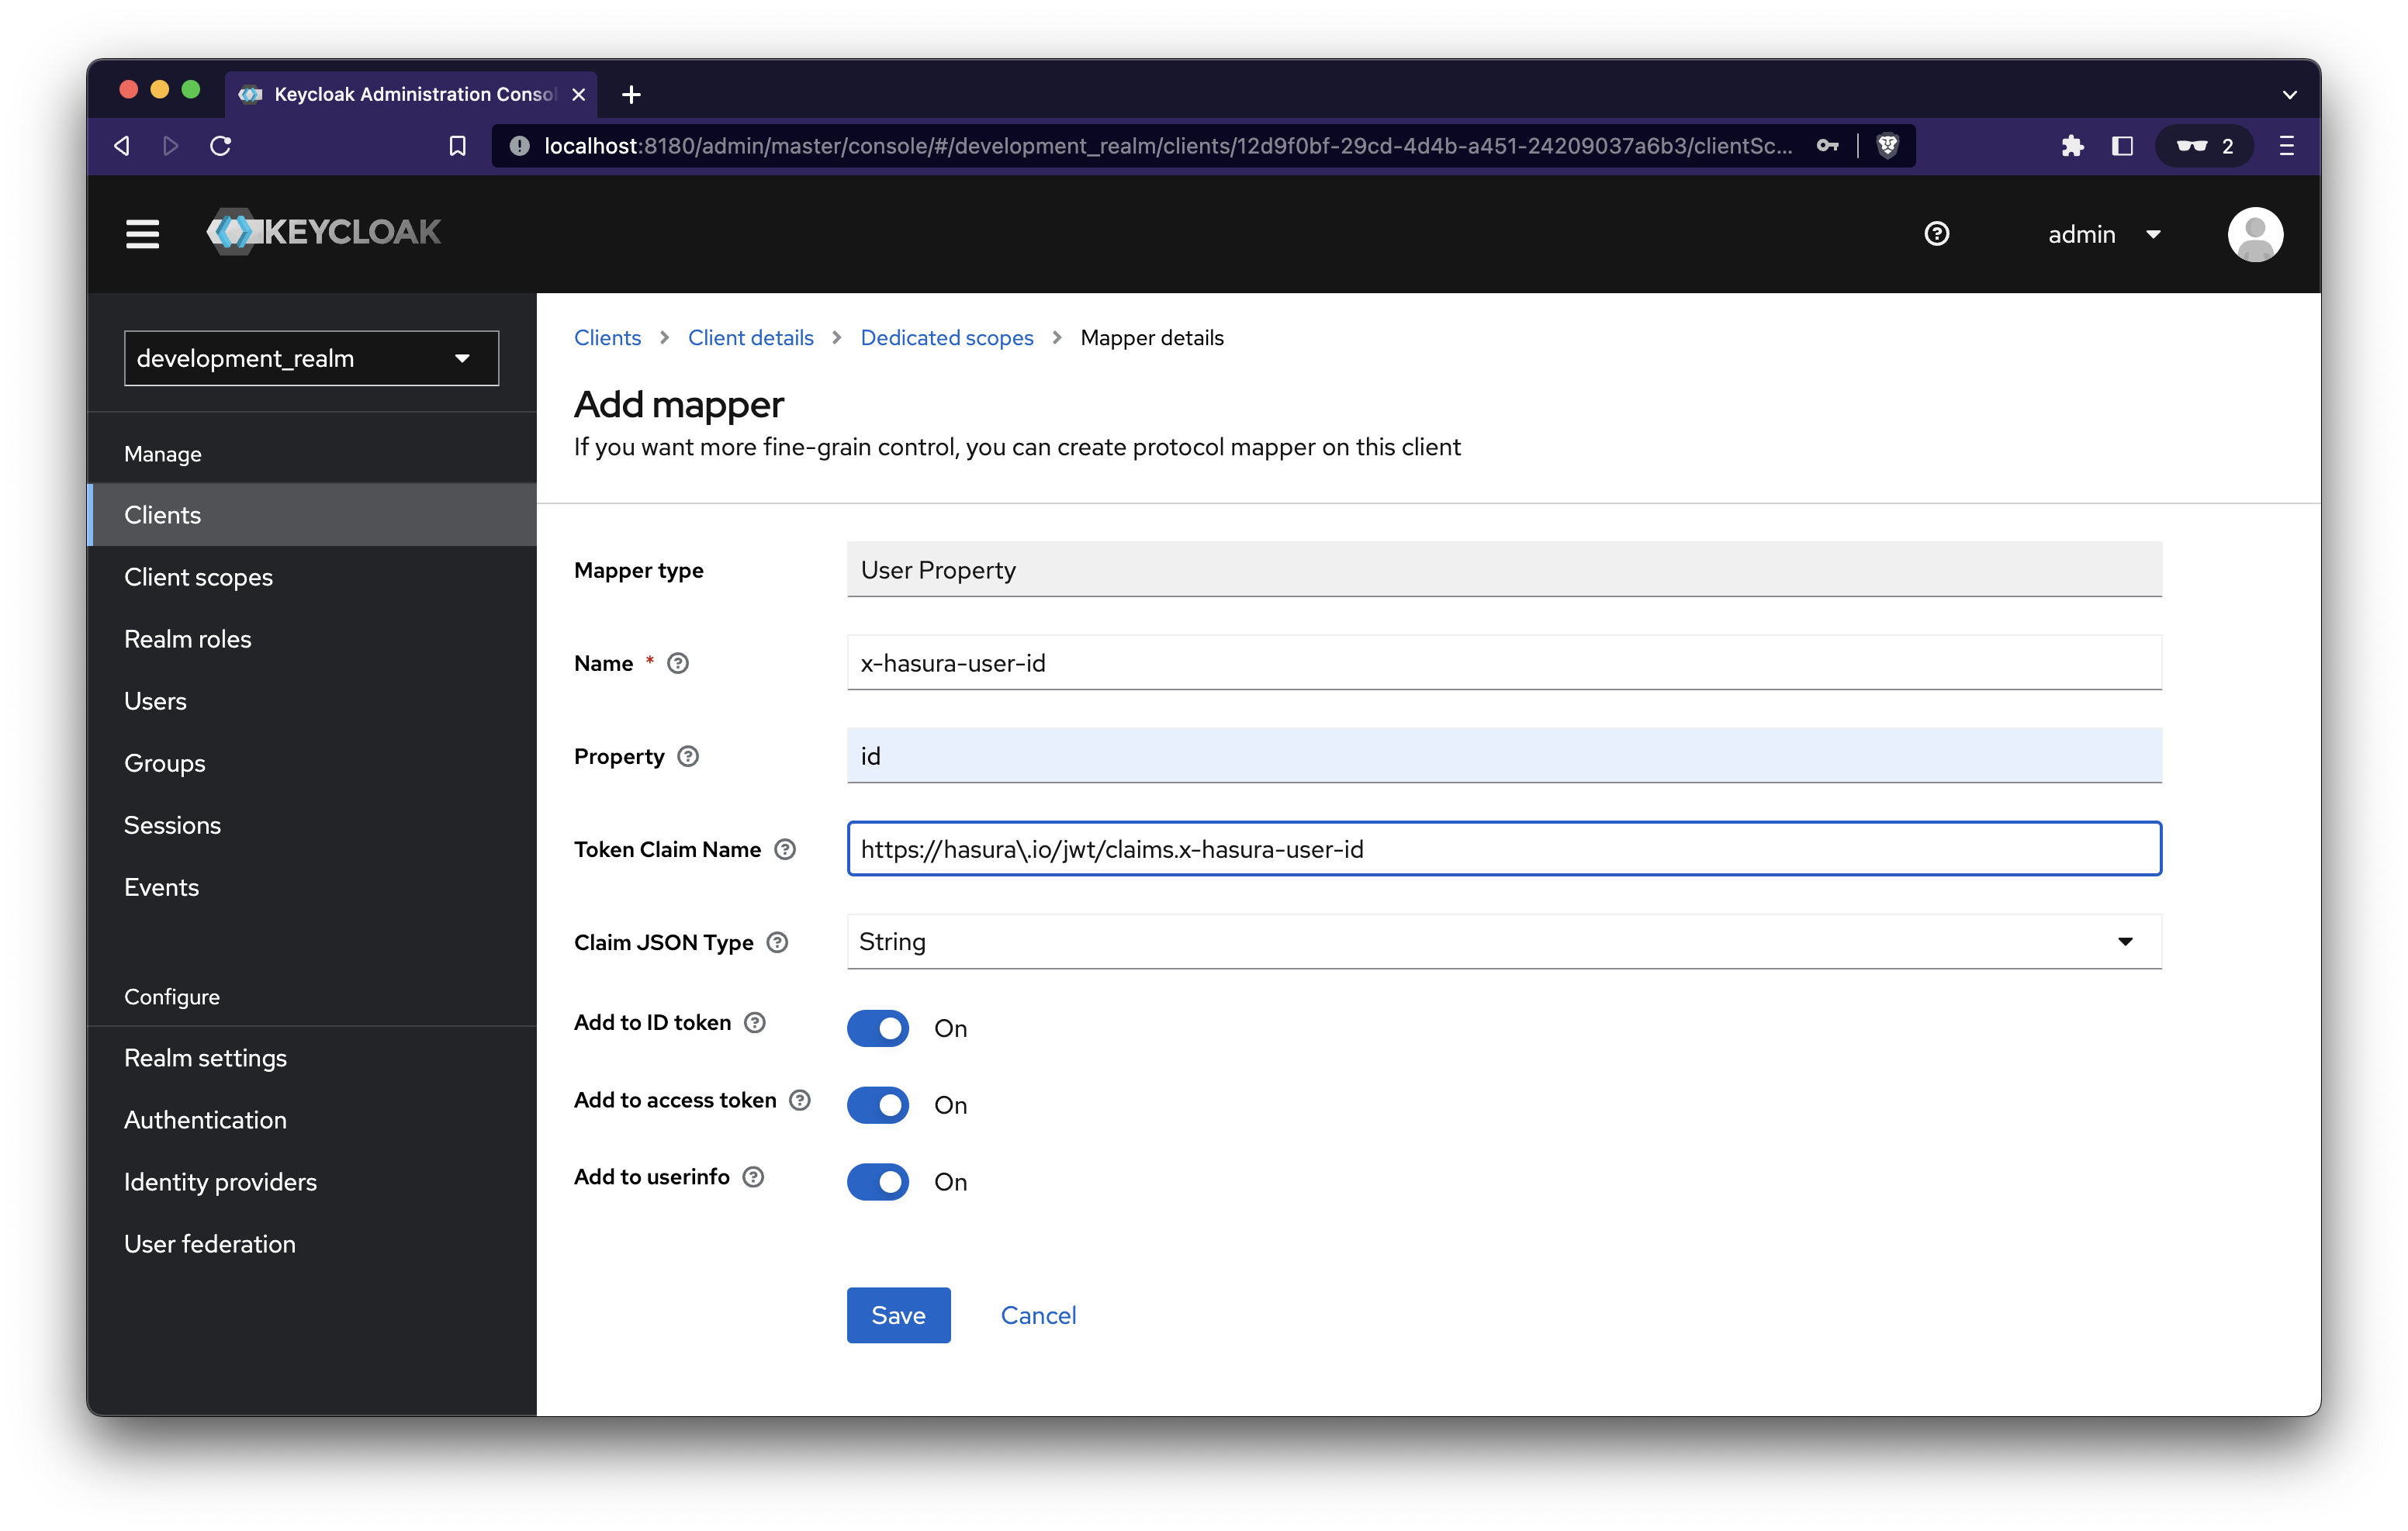
Click on Configure a new mapper and select User Property.
Add the following values and save
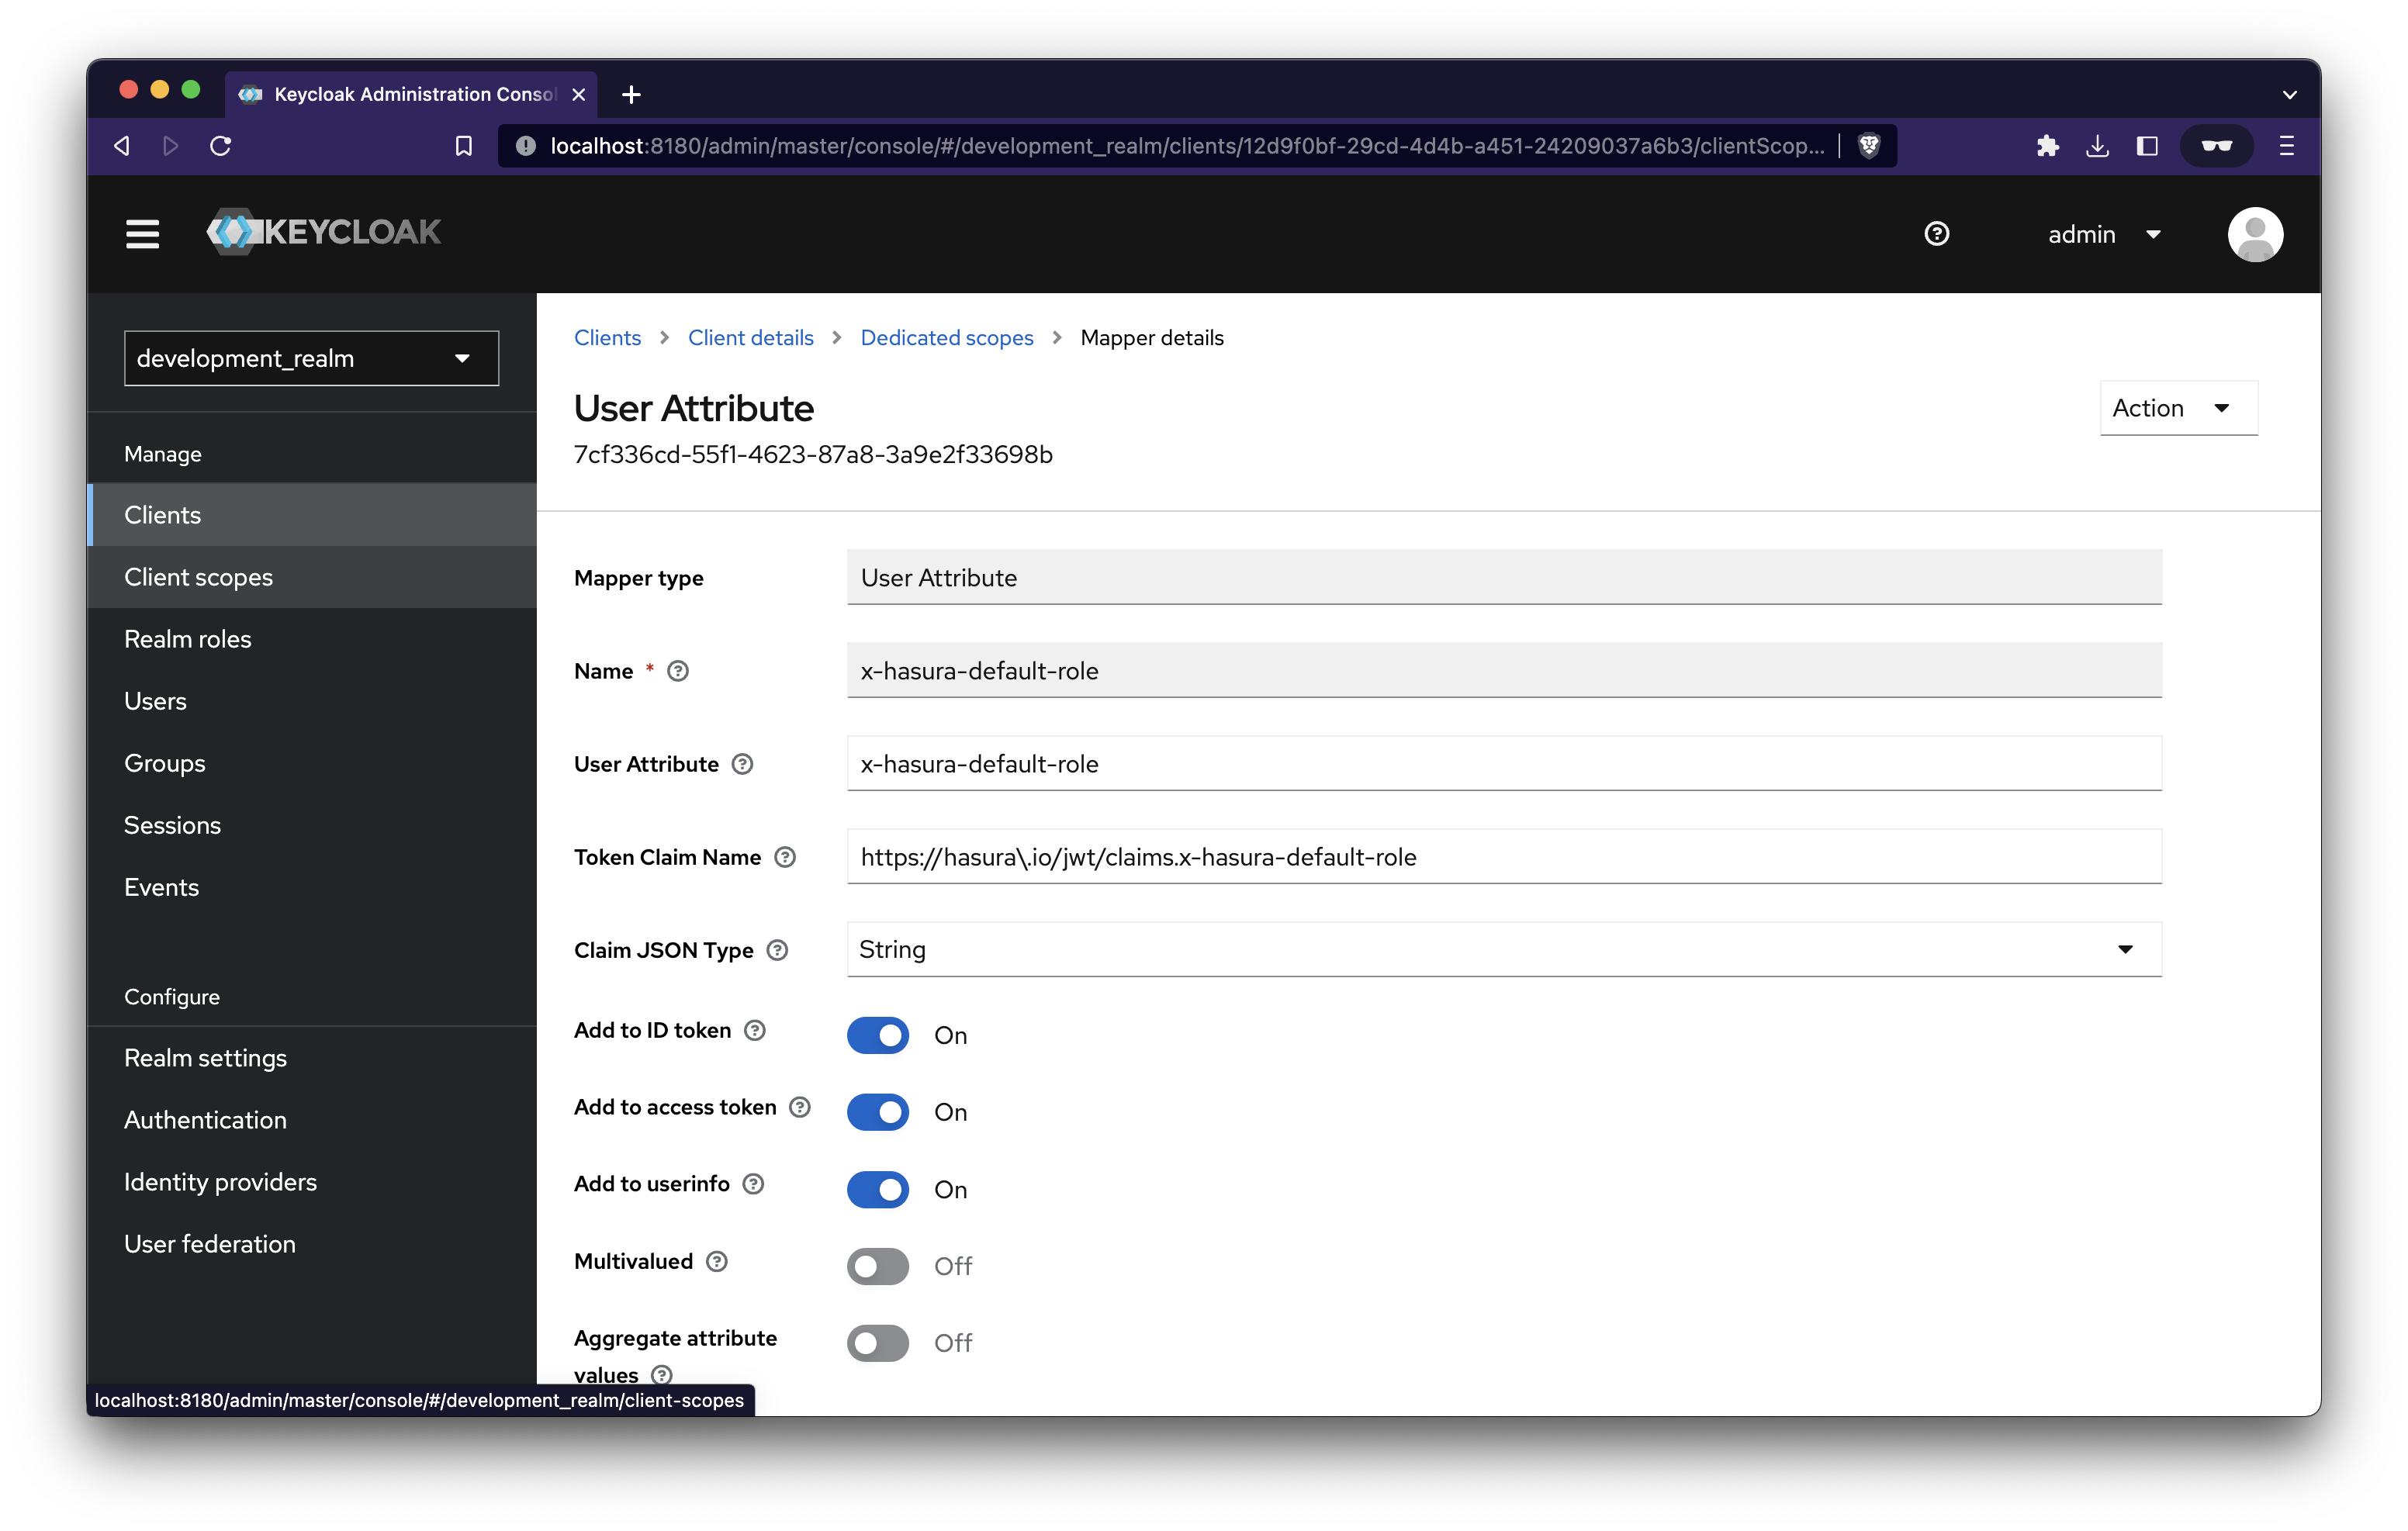
Add mapper for User Attribute
Add the following and save.
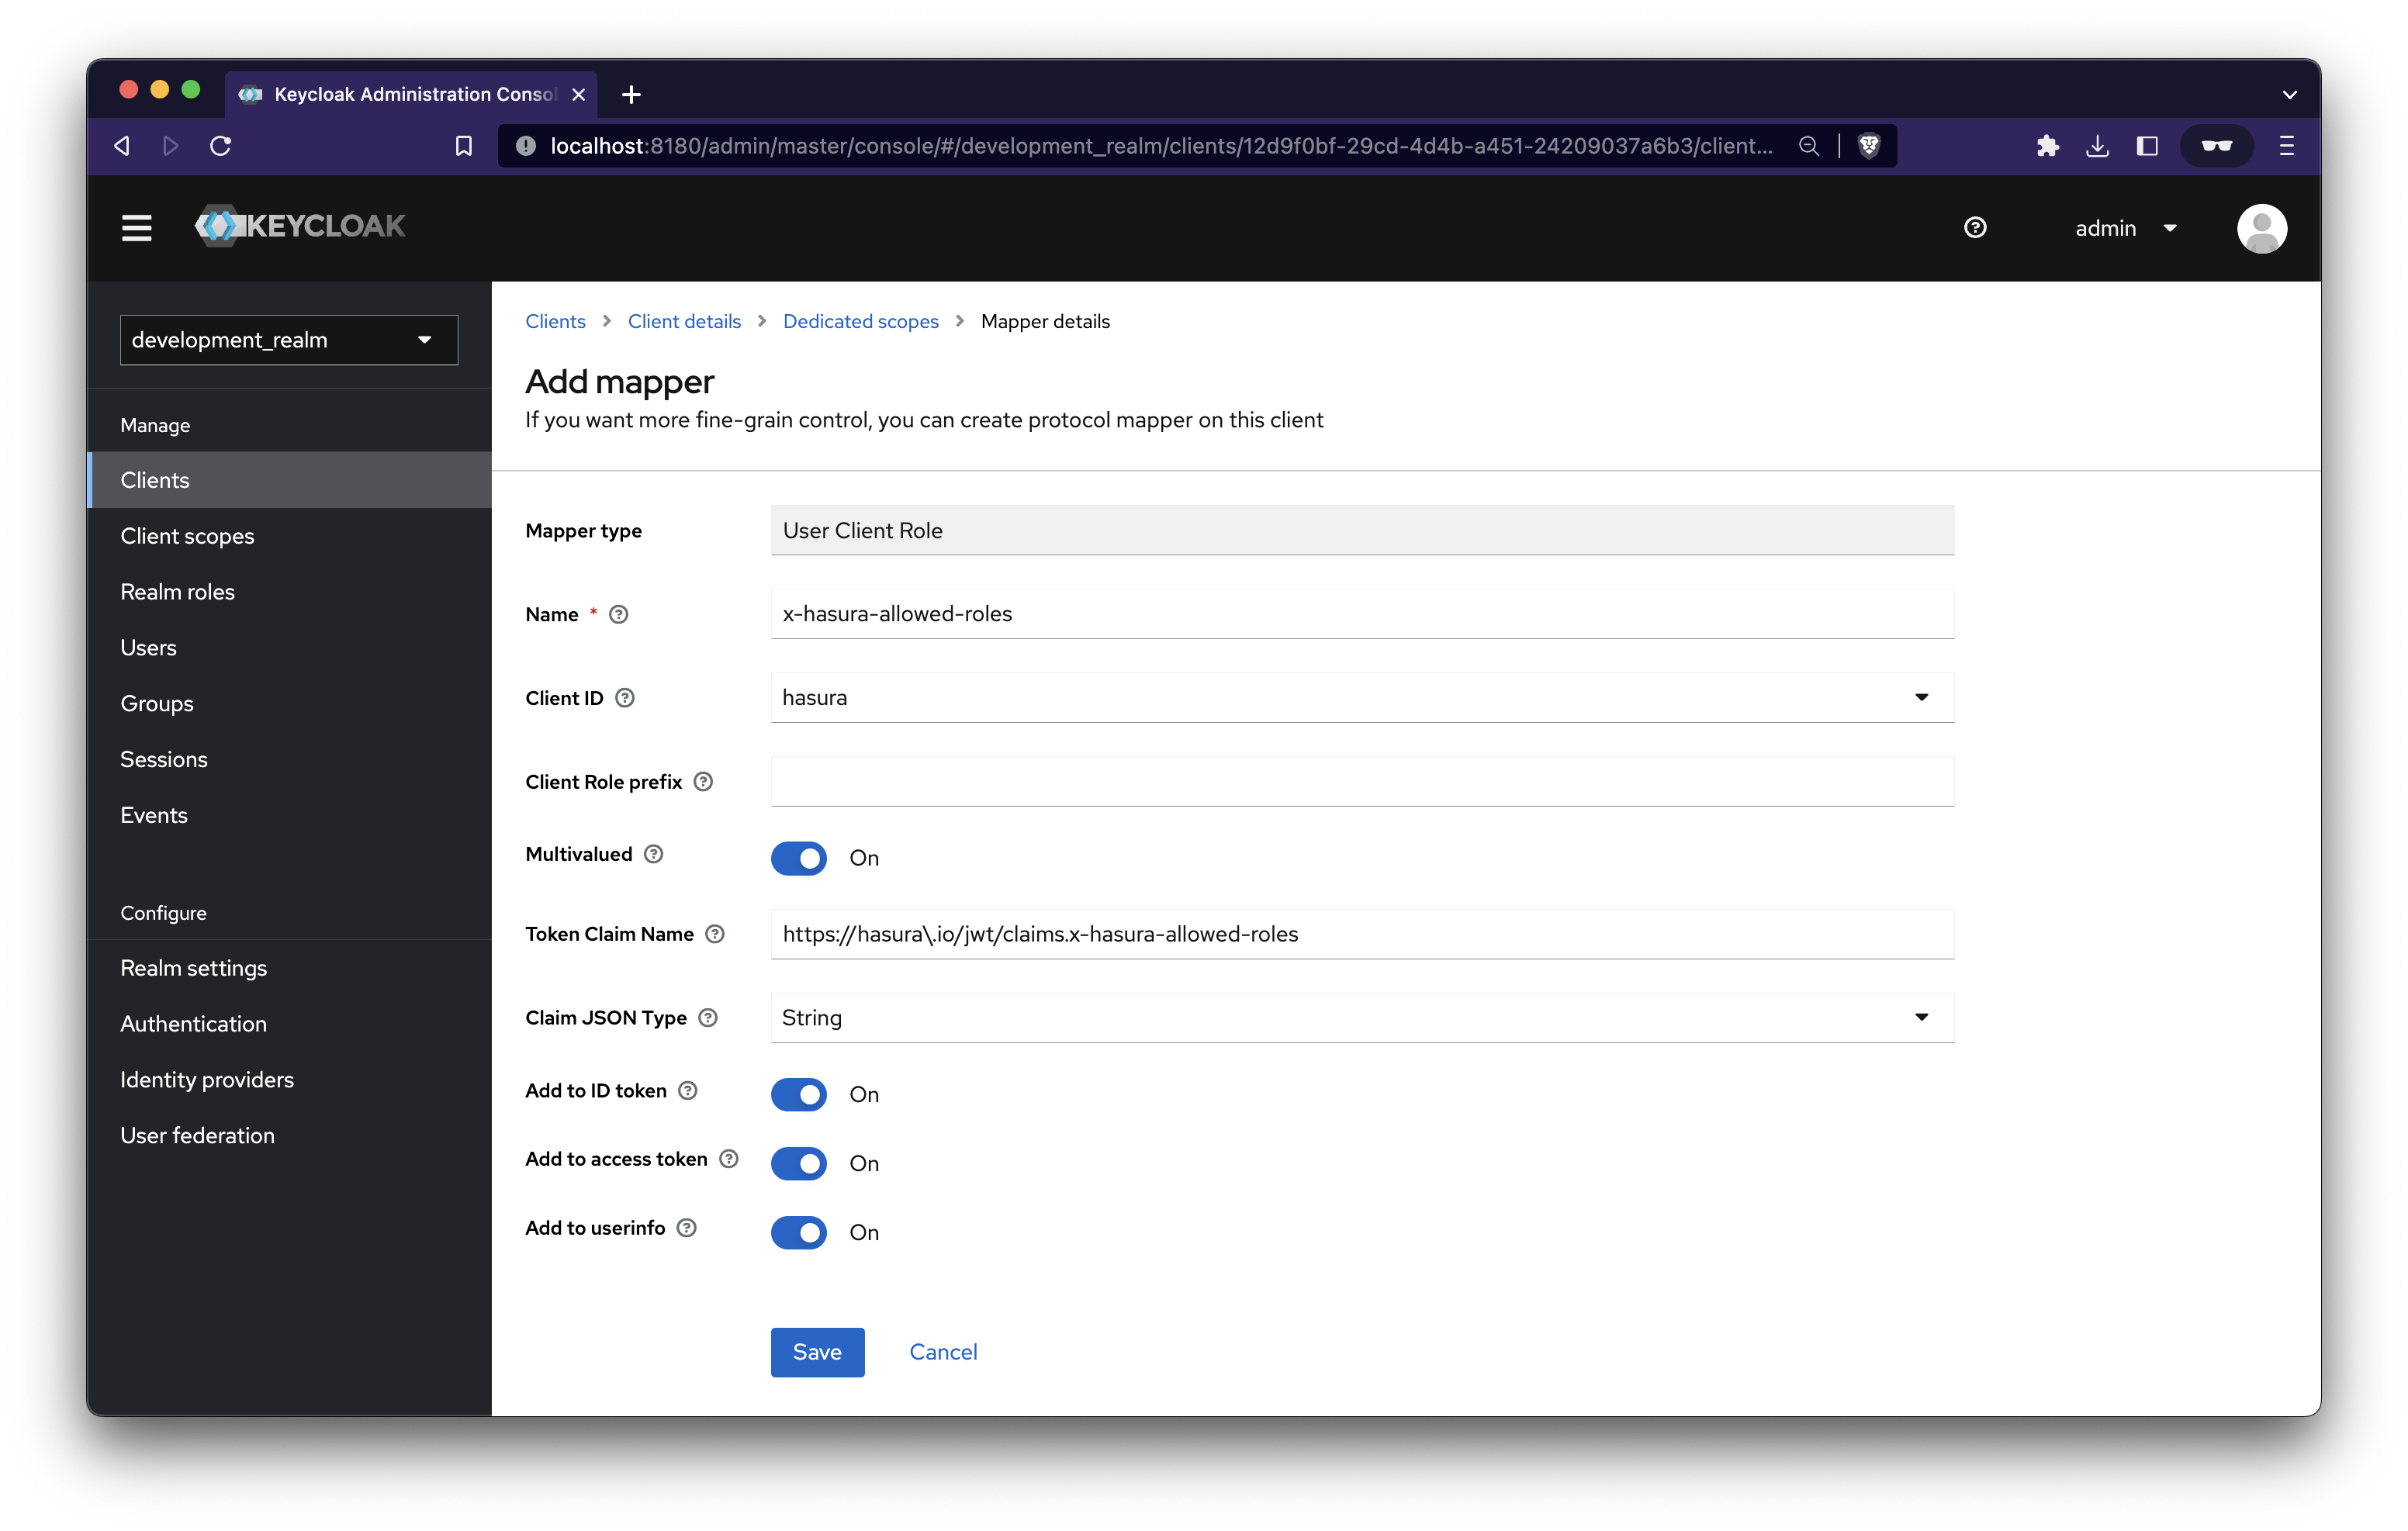
Add mapper for User Client Role
Add the following and save.
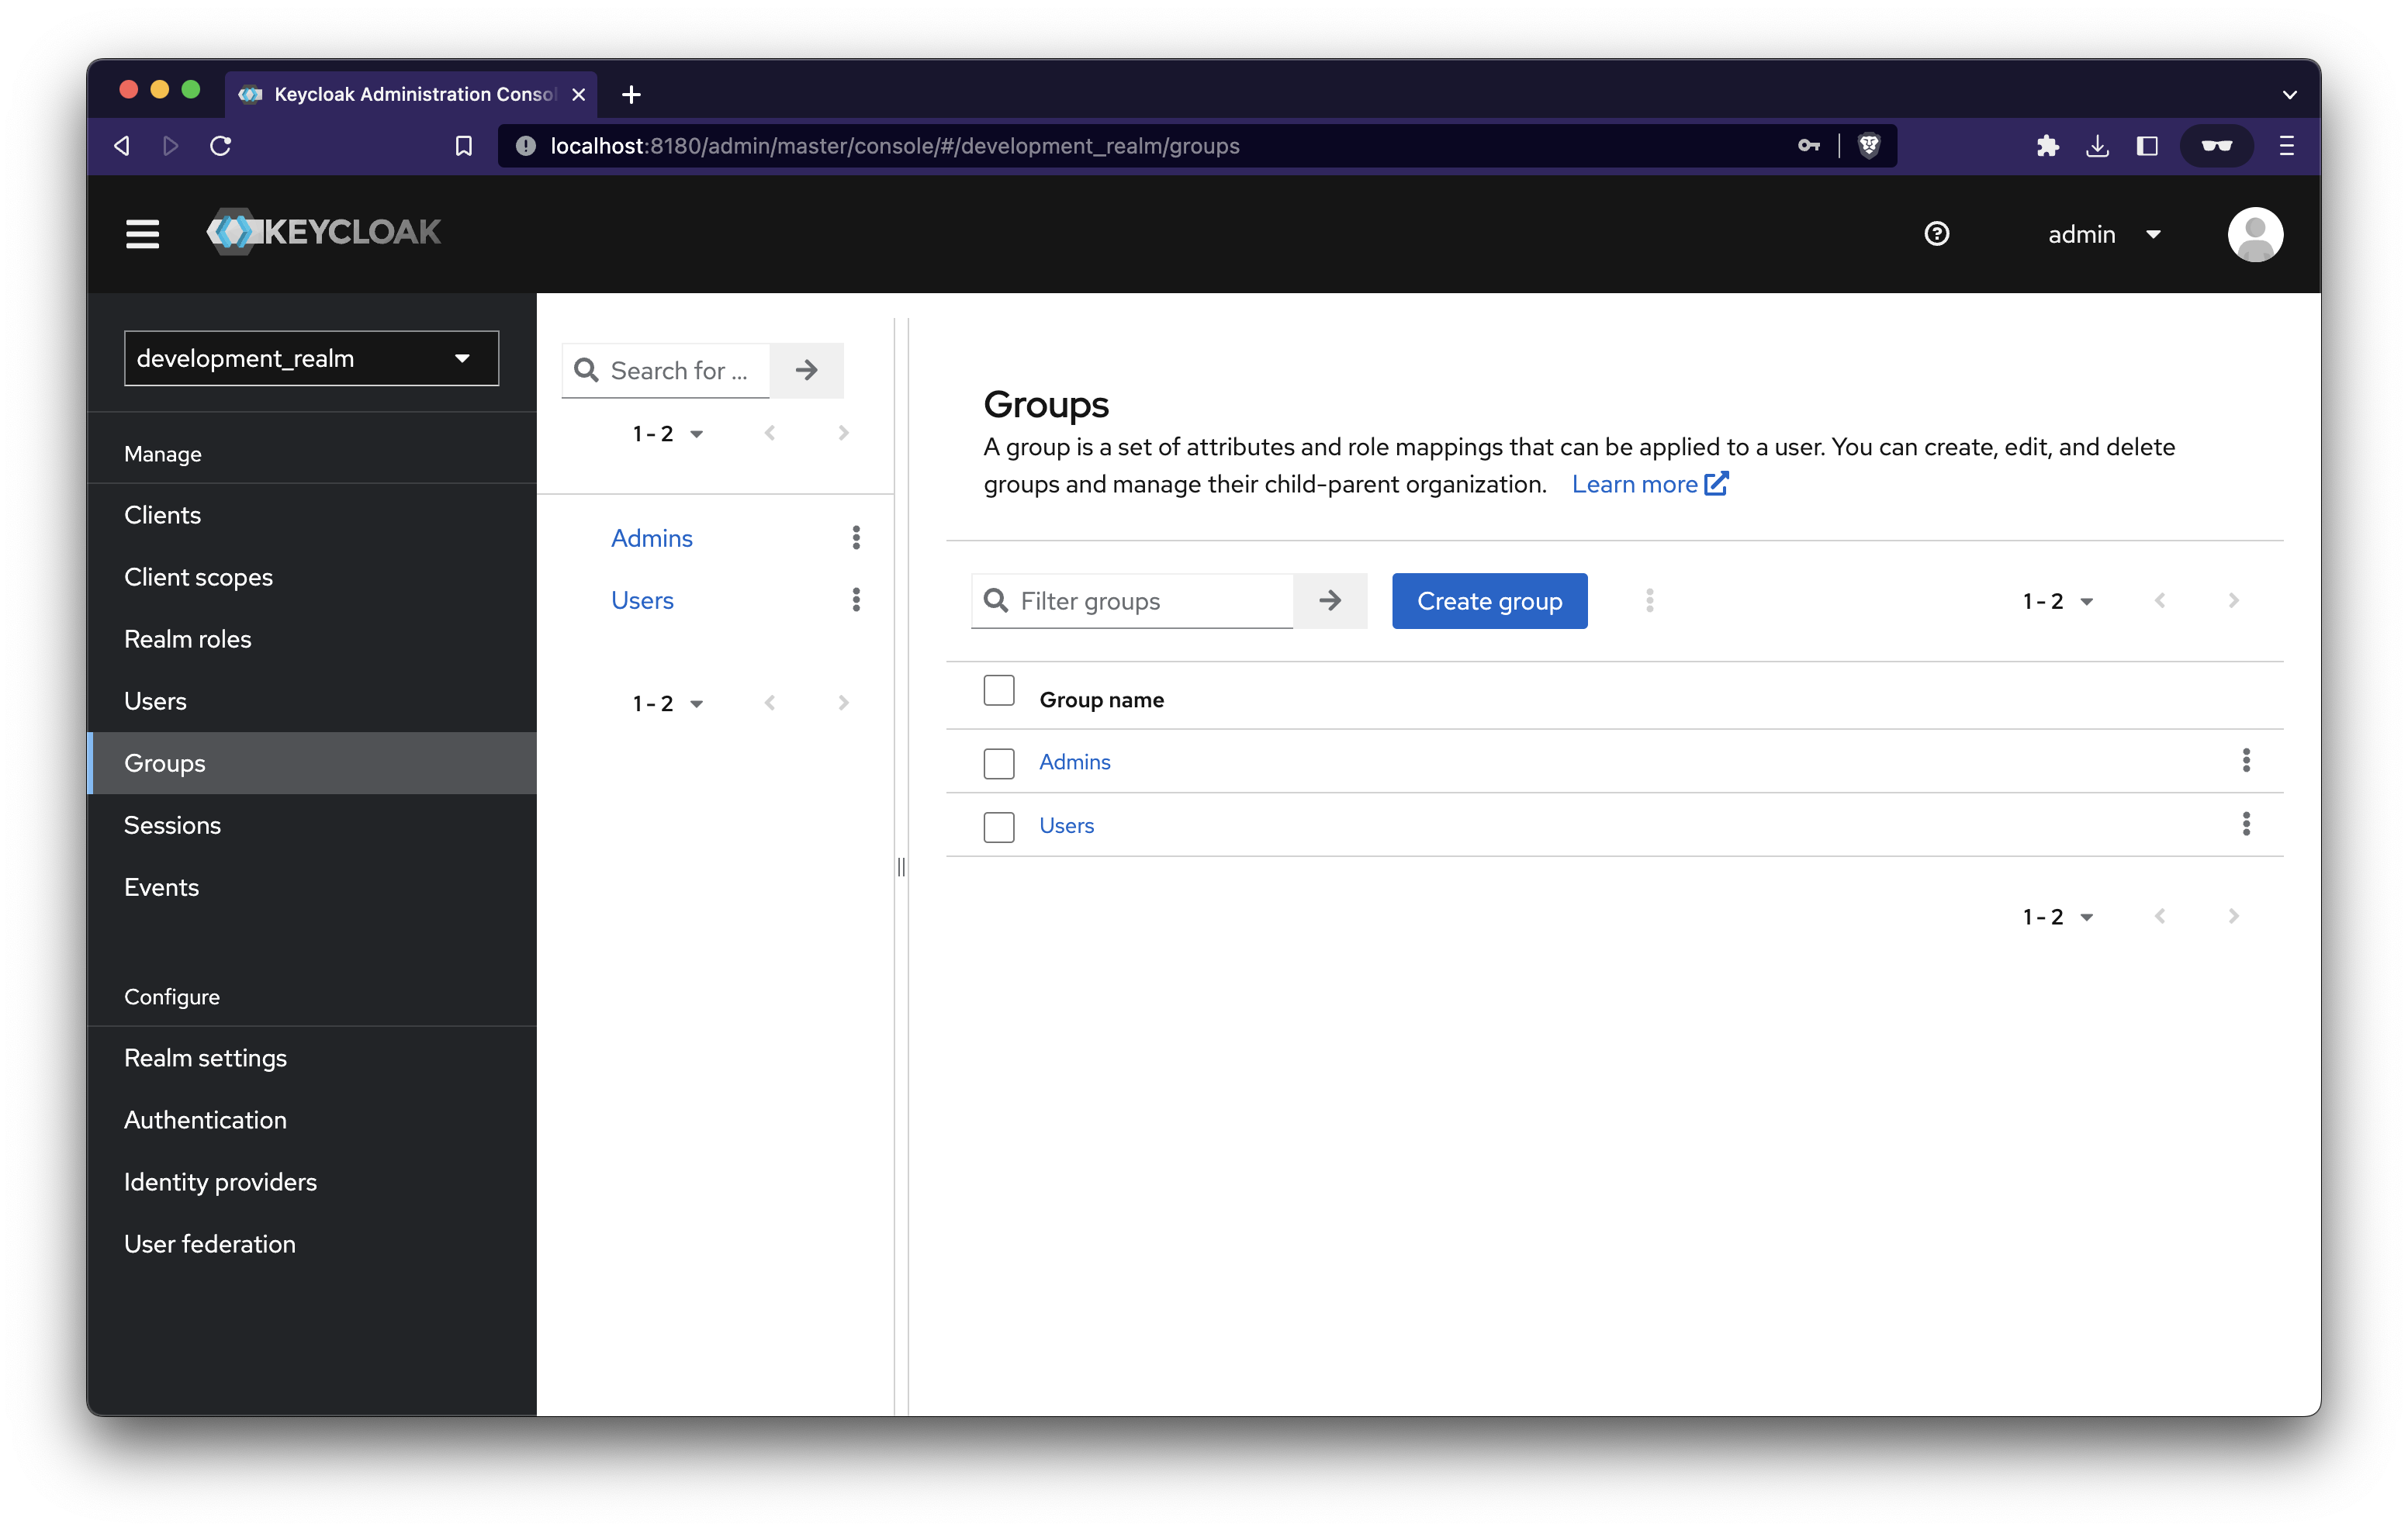
Create Groups
Navigate to the Groups tab and create two groups Admins & Users
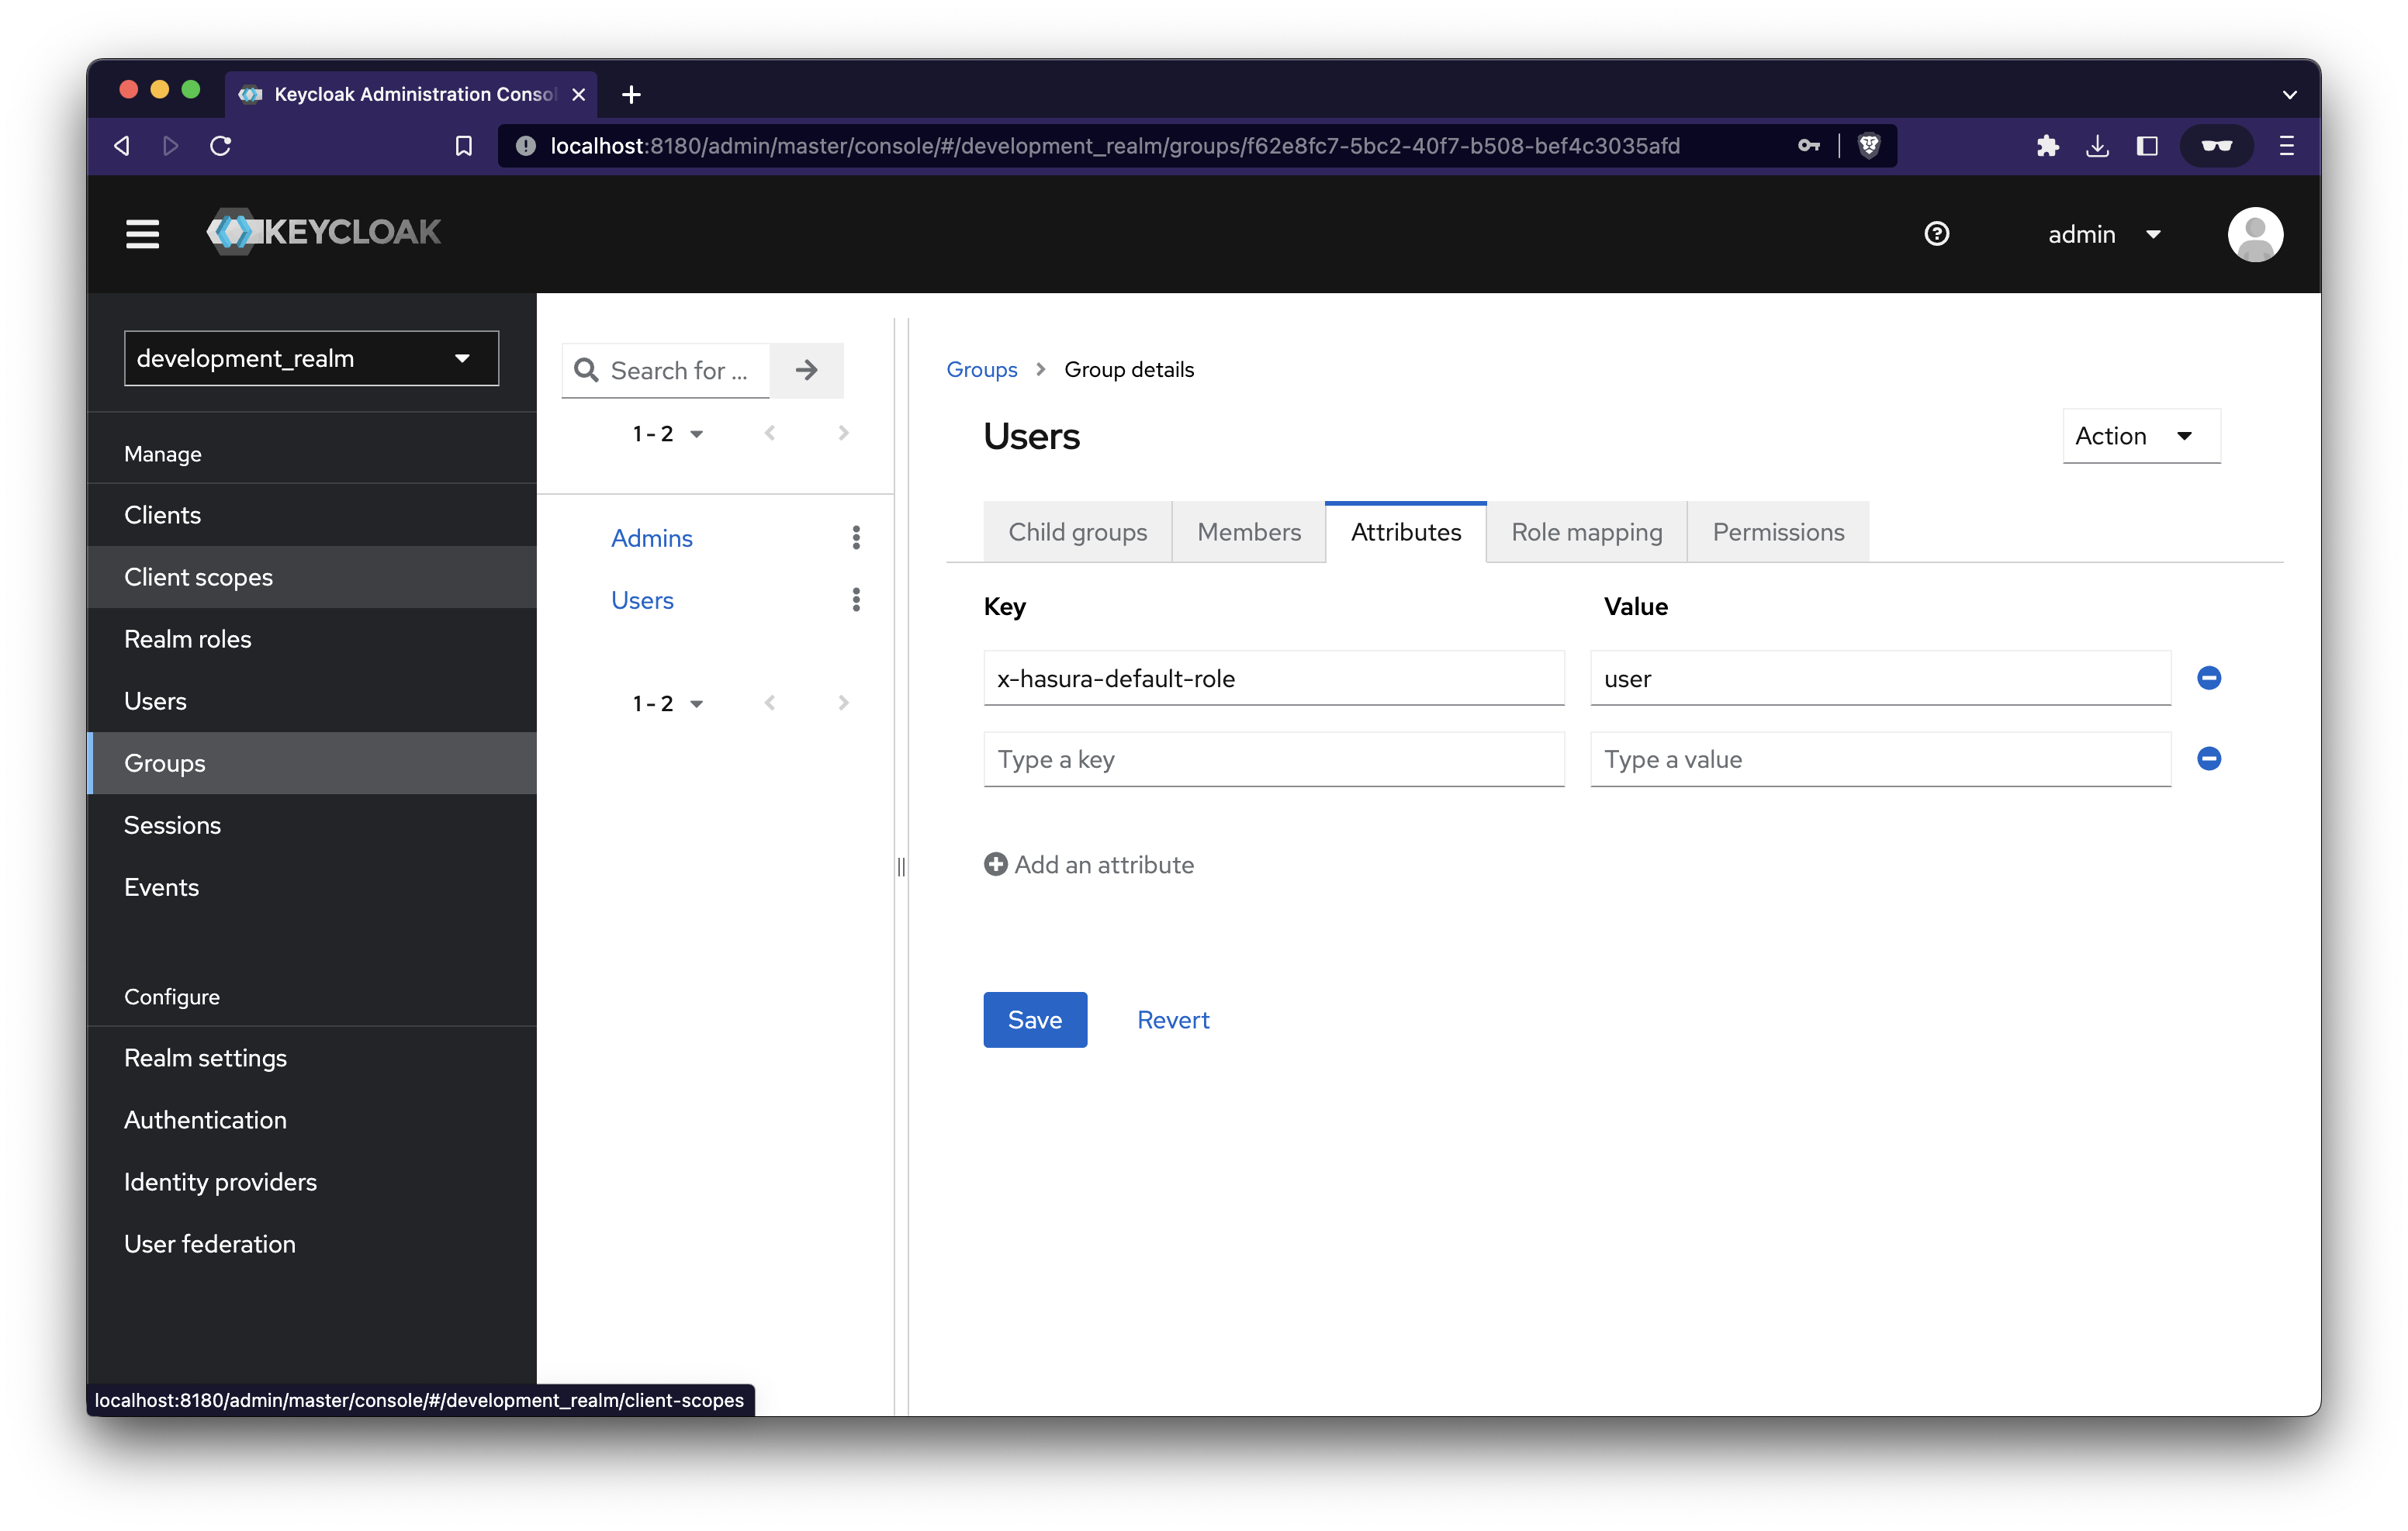
Add attributes to the Groups
Group: Users
Group: Admins
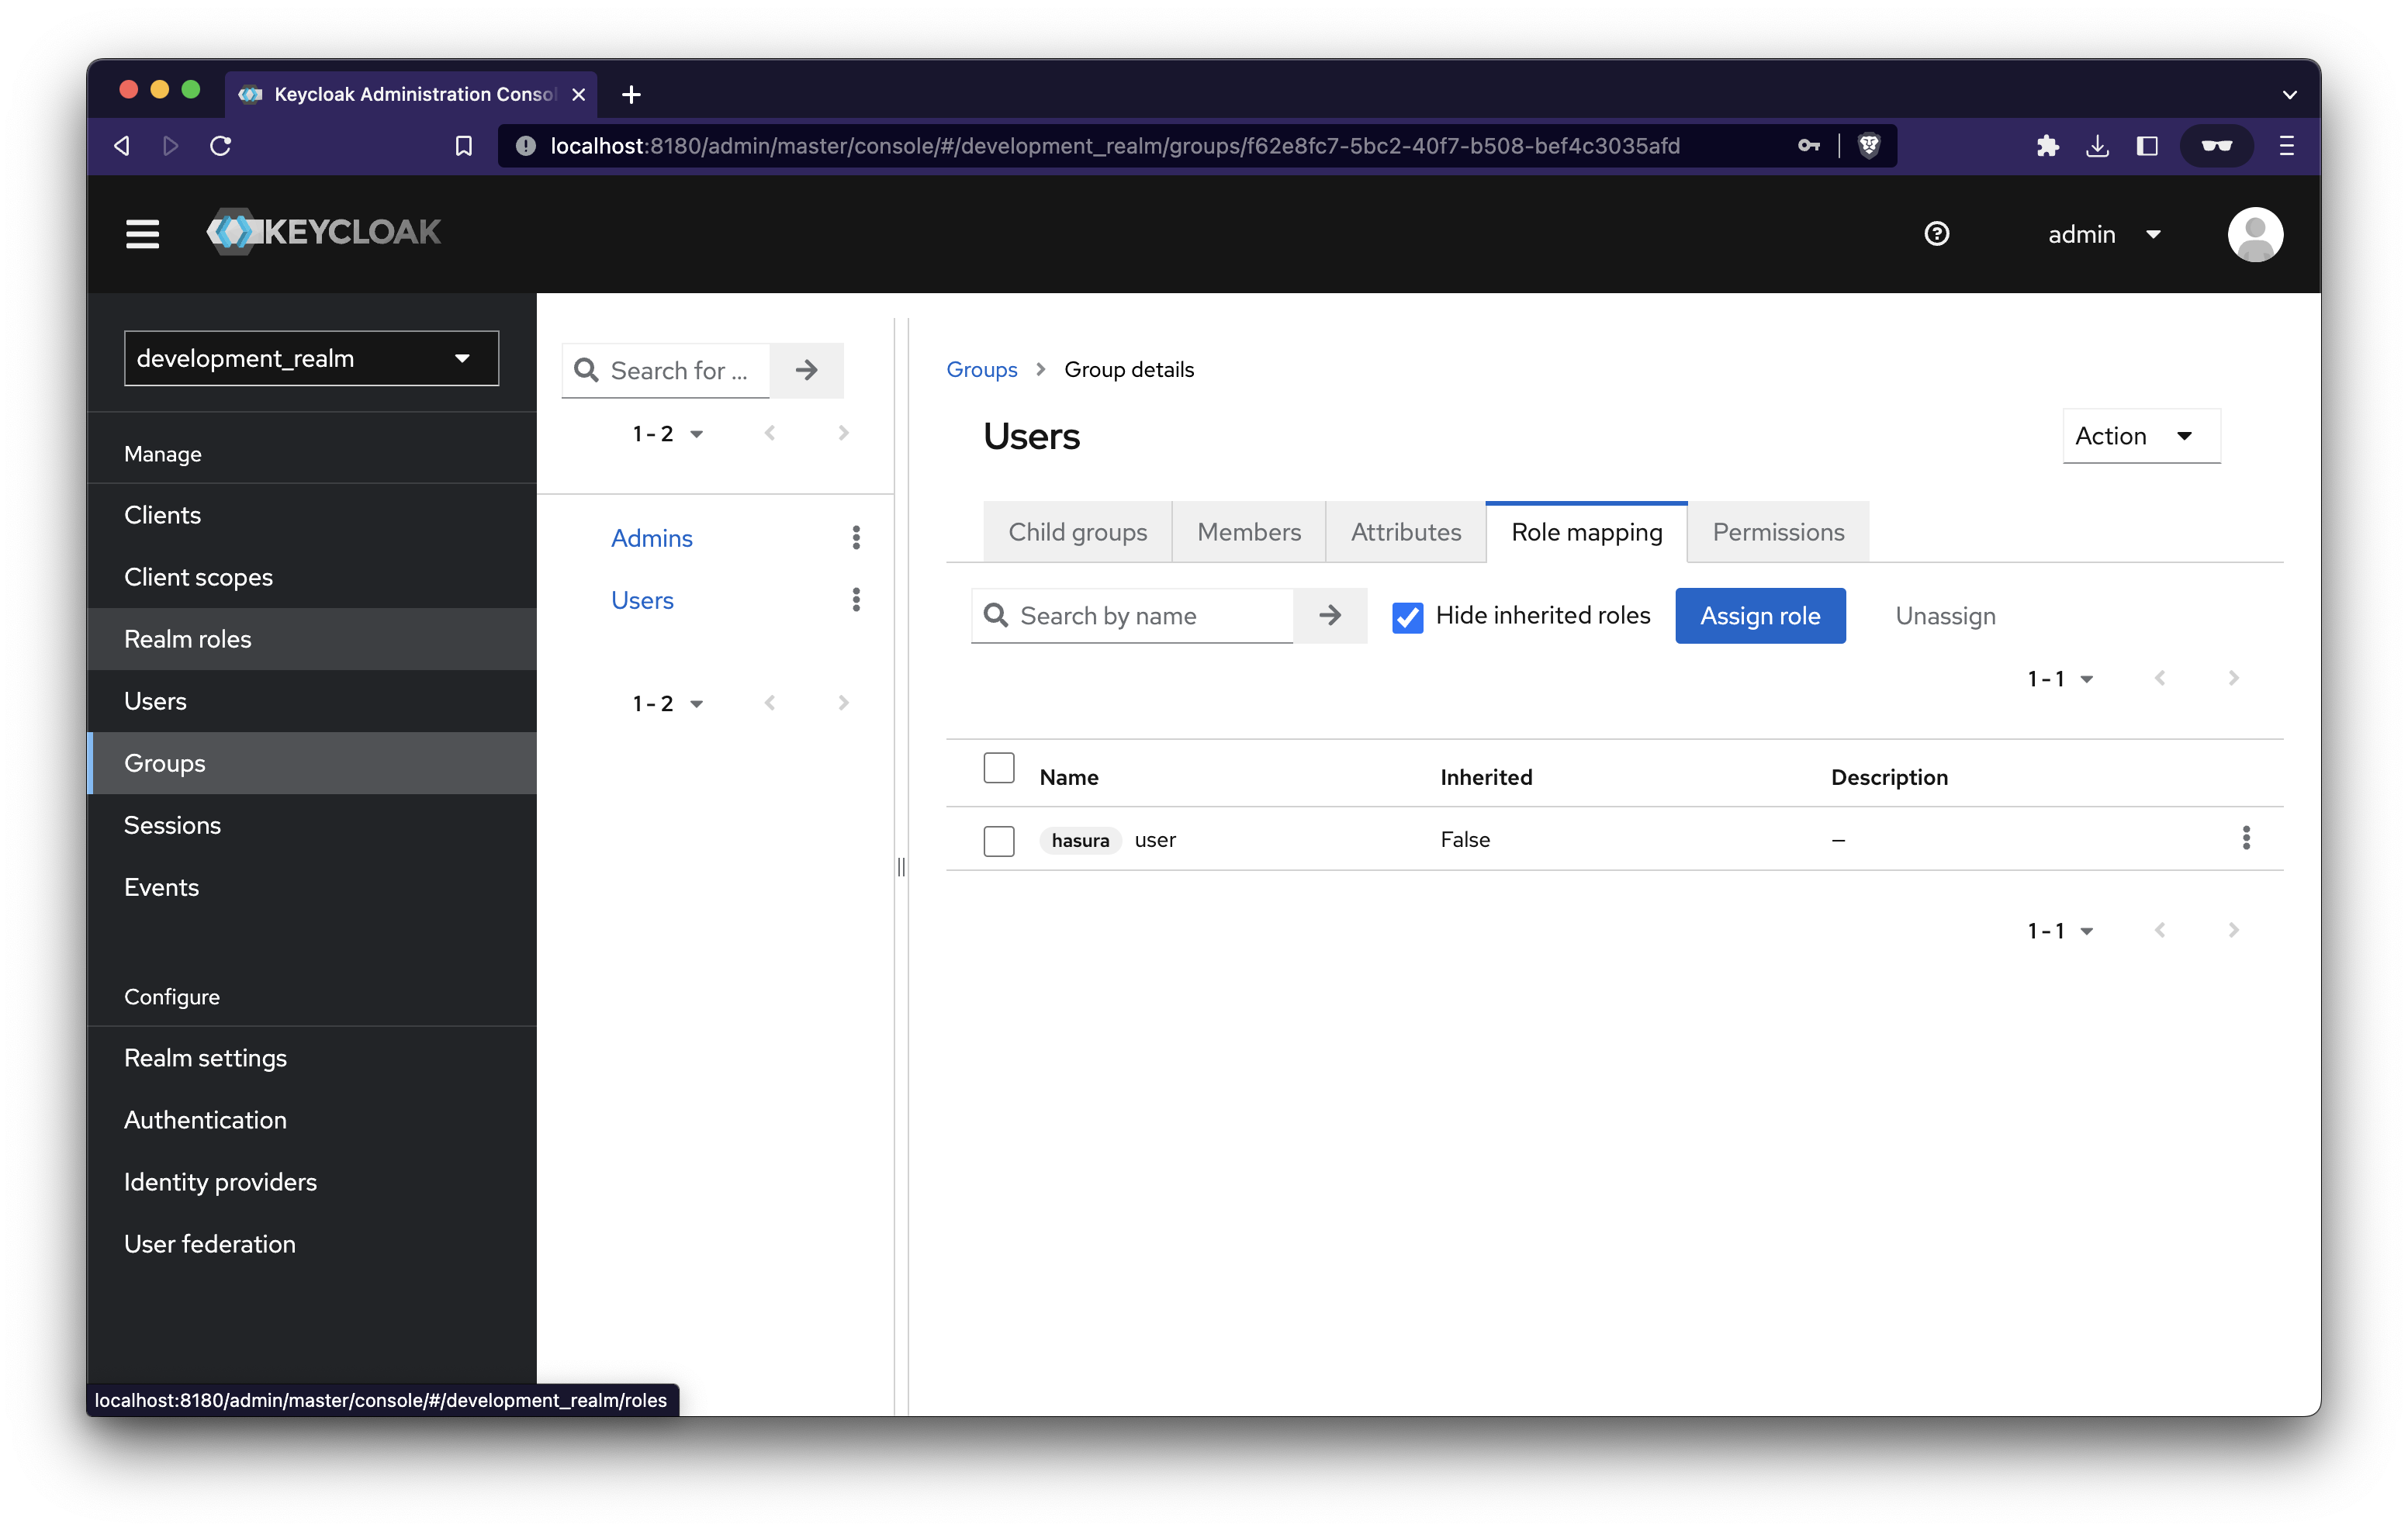
Assign Roles
We need to assign the role we created at the beginning. Every member of this group will have that role
Group: Users
Click on Role mapping → Assign role → Filter by clients → hasura user → Assign
Group: Admins
Click on Role mapping → Assign role → Filter by clients → hasura admin → Assign
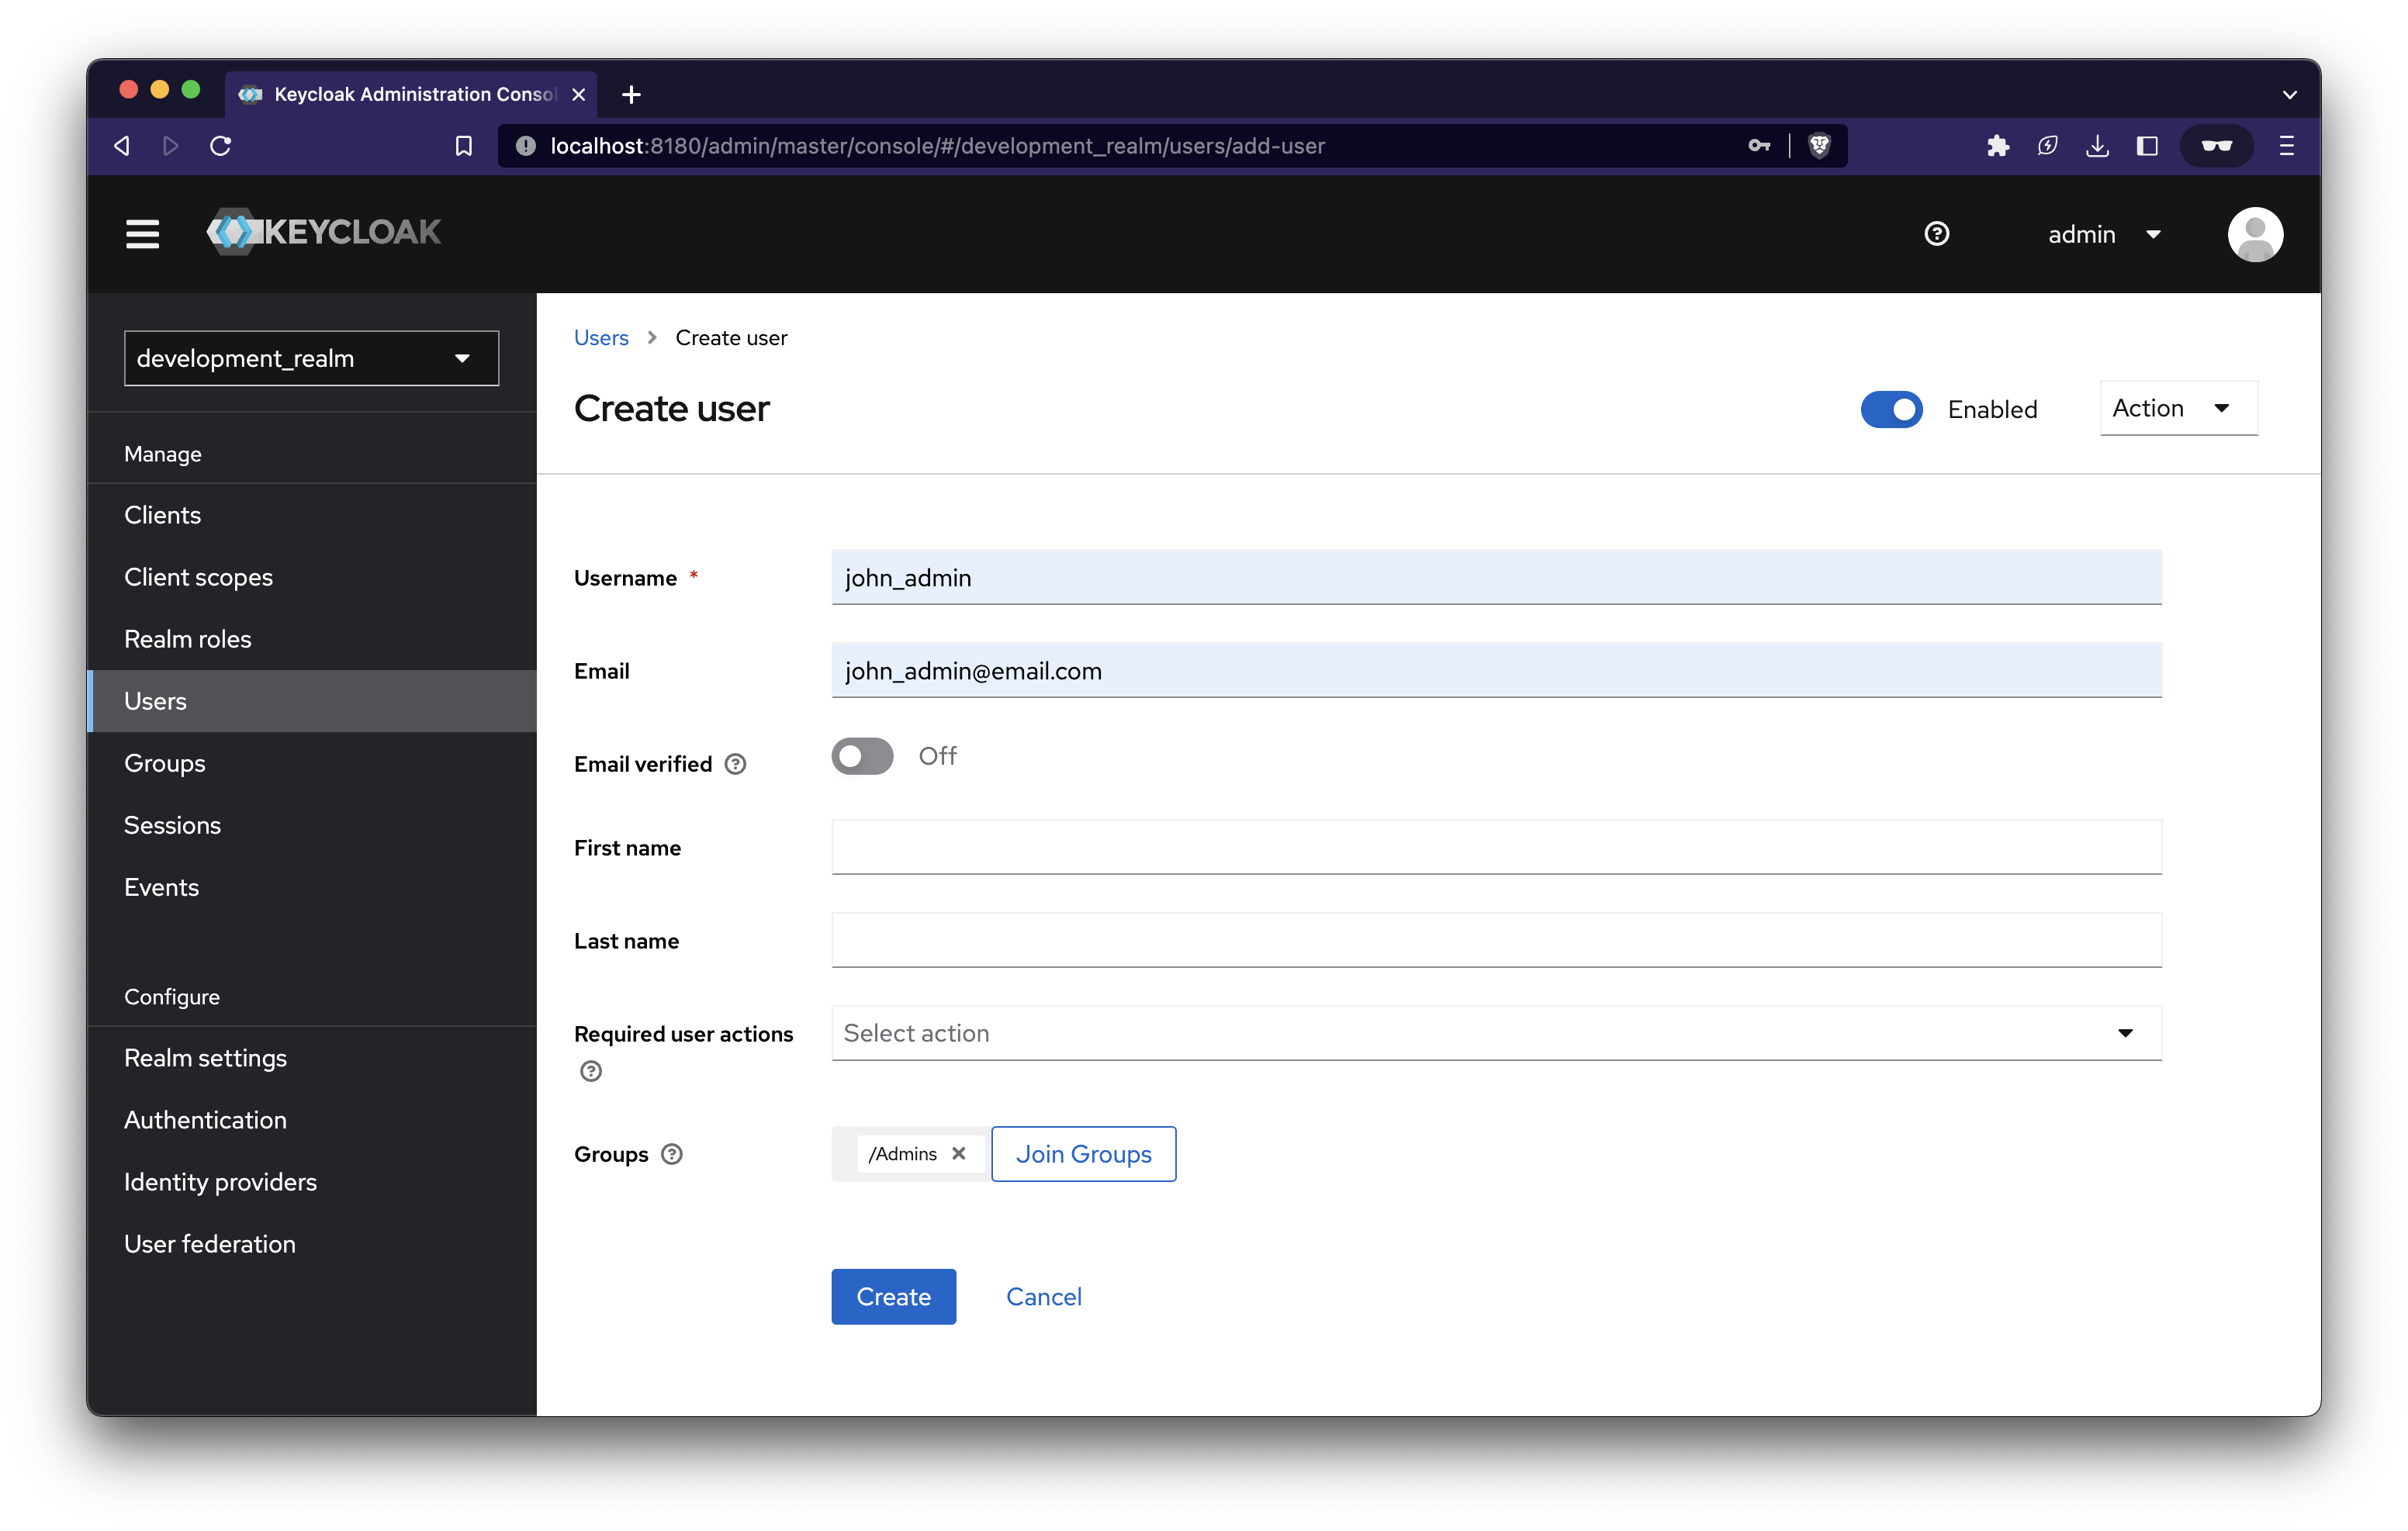
Create user
Navigate to the Users tab and create two users. One is an admin user, and another is a regular user.
Join the group Admins when creating an admin user and Users when creating regular user.
After user creation, set their password. You can do this by navigating to the Credentials tab of that user. You can choose to turn off the Temporary option.
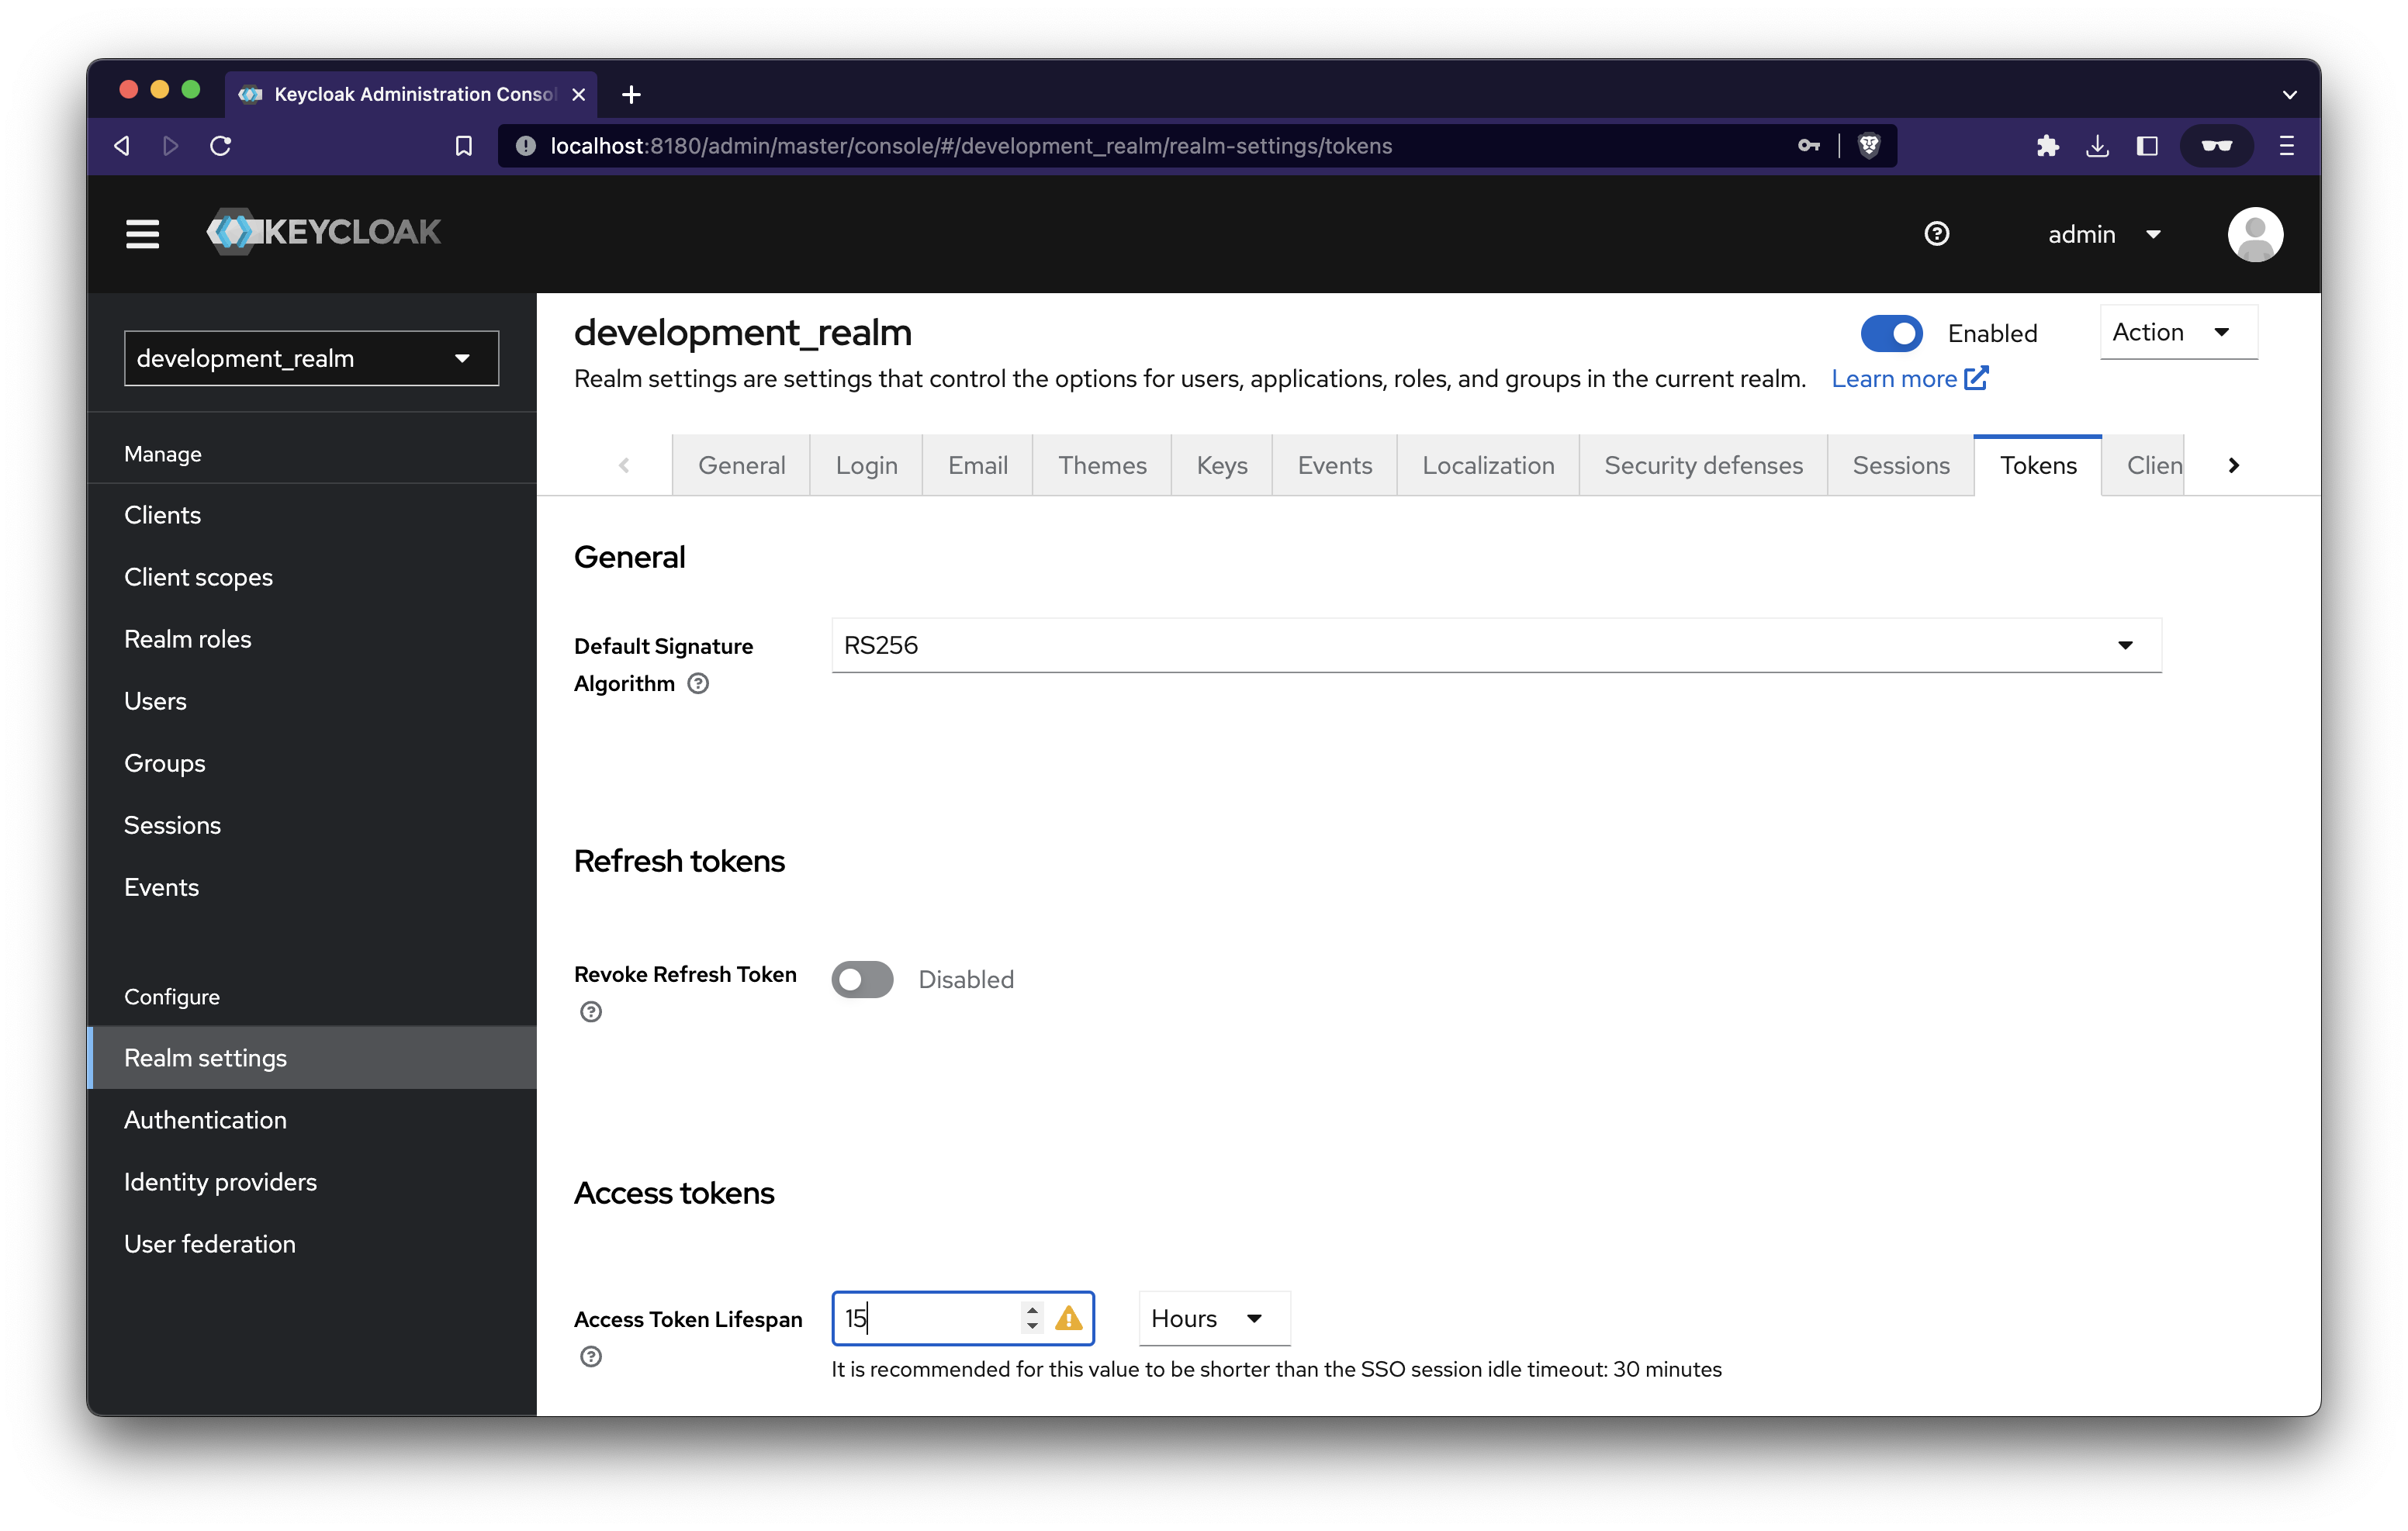
To make things easy to test, let’s increase the access token lifespan.
Navigate to Relam settings → Tokens → Access Token Lifespan → Enter 15 Hours → Save
Now set the HASURA_GRAPHQL_JWT_SECRET environment variable in the docker-compose file for Hasura with this
'{ "type": "RS256", "jwk_url": "
<http://keycloak:8080/realms/development_realm/protocol/openid-connect/certs>" }'
Hasura will get the public certificate from Keycloak.
Setup app login
If you haven’t already, let's clone the repo and cd into apps/backend_server in your terminal.
GitHub - tousifws/hasura-keycloak
We’ll integrate keycloak with our NodeJS server to initiate the login. Let's grab the Client secret by navigating to Clients → Hasura → Credentials
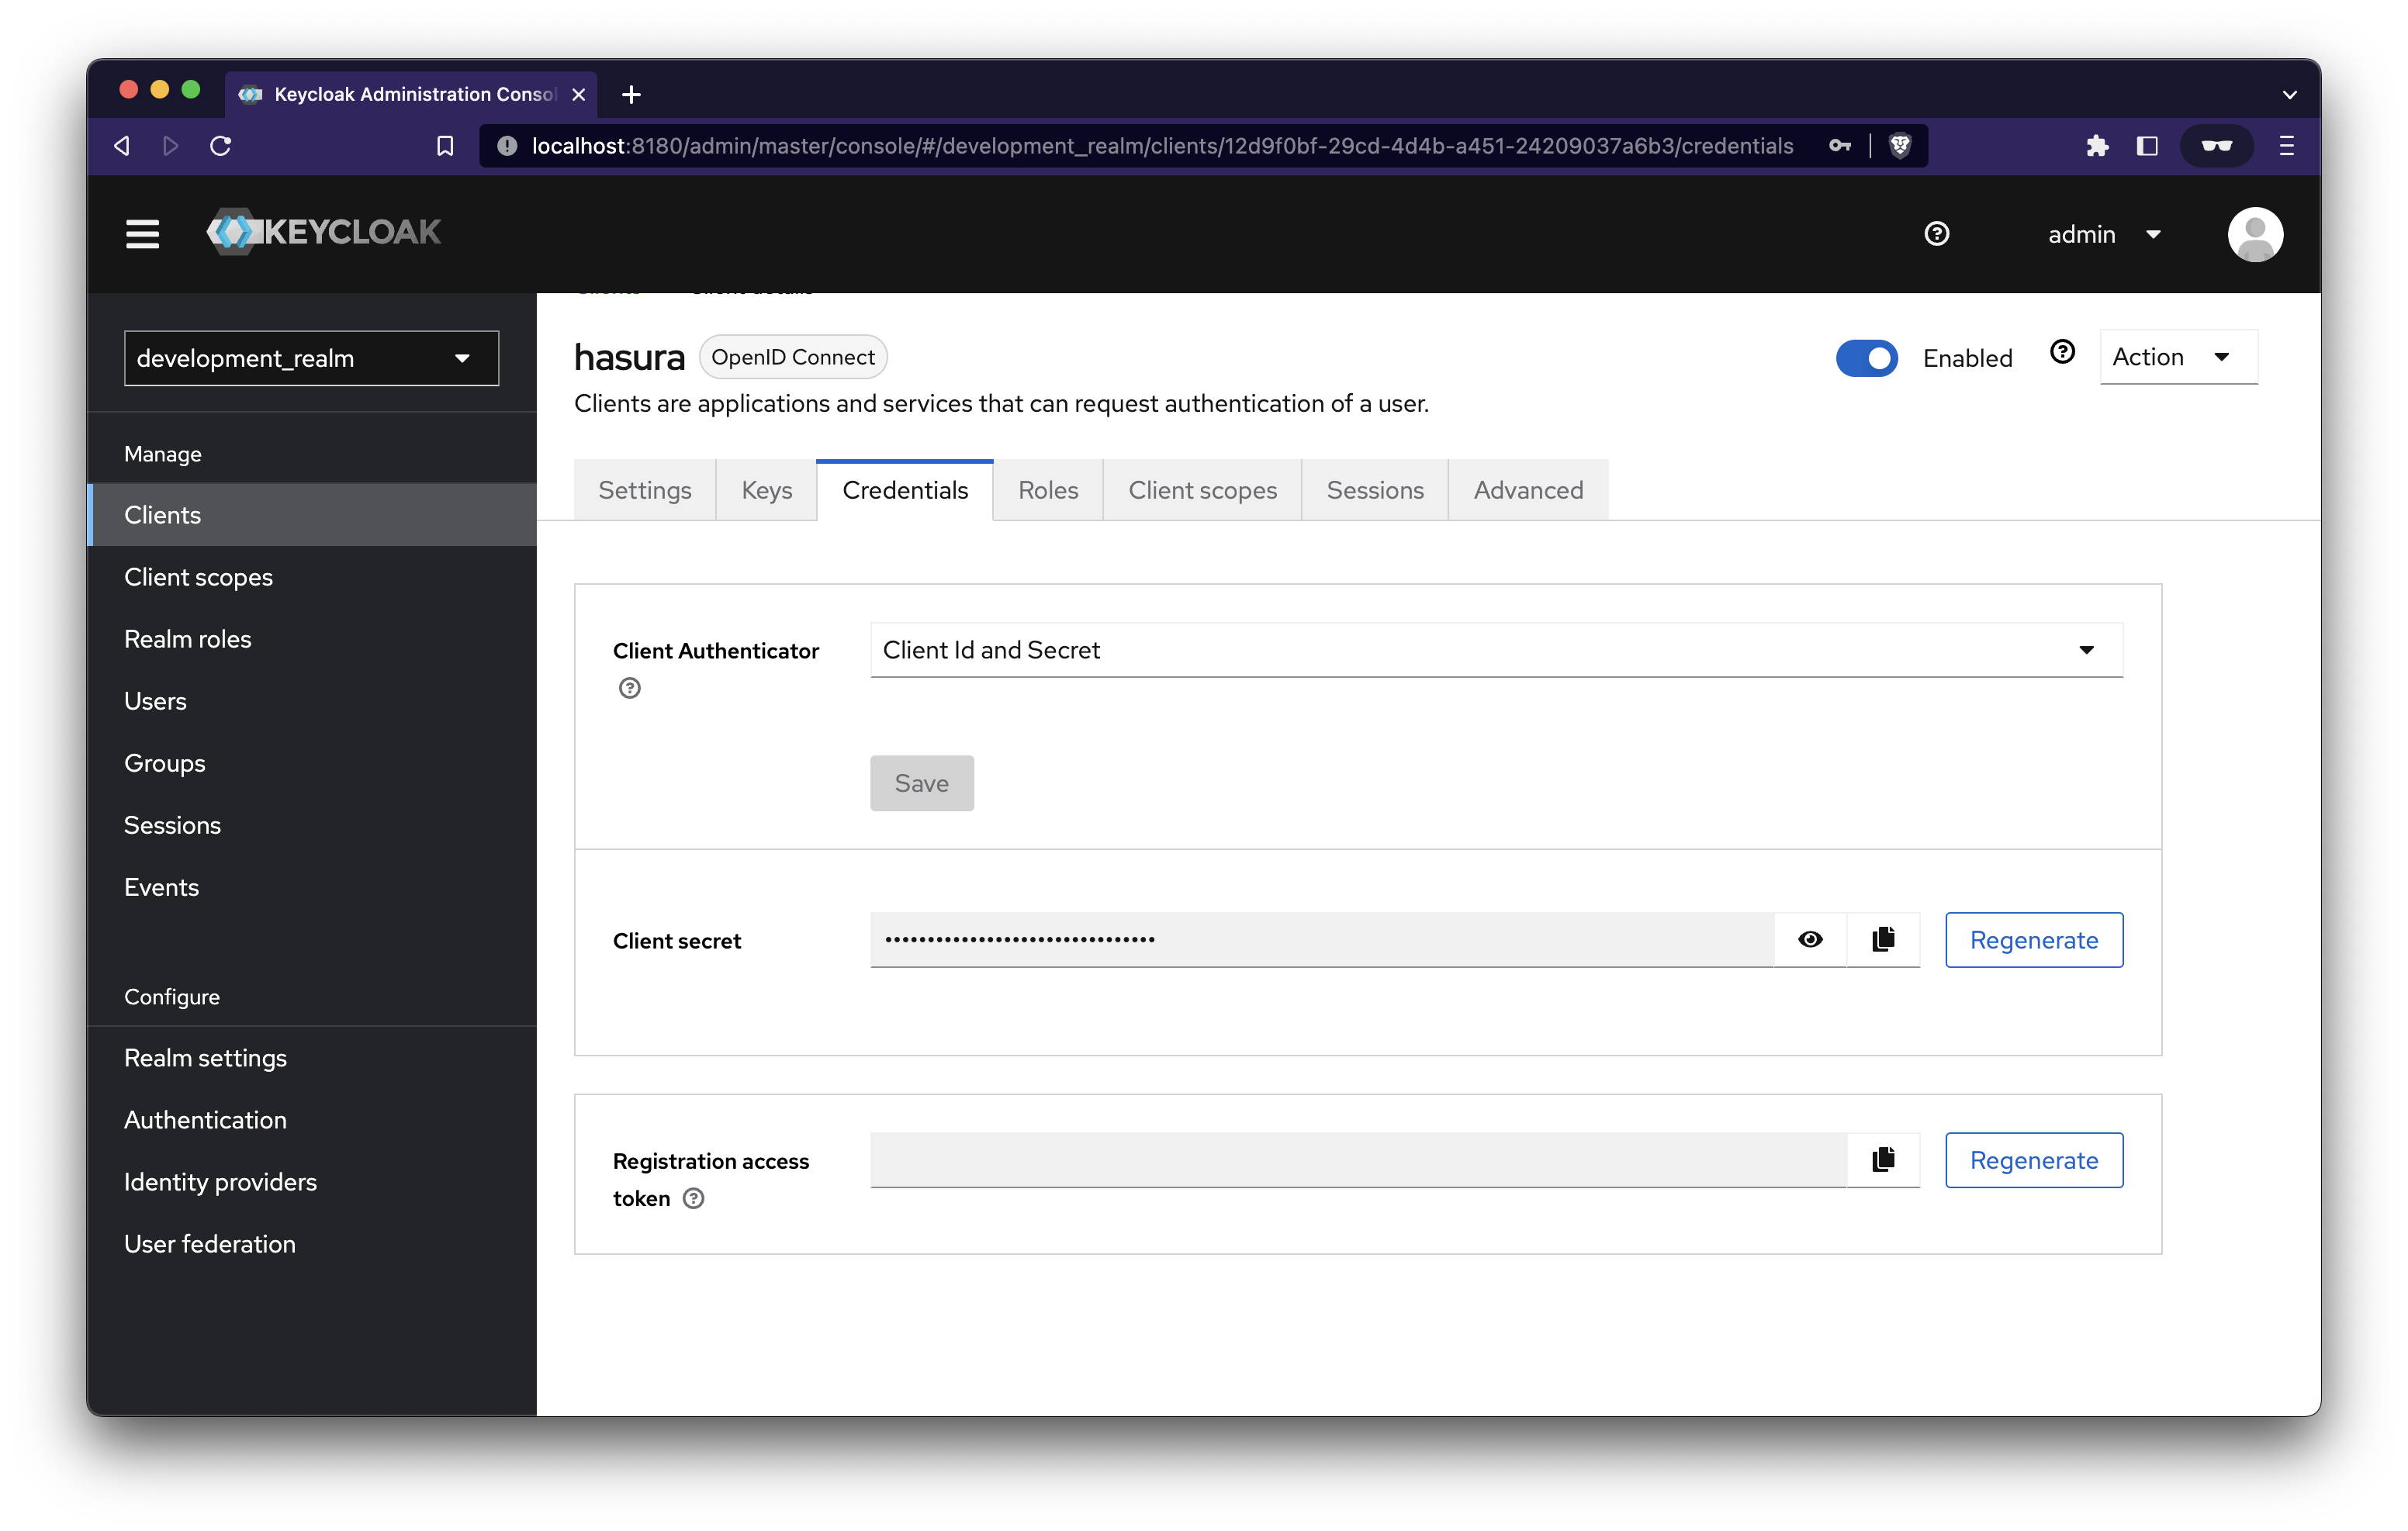
Set the copied client secret to OPENID_CLIENT_REGISTRATION_LOGIN_CLIENT_SECRET environment variable present in .env.development.local
Next, do pnpm dev. It’ll start the NodeJS server using the beautiful NestJS framework. It’ll do the oAuth dance.
Open up http://localhost:7000/auth/login in your browser; it’ll redirect you to the Keycloak login page. Here you’ll need to enter the credentials of the users you created earlier.
Next, open up http://localhost:7000/auth/user You’ll get user information and associated tokens. You can use the access token in Hasura. Here’s a demo
Acknowledgement